Creating a Microsoft Access Database
Microsoft Access ® databases are the default type for On-Screen Takeoff. No additional software is required to use this database type. By default, Access databases are stored at C:\OCS Documents\OST. This default location may be changed using Tools > Options.
- Click File > New > Database, click the New icon drop down
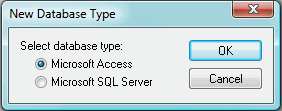
 , and click Database, or right-click anywhere in the Bid window and select New > Database from the Context Menu - The New Database Type dialog opens
-

- Select Microsoft Access and click OK
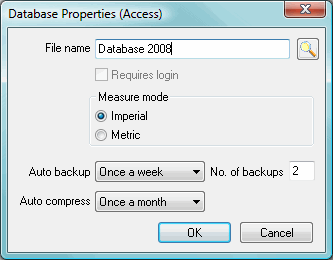
- The Database Properties (Access) dialog box displays. File name and Database settings are entered in this dialog box

- Name your database
- To store the database in the default location, enter a File Name (see Options Dialog - Folders Tab for more information on setting the default database folder)
- To save the database in a location other than the default location, click the lookup button
 and browse to the desired location and enter a file name for the database - The full file location pathway is displayed in the File name field

WARNING: Database names cannot contain special characters such as the following symbols: \ / : * ? ’ ; < > | - Requires login is only available after creating the database and employee logins
- See Logging into Databases for more information.
- In the Measure mode field, select either Imperial or Metric as the system of measurement to use

Additional Information: See Units of Measurement for more information. All UOM boxes in the application are based on this setting. - Select how often the Auto-backup utility should make a backup copy of the database, and indicate the number of backups to retain - At the scheduled time, On-Screen Takeoff will perform the auto-backup upon application close
- Set the number of backup copies of the database to be stored in the No. of Backups field - Once this number is reached, On-Screen Takeoff will being overwriting the oldest copy

Additional Information: See Backing up a Microsoft Access Database for more information. - Select how often the Auto-Compress utility should compress the contents of the database to save disc space
- Click OK, the database is now available and listed on the Bids tab
Set Database Options and Defaults 
Synchronize a new database with an existing database 


