Entering time (tracking labor) has four steps:
- Choose the Work Date
- Select an Employee (or employees)
- Set the appropriate Work Area (optional)
- Allocate hours to various Labor Cost Codes in the LCC grid
It is not necessary to apply time to the correct date - the cumulative labor hours can all be added to a single day, each week. The Budget Graph will not show correct Daily production, but the overall progress of the
project will be correct - you must decide the level of granularity you want to track. Actually, it is not necessary to apply to the correct employee even, only if your company uses the Timecard Tab to process payroll. You may want to add a placeholder employee for each type of Labor performed and apply all time to that placeholder. Just be sure that time is applied to the correct
Labor Cost Code and Bid Area.
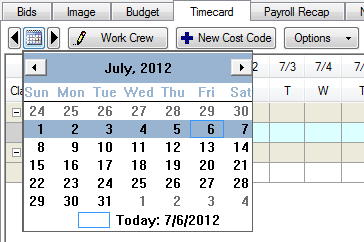
Choose the Work Date
Select the correct week using the Calendar Control. Time cannot be entered for future dates or to a Timecard that is already Posted and Approved (see the next article, "Posting and Approving Timecards" for more information).
Select Employee
By default, after selecting the Work Date, the first employee in the list is selected.
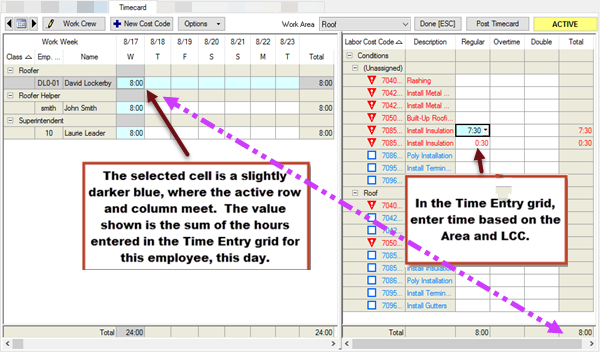
To choose another employee, click on the day cell in the Employee Work Grid corresponding to that employee and the day for which time is to be recorded.
The light blue highlighting indicates the day (column) and employee (row) currently selected. The slightly darker blue cell indicates the active cell or cells. Active cell(s) indicate where time is to be applied.
Apply Time
To apply time for an employee:
Verify the active cell in the Employee Navigator field corresponds to the employee and date worked - the last edited cell in the Time Data Entry area will also be active
Verify the correct Bid View (Base Bid or Change Order) is active, if necessary, switch to the Image Tab to select the appropriate Bid View where the labor activity occurred
Select the appropriate Bid Area
To calculate projections (on the Bids and Budget Tabs), DPC requires that Time be entered in the same place where work was performed (where objects were percented). This means, if you used Bid Areas in your Project, you must assign the Labor (Time) to the same Bid Area where the objects reside (and in the Base Bid or Change Order where the takeoff resides).
If you apply Time to the wrong Area or to the wrong Base Bid/Change Order, the Budget Tab will not be able to calculate projected values correctly.
The Project Manager can set the option to "Ignore Bid Areas on Timecard" on the Cover Sheet of the Bid before sending it out to the field, however you will not be able to "Break by Area" when viewing the Budget Tab. See Related articles for more information.
In the Time Data Entry field, click the cell that corresponds to the Labor Cost Code and type of pay (Regular, Overtime or Double) to be recorded, a drop-down displays
Select the amount of time from the drop down or manually type in the hours and minutes (i.e. 4.5 or 4:30)
The overall number of hours and intervals shown in the drop down boxes can be set in Tools > Options > DPC. (Changing the Bid's Cover Sheet determines the number of hours in a typical work-day. This is set before you start entering time.)
The next employee in the
Employee Navigator automatically becomes selected when the daily hours equal or exceed the value specified under the
Cover Sheet for Hours/Days. For example, if the work day is based on 8 hours, once 8 or more hours is entered for employee 1, employee 2 automatically is selected.
Press the <Esc> key or click the  button when you've finished entering all labor.


 Timekeeping - Timecard Tab Controls