On-Screen Takeoff supports GTCO branded digitizers and On Center Software's Digital Takeoff Table™. For instructions on setting up the Digital Takeoff Table, please refer to Related articles and the documentation that came with your product. This article explains how to setup and use a GTCO brand digitizing board with On-Screen Takeoff.
If you'd like to stop using your digitizer but were not provided electronic plans, see the previous article for some options.
GTCO Digitizers
On-Screen Takeoff supports using GTCO brand (or 100% compatible) digitizers to perform takeoff. Other brand digitizers may work with On-Screen Takeoff but On Center Software does not provide technical assistance for anything other than the Digital Takeoff Table and GTCO Brand, large-scale digitizers.
Download software to support your digitizer from GTCO: https://www.gtcocalcomp.com/software-downloads/
By design, On-Screen Takeoff® supports digitizer functionality for licensed users only. If you are using the free On-Screen Takeoff PlanViewer, you cannot use a digitizer.
For additional information about the On-Screen Takeoff PlanViewer or for information about requesting a free demo of On-Screen Takeoff Professional, please visit our Web site http://www.oncenter.com/.
|
Term/Object |
What it is/how you use it... |
|
Digitizer |
Sometimes called a digitizing board. This is the hardware device where plans are placed to draw takeoff on them. |
|
Stylus Pen |
Also called the digitizer pen. Some are tethered to the digitizer while others are cordless. May be interchanged with a 'puck'. |
|
Mouse Template |
Used to define a region on the digitizer where the Style works as a mouse. When the stylus is moved into the defined region, its acts as a mouse rather than a takeoff tool for selecting menu items and buttons. |
|
Digitizer Active Region |
The region of the digitizer that has grid lines. The grey border area is not part of the active region. |
|
Takeoff Area |
Allows you to define a Takeoff Area region on the plans indicating the boundaries where takeoff can be drawn. |
|
Device Info |
This screen indicates if the digitizer is recognized correctly by On-Screen Takeoff. If it is blank or does not have the correct information, review the Related article for information on troubleshooting a GTCO Digitizer. |
Please follow the manufacturer’s instructions for installing the digitizer. Install any drivers provided by the manufacturer before attempting to use the digitizer with On-Screen Takeoff. Please contact the Manufacturer of your digitizer for assistance with connecting the digitizer, installing the necessary drivers, and configuration issues.
After installing the digitizer and the appropriate driver, open On-Screen Takeoff.
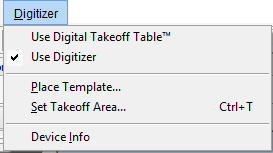
Click Digitizer > Use Digitizer to enable On-Screen Takeoff to receive input from the digitizer.
Next, click Digitizers > Device Info. Your digitizer information should display:
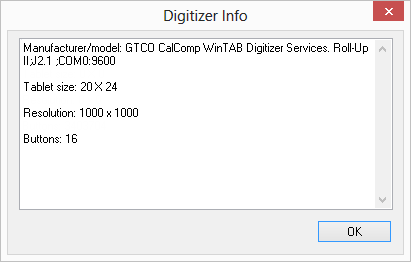
If this screen does not list your digitizer information, the driver may not be installed correctly. Please contact your digitizer manufacturer for assistance with correcting this.
Setting the Mouse Template
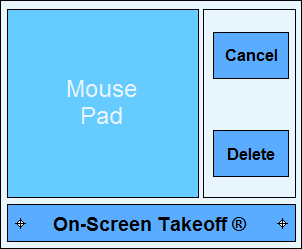
The Mouse Template allows the digitizer stylus to interact with the menus and toolbars in On-Screen Takeoff when the stylus is moved into a certain region on the digitizer board.
Place your Mouse Template someplace on the active region of the digitizer - secure the template (tape works well) to the digitizer to prevent it from moving during use.
Click Digitizer > Place Template...
The Place Template dialog appears.
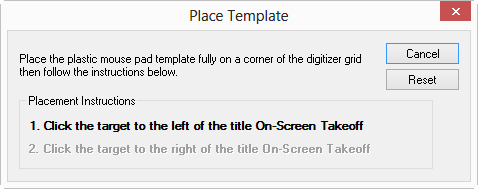
Click the target to the left of On-Screen Takeoff on the mouse template, a beep signals the point was accepted
After the second sentence turns bold, click the target to the right of On-Screen Takeoff, a beep signals the point was accepted
Use the Reset button to adjust the mouse template region if needed.
You can print this article and cut out the mouse template above.
Setting the (Active) Takeoff Area
Before you can perform takeoff using your digitizer, you need to specify what region of the board is being used (unique for each page). Stylus input outside this region is ignored by On-Screen Takeoff.
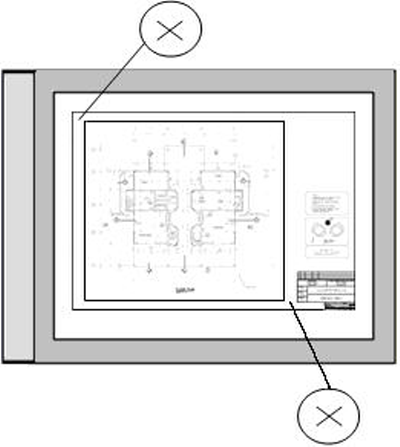
Place the drawing on the Active Region of the digitizer making sure to line up the drawing edges as squarely as possible with the grid lines of the digitizer.
Using a pencil, place an X in the upper-left and lower-right locations of the drawing as shown below. These are just reference marks to help you determine where your takeoff area is if you have to come back to this page to draw additional takeoffs.
In On-Screen Takeoff, click Digitizer > Set Takeoff Area
The Set Takeoff Area dialog appears. This dialog explains how to set the takeoff area.
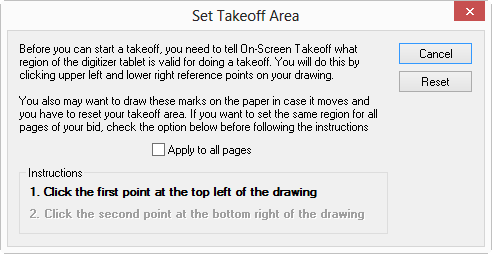
Put a check next to Apply to all Pages if you want to set the takeoff area for all pages in your project - if you want to set the takeoff area for the current page only, leave the box empty. Because takeoff is performed in a different region on each page, this is not recommended.
Click the X in the upper-left corner - the dialog box updates when the point is successfully stored
Click the X in the lower-right corner - the dialog box closes if the process is successful
Any stylus movement outside this region is ignored by On-Screen
Takeoff (except for the Mouse Template region).
Repeat the steps above for each page in your project when it comes time to takeoff a page (you must set the "Active Takeoff Area" for each page separately).
If you are unable to Set the Takeoff Area, see OST - GTCO Digitizer Issues for information on troubleshooting.


 Using Paper Plans