Selecting Typical Group Markers
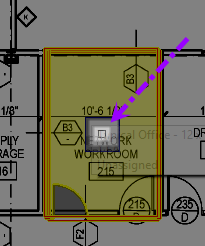
You do not have to have the Typical Group selected in the Conditions List to select one of its Markers. To select any Marker, simply use the Select Tool  to rope the Marker (not the associated takeoff). A small square appears inside the Typical Group Marker to show it is selected.

If the takeoff is displayed with the Marker, this square appears and all the takeoff shows a yellow border to indicate it is selected also. The Marker and its associated takeoff act as one group - selecting one object (either the marker or a piece of takeoff) selects everything included in the Typical Group.
Selecting Multiple Markers, from the same or multiple Typical Groups
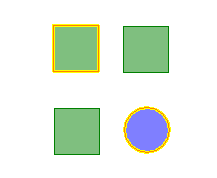
Hold down the <Shift> key and click on each Marker or rope the Markers. When multiple Markers are selected, each marker shows a yellow border versus the Typical Group Marker indicator box (above).

Click again on a marker to deselect it or click anywhere in the Image window to deselect all markers.
Moving Typical Group Markers
After selecting a Marker or Markers drag it (or them) to a new location on the same page, or, cut, copy, and paste to a different page within the same project.
Dragging (for moving markers on the same page)
For single or multiple selected Markers, click and hold down the left mouse button anywhere on the Marker or its takeoff. Drag it to its new location on the page and release the mouse button. Use the arrow keys on the keyboard to 'nudge' the markers/takeoff slightly.
Cutting or Copying (to a different page)
For single or multiple selected Markers:
Right-click the Marker or group of Markers - the Context Menu appears
Click Cut or Copy
Navigate to the page where the object(s) is to be pasted
Right-click the desired location of that page - the Context Menu appears
Click Paste - the Typical Group Marker pastes to the page.
- If you "Cut" the original Marker, once the object(s) are pasted to their new location, the cut object(s) are deleted from their original location - to cancel the process, hit the <ESC> key before pasting
- If you "Copied" the original Marker, the original remains in its original location
Rotating Typical Group Markers (and takeoff)
Sometimes, the takeoff represented by a Typical Group Marker does not line up with the plans exactly. Typical Group Markers can be rotated or spun just like any other takeoff, see Related articles for more information.
