You can allocate your takeoff to a Typical Area two ways:
- After you've drawn the takeoff (recommended), or
- As it is being drawn
You do not have to set up Typical Areas before taking off your project, but you must create Bid Areas and then fill in the Typical Area Grid (previous article) before you assign objects to a Typical Area.
After you have drawn your takeoff on your detail plans (those which are to be multiplied out), you'll return to your detail plans and assign that takeoff to your Typical Area(s).
When you select an Area (Bid Area or Typical Area) in the Area drop down, takeoff not assigned to (or "in") the Current Area is greyed-out - you can tell what needs to be assigned to a Typical Area easily.

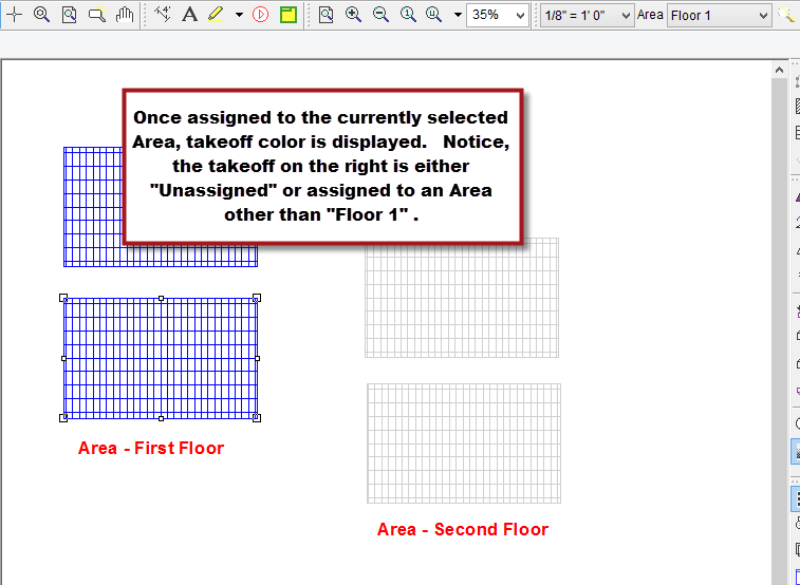
Once takeoff is assigned to the currently selected Typical Area, it is no longer greyed-out.
Once takeoff is assigned to a Typical Area, that Typical Area is bolded in the Areas drop down list. This bolding is page-specific and helps the user quickly identify which areas are used on a particular page.
Assigning Takeoff to a Typical Area After You Draw Takeoff (Recommended Method)
To assign takeoff to a Typical Area after you've drawn it,
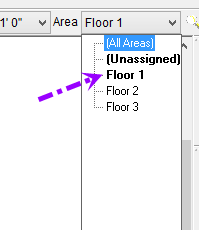
- Select the appropriate Typical Area from the Area drop-down menu.

- Click the Select tool
 .
. - Select the takeoff object(s) to assign to the selected Typical Area.
- Right-click to display the Context Menu.
- Select Assign to Current Area.
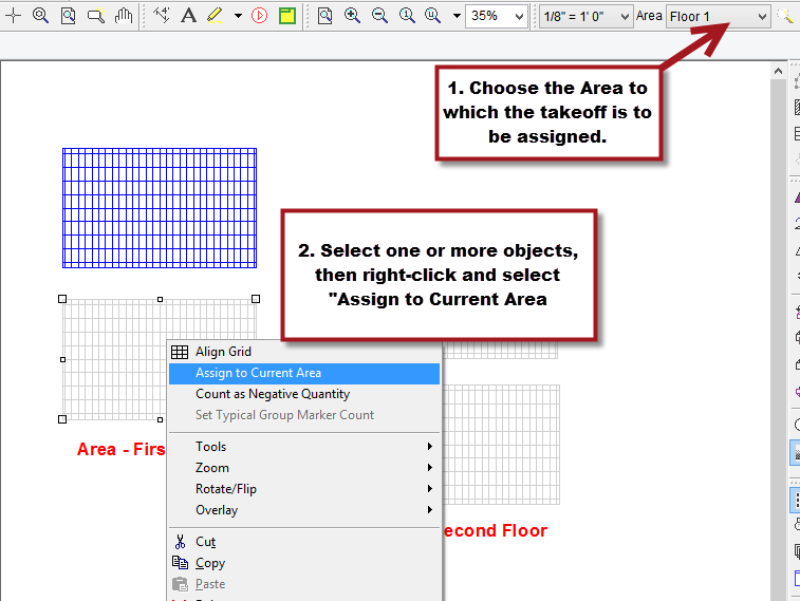
- Repeat this process for all takeoff objects to assign to each Typical Area.
Notice that objects are displayed in color once they are assigned to the current Area (the Bid Area or Typical Area selected in the Area drop down).
The steps for assigning takeoff to a Typical Area are identical to assigning to a Bid Area (covered in Related Articles).
Assigning Takeoff to a Typical Area As You Draw
To assign takeoff to an Area as you draw the takeoff:
- Select a Typical Area from the Area drop down menu on the Settings toolbar. (Select (All Areas) in the Area drop down menu to leave takeoff 'unassigned'.)
- Select a Condition from the Condition List and draw takeoff.
New takeoff is automatically assigned to the currently selected Bid Area/Typical Area.
Be sure to select the correct Typical Area when you are drawing takeoff. It is easy to forget to change the 'active' Bid or Typical Area when you switch pages.
For this reason, we recommend assigning takeoff to Typical Areas after you've completed all takeoff - it is more deliberate and you are less likely to make any mistakes.
Use the
Takeoff (Summary) Tab to check the cumulative totals.


 Creating Typical Areas (Filling out the Typical Areas Grid)