| |
| |
On-Screen Takeoff - 06.06.01 Drawing Count Takeoff Using Auto Count - OST
| Views: 792 Last Updated: 12/17/2024 07:59 am |
0 Rating/ Voters
|
     |
| Be sure to rate this article 5 Stars if you find it helpful! |
Auto Count can locate and takeoff many Count objects quickly and automatically (saving you time and clicks!). Based on a selection from the plan image, Auto Count scans the current page and locates all occurrences of that selection. This saves valuable time when taking off items such as switches, light fixtures, plumbing fixtures, and fire prevention/detection controls; even text can be selected for the search criteria.
The Auto Count Tool becomes active after you click on a Count Condition.
Automatic Selection Mode
- Select a Count Condition from the Condition List.
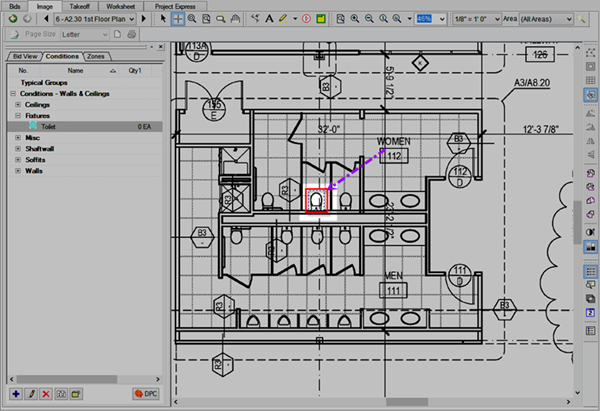
- Click the point at the upper left corner of the object to search for.
- While holding down the left mouse button, drag the cursor to the bottom right of the object (the red box indicates where the selection box is being drawn in the screen shot below).

- Release the mouse button and the Auto Count Tool dialog box opens, skip down to Running the Auto Count, below.
Manual Selection Mode
- Select a Count Condition from the Condition List.
- From the Takeoff Mode toolbar, click the Auto Count button
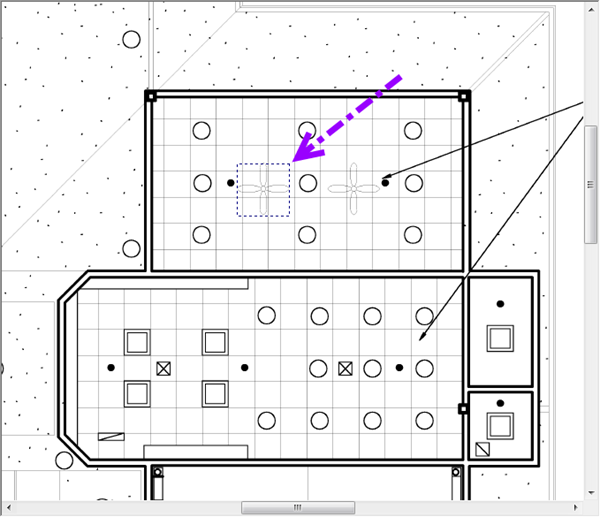
 in the Takeoff Mode toolbar - the curser changes to Takeoff mode in the Takeoff Mode toolbar - the curser changes to Takeoff mode  . . - Rope the object to count - in this example, a ceiling fan - notice how the fan is surrounded by a blue, dashed line.

- Release the mouse button and the Auto Count Tool dialog box opens.
Running the Auto Count
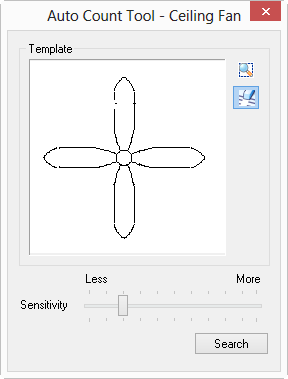
After you draw your selection, the Auto Count Tool dialog displays,

- To fine-tune your search, erase any unwanted or stray marks on the selected object by clicking the Eraser button
 and tracing over the detail to remove (original above, corrected below). and tracing over the detail to remove (original above, corrected below). - To redraw the selection, click the Change Selection button
 in the Auto Count Tool dialog box, the dialog box closes and you can make a new selection. in the Auto Count Tool dialog box, the dialog box closes and you can make a new selection.

- When you are satisfied with the sample, click Search - a scanning window appears during the search process.
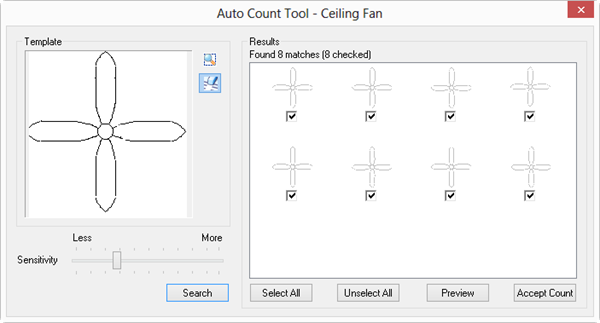
When the search is complete the Auto Count Tool dialog expands to show the results of the search - the total number of matches is displayed and all matches are selected by default.

The Auto Count Results dialog box automatically sizes to fit 21 Results, you can resize the window to fit even more. - View the results and de-select those objects that do not actually match the intended selection.
- Use the buttons provided to Select All, Unselect All, or Preview (which displays the View Window panel with all counted objects highlighted).
- Click Accept Count.
Once accepted, On-Screen Takeoff places a Count takeoff object on top of each 'found' object, and updates the Condition List results.
Auto Count Tips and Notes
- Press <Ctrl> <2> to open the View Window, so you can review the image and make any selection adjustments. Minimize, Close, or Move the View Window and return to the Auto Count Tool dialog box.
- Adjust the Sensitivity level by clicking and dragging the indicator in the Auto Count Tool dialog - the further right the selector is moved, the more precise the match must be. It is better to perform a less sensitive search and de-select mismatches rather than setting the sensitivity too high and missing potential matches. Experiment a bit as each plan is a little different - some are easier to scan than others, some are blurry or have many overlapping objects which may cause the Auto Count scanner to overlook some objects. Adjust the Sensitivity and rerun the scan while the dialog box is open to see how changing the Sensitivity affects the search.
- Auto Count only scans the current page - repeat this process on any other page where this object occurs.
- If an object was counted incorrectly or was not counted, manually delete or add Count takeoff objects to this page - once Auto Count is done, the takeoff objects are just normal Count objects.
- To quickly remove all Auto Counted objects, immediately after clicking Accept, click "Undo" (or press CTRL+Z).
|
|
|
