On-Screen Takeoff allows you to set a segment to be a 3-Point Curve, allowing you to adjust all three points (the ends and the center point). This allows you to accommodate a curved area that is not a section of a circle (like an "arc", in the previous article).
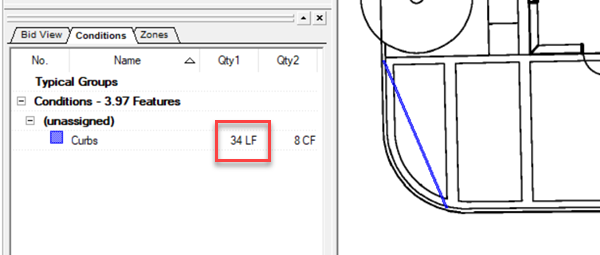
So, to accommodate a curve, draw a linear segment between the starting and ending points.
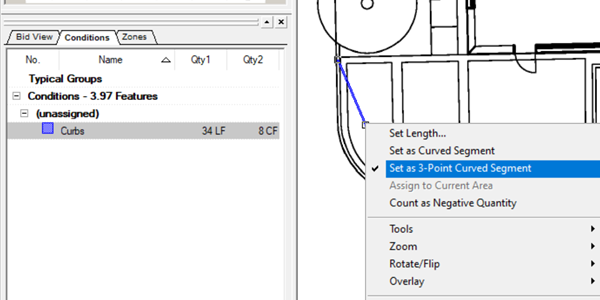
Next, right-click on the segment and select "Set as 3-Point Curved Segment"
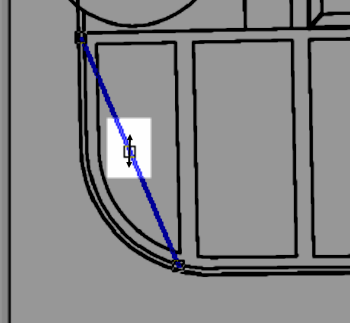
Now, in addition to the end point adjustment handles, there is another in the center. When you hover your mouse over this, the cursor changes from a four-way arrow, which allows you to move the segment, and the double-ended arrow (shown below), which is your "curving" handle.
Grab that double-ended arrow and drag it toward the center point on the curve.
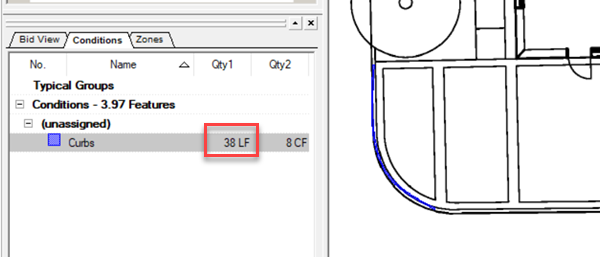
Once you match up your takeoff to the plan, you can see the difference in takeoff quantities.
Once a segment is set as 'curvable', you cannot place an Attachment on it, even if the segment hasn't been "curved". If you need to place an Attachment, you need to draw shorter, straight segments to accommodate the curve.


 Drawing Arcs (Curved Linear Segments)