You can set up an Area Condition to Round Quantity on the Advanced Properties tab. It is important that you understand that "Rounding" does not round the area measurement up to the next highest value, it rounds each segment of the Area takeoff object to the next highest value (never rounding down), see the examples below.
Rounding may dramatically affect
takeoff results, please review the information below carefully
before setting an Area
Condition to "Round Quantity".
In the Advanced Tab, click "Round Quantity" and then set the "Round to" field to the dimension/increment (such as 1'00" or 200 mm).
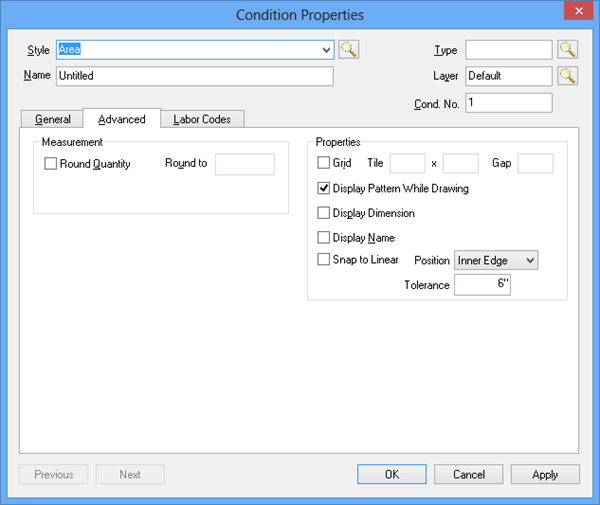
When you draw takeoff using this Condition, each segment is rounded to the next highest increment. If the segment you draw is 10'6" and you have set the Condition to "Round to 1'", the segment is calculated as an 11' segment. It does not display as 11' on the plan, it looks like a 10'6" line, it's only adjusted in the calculations of the object.
Rounding is always up, never down.
Rounding Examples
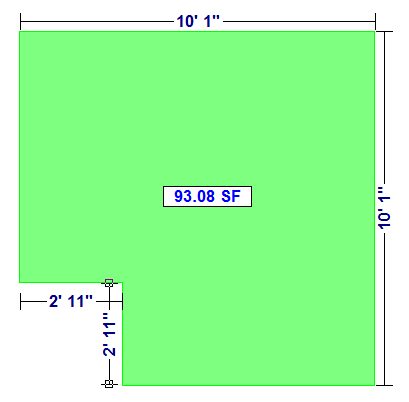
For example, the square below measures 10' 1" on all sides and another square, same dimensions with a cut-out.
Notice the difference to overall quantity when rounding is used, especially when measuring irregular shapes (examples on the right).
Not Rounded (baseline)
Each segment in the square is calculated at its true measurement of 121 inches (10'1") and the 'cutout' at the bottom left of the irregular polygon is measured at exactly 35 inches by 35 inches (2'11").

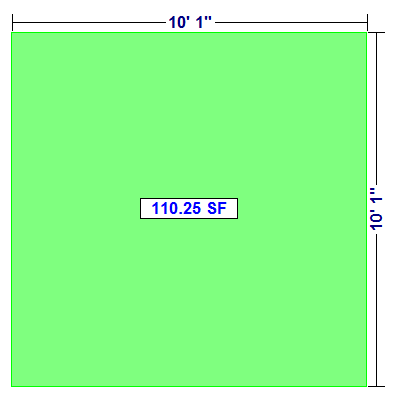
Rounded to 6 inches
Each segment in the square is calculated at its rounded measurement of 126 inches (126 is the closest number higher than 121 divisible by 6, it's the next increment of 6").
So, the basic square is calculated as: (126x126 = 15876 (sq in), divide by 144 to get sf, 110.25). Notice, the result isn't rounded, only the segments are rounded.
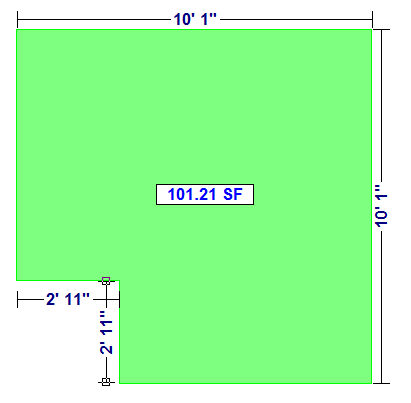
The shorter segments in the irregular polygon calculate at 36, however, you cannot neglect the longer segments, connected to those shorter segments. There are six segments involved with this polygon: two are 126 inches long, two are 36 inches long, but there are those two longer segments, each are drawn as 86" (10'1" - 2'11"), so they calculate as segments that are 90" long (90 is the next highest integer divisible by 6). You can see how this starts to become a complex calculation that may not produce the expected results.
Again, notice the overall result isn't rounded, every individual segment is rounded.
Rounded to 2 feet
Each segment in the square is calculated at its rounded measurement of 144 inches (144 is the closest number, higher than 121, divisible by 24 (2 feet = 24 inches). So, 144 x 144 (sq inches), divided by 144 (to calculate SF) is 144 SF.
The shorter segments in the irregular polygon are rounded to 4 feet (4' is the next highest multiple of 2'; remember, the program never rounds down) and the longer segments, each drawn to 86" becomes 96" (the next highest integer divisible by 24).
Again, this becomes a very complicated calculation which produces results you may not expect or intend, and of course, the calculated Result (for the complex shape) is not rounded.
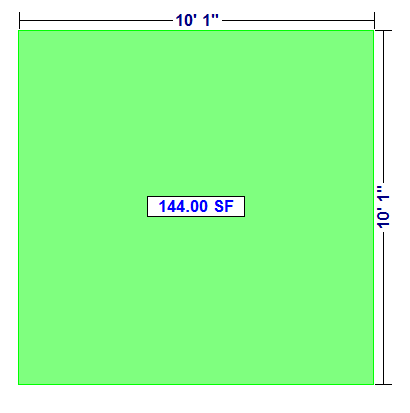
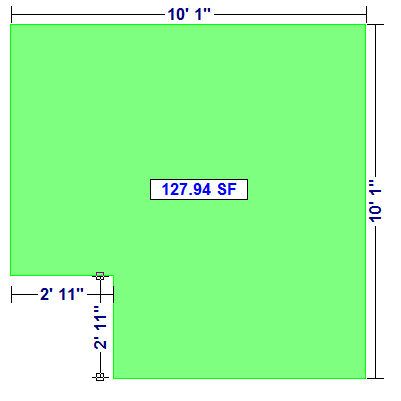
You can see the significant differences in calculated values when rounding Area takeoffs, especially when calculating irregular polygons (over 10%!).
If your goal is to account for waste or to round up all your Results to a whole number, you can export the Takeoff (Summary) or Worksheet Tab to Excel and use Excel's Rounding Function or Round to the nearest value in your Estimating program, if it supports that functionality. See Related Articles for more information on exporting data from On-Screen Takeoff.
