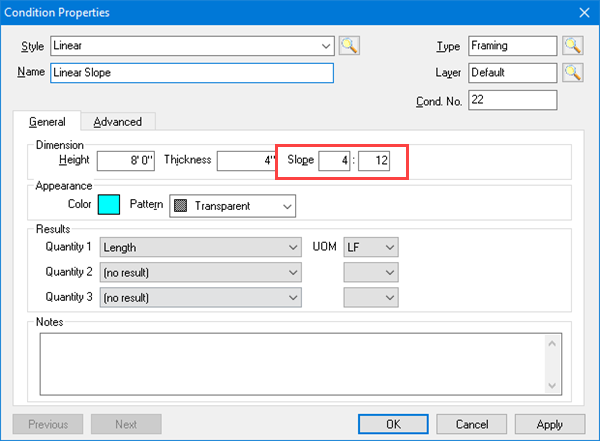
Linear Conditions can be setup to accommodate slope.
Linear Slope Explained
On-Screen Takeoff does not use conversion ratios to calculate sloped linear objects, all calculations use standard mathematical equations. The quantity results in On-Screen Takeoff do not account for waste, overages, coverage, or any other industry-specific calculations, they provide the exact measurements of the sloped linear object (adjustments to those quantities can be made in your Estimating product).
Example
Set the Scale of your Page to 1"=1', just to make things easier to follow
Set up a Linear Condition with a slope of 4:12 (for every 12 feet of run, rise is four feet)

Takeoff a line on an orthographic projection that is 12' long (birds eye view)

The Linear result is 12.649 LF - this is correct because On-Screen Takeoff calculates true math, not slope-factor (industry set conversion factors that may not be based on direct mathematics).
What you're drawing is the "birds' eye view" of the linear - the horizontal line that represents it on the plans.
The Math
Review the right triangle formed by the 12' linear we drew above.

In the hip roof diagram below, the line "A-B" (the base of the triangle) is what is actually taken off (drawn by the estimator) on the plan.

No conversion factors are needed because calculating the line "A-C" is a mathematical equation.
On-Screen Takeoff v. Conversion Factors
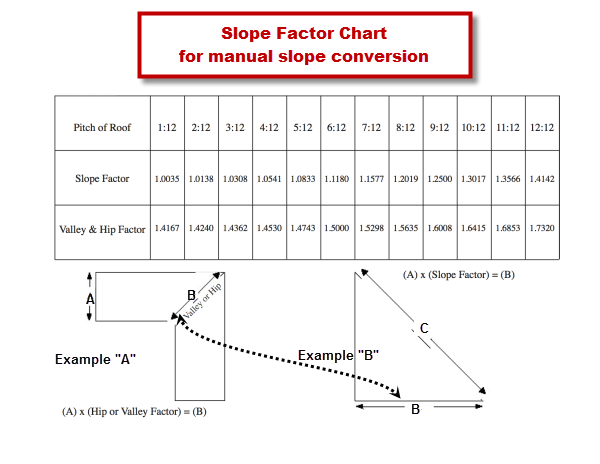
On Screen calculates the exact distance between points A and C, (the ridge or hip of the roof) in the screen shot above. In the example above, the conversion factor calculated for this measurement for a 4:12 slope is 1.05409 although the roofing industry lists the conversion factor as 1.453.
Compare that to the measurement "A" below. The conversion factor (1.453) is required to convert that measurement to the angled (45°) and sloped line. But in OST, you've already accounted for the angle because you drew the takeoff on an angle so the 'conversion factor' would, of course, be lower.

In example "A", the conversion factor was necessary (prior to On-Screen Takeoff) because the estimator may not have known the exact distance of "B" so they had to calculate the diagonal line using the known linear "A".
In example "B", the line 'B' is the same as line "B" in the first example, the estimator can just takeoff that line rather than having to apply a conversion factor to line "A" to calculate line "B".
On-Screen Takeoff saves the estimator a step - there is no need to calculate the horizontal line of the hip angle because it is taken off directly on the plans. The program automatically calculates the measurement of the sloped framing member without the need for any conversion factors.
Reminder: On-Screen
Takeoff's calculations do not take into account waste or overhang - the linear total is based on the right triangle created by the line you draw (the base of the triangle) and the height which is based on the rise:run setting. The program calculates the hypotenuse of that right triangle (
A2 + B2 = C2).
