| |
| |
On-Screen Takeoff - 01.07 Working with OST - the Program Tabs - OST
| Views: 550 Last Updated: 12/17/2024 12:37 pm |
0 Rating/ Voters
|
     |
| Be sure to rate this article 5 Stars if you find it helpful! |
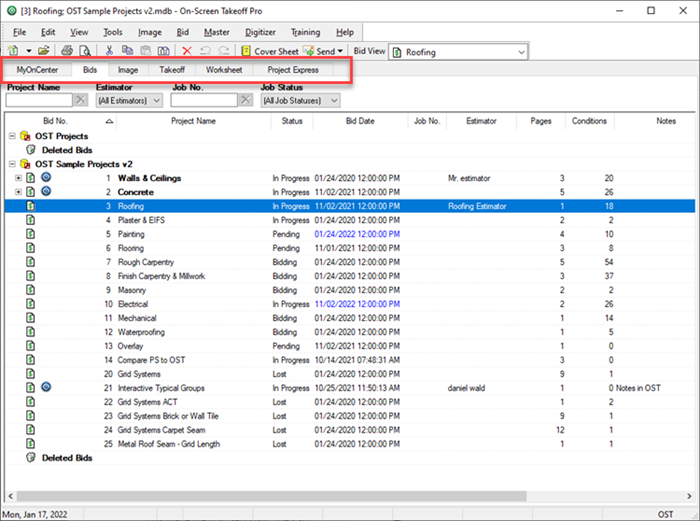
On-Screen Takeoff contains seven Tabs that provide access to different parts of the program: - MyOnCenter- a welcome page that shows you helpful information to help you get familiar with On-Screen Takeoff and ConstructConnect. Also provides access to the customer portal and company and product news.
- Bids - a list of all the projects you are working on in On-Screen Takeoff.
- Image - where you see your plans, create Conditions (measuring tools), and draw takeoff (measurements) and annotations (plan markups).
- Takeoff - also called the Summary Tab, this shows cumulative totals that you can analyze in various ways.
- Worksheet - allows you to create a very simple unit cost (rough) estimate against your preliminary takeoff results.
- Project Express - a utility On-Screen Takeoff (and Digital Production Control) users can leverage to send/receive projects, directly through the software.
We cover each of these Tabs in an overview in the articles that follow (or click on a link above to open that Tab's Overview article in a new window). - When you open On-Screen Takeoff, when you have not selected a bid, only the MyOnCenter, Bids, and Project Express Tabs are visible.
- When you select a Bid on the Bids Tab (when you click on a single bid), that activates the Image, Takeoff, and Worksheet Tabs for that Project.

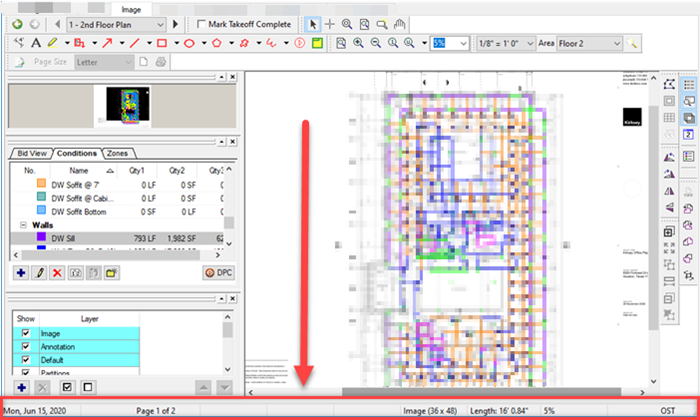
At the bottom of the program is the Status Bar. - On all Tabs, the current date is shown in the leftmost field, then the current user (if the database requires login), and your applied licenses are shown in the rightmost field.
- On the Image Tab, the status bar also displays the current page (1 of 2, for example) the page size, the dimensions of the currently selected segment (Linear and Area takeoff), and the current zoom level (%).

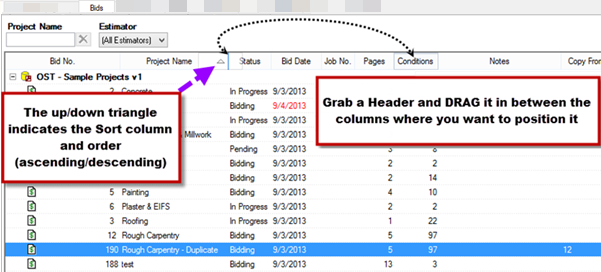
Several Tabs (the Bids, Takeoff, Worksheet, and Project Express Tabs) are organized into columns. Each column header can be moved within the header row by clicking and dragging. The Tab 'grids' can be sorted by any column header in ascending or descending order by clicking on a column, then the up or down arrow next to the column header. You can also export/print each Tab. See Related Articles for more information. 
Let's start with the MyOnCenter Tab.
|
|
|
