There are three ways to adjust production (how much labor is required to build, install, finish, etc. a certain quantity of a particular Item, in a certain amount of time):
- Adjust each line Item's production within a Condition's Item Detail Grid (detailed in this article)
- Adjust Condition-level Labor Production which allows you to set production for all the Items included in a single Condition (see next article)
- Adjust Bid-Level labor production on the Labor Tab (see the articles that follow)
Adjusting Labor Production in the
Condition Item Detail Grid, explained in this article, does not affect other uses of this Item even in the same
Condition. To adjust every use of a
Labor Cost Code in the Same
Condition, use the "Labor Adjust" button, described in the next article. To change
Labor 'globally' in a Bid, adjust Production on the
Labor Tab, described in Related articles.
- Labor may be viewed by unit price, production, piece count, time, or total money for a given Item
- Production and time may be viewed either by the day or hour and by pieces or cut per duration
- Production values may be modified by entering a percentage of the labor’s default rate
Controls to modify Item-level Labor/Production are accessed within the Item Detail Grid.
How Production Works
When you add an Item containing labor to a Condition, Production Rates are based on how you've setup the Master Item. You can click any labor value and change it directly within the Condition Item Detail Grid. Labor may be viewed in terms of cost, production, or time, but since all these values are inter-related, modifying one value changes the others for an Item.
All the calculations for Labor are based upon the Item Quantity ("Qty" in the Item Grid) for the Item being adjusted. If a Material or Labor Item defaults to one, two, or even four layers, Quick Bid still applies the labor to the Item quantity. The same principle applies to quantities that are entered directly. Calculated cost and man hours are the result of production or unit pricing applied to the Item Quantity.
To illustrate this:
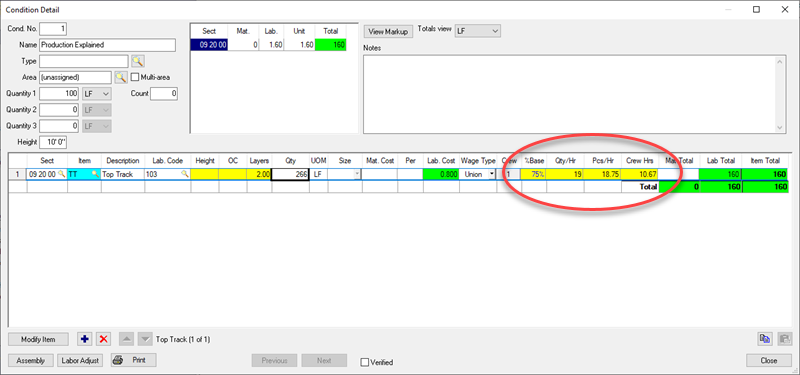
Let us create a test Condition with a quantity of 100 LF and assign a height of 10’ 0”
Next, we drop-in Code "TT"(Top Track) - this is for demonstration purposes, of course, your database may not include this Item.
This Item defaults with 1 layer and displays a quantity of 100 LF (this particular Item has a very simple Calculation and doesn't include Waste, see Related articles for more information on setting up Item Calculation, including Waste Factor). The unit price or production is used to calculate time (Crew Hours) and total money and are all based on the Item quantity of 100 LF.

Next, we change the layers entry to "2" - the quantity becomes 200 LF, but the unit labor price (Lab. Cost) and production (% Base, Qty/Hr-Day) values remain the same - only total time (Crew Hours) and total labor money (Lab Total) are doubled...
Production (Qty/Hrs (or Days)) doesn't change when the Quantity is increased or decreased, only the Hours needed and associated Labor Cost change. Think of it this way - the same people are doing the same action - how much per hour/day doesn't change, it just takes longer to finish if there is more to do.
In the next few articles we show you how to adjust these Production rates.


 Making Adjustments to Material, Labor, Equipment, Other, and Subs Expenses