This is a relatively long article, but it explains how you select what you want to show has been completed on the job
site, so it's important that you understand how to set Percent Complete. Take your time, print out this article if necessary and after a few tries, you'll be a pro.
There are four steps you will need to follow to 'percent' your completed work:
- Choose the floor on which work was completed (where did the labor activity happen)
- Choose the Labor Code(s) for which work was completed (on-site labor correlates to Labor Cost Codes furnished by your estimator)
- Select which (takeoff objects) to "Percent" (takeoff is the various building objects drawn by your estimator, they are tied to Labor Cost Codes)
- Set Percent Complete (how much work is complete for the selected Labor Cost Code(s) on the object(s) you selected?)
Choose the floor on which work was completed
Choose the floor you are working on...
 Click on the Image Tab
 Click the Page drop-down
 Select the floor you are working on
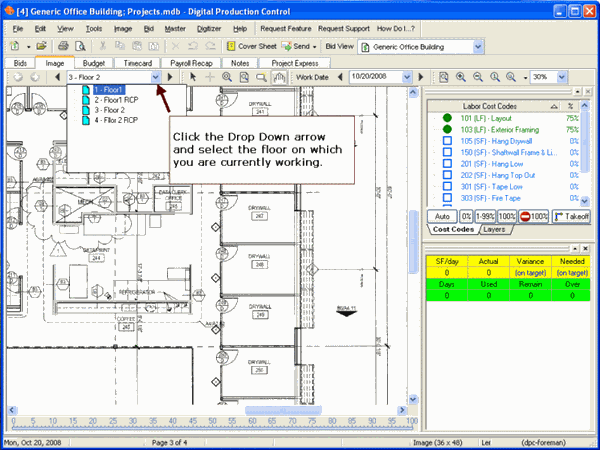
Choose the Labor Code(s) for which work was completed
The LCC (Labor Cost Code(s)) indicates the activity/work that was performed.
Choose the labor cost code...
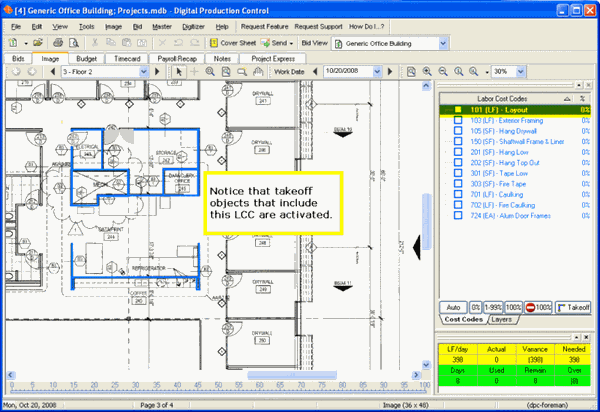
 Click on the labor cost code to percent (highlighted in yellow below)
After you click on a labor cost code, the related objects turn blue on the floor plan.
Select which takeoff objects to "Percent"
Select the objects worked on (there are three ways to select takeoff objects, each explained below)...
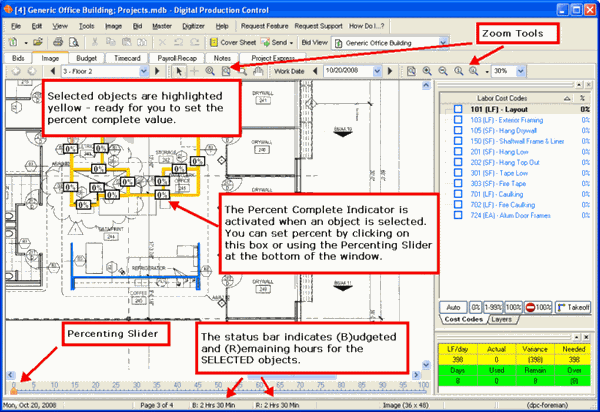
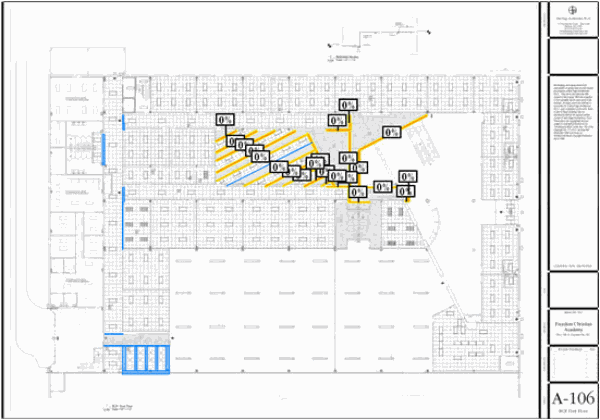
Once an object (or objects) is selected, it turns yellow and displays a Percent Complete box.
Select Objects using Roping
You can use the “Roping Method” to select objects. You draw a selection box and all objects touching or within that box are selected (see Related articles for information on setting your Program Options to work more efficiently with DPC.
 On the plan image, use the zoom tools to zoom in or out
 Click the Select Tool
  on the toolbar
 Draw a box around the objects you want to select
Remember, once an object is selected, it turns yellow and displays a Percent Complete box.
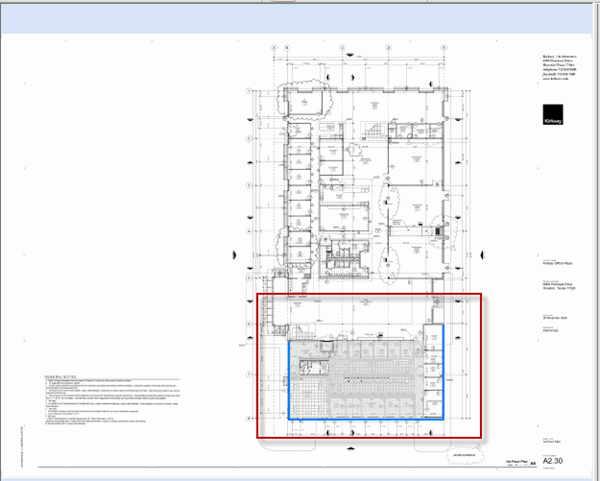
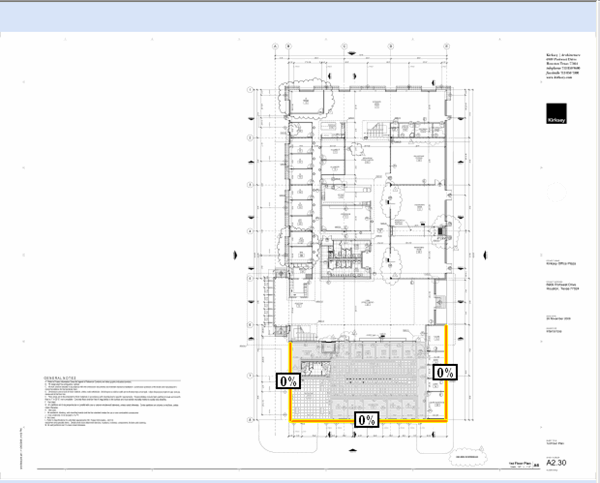
When you draw the 'box' around the takeoff objects, the objects are selected:
Select Objects by Clicking on them
You can use the Select Tool  to click on one object at a time to select objects that are not easily roped.
 On the plan image, use the zoom tools to zoom in or out
 Click the Select Tool
  on the toolbar
 Click on the object(s) you want to select
To deselect an object, click on it again
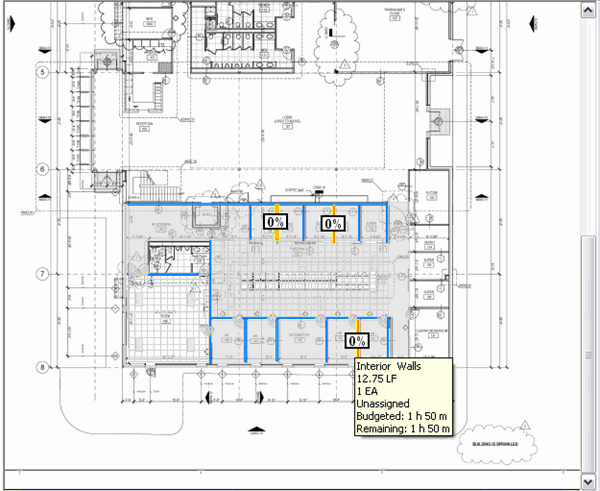
Once selected, the object(s) turns yellow and displays a Percent Complete box.
Select Objects by "Striping"
You can draw a 'stripe' through objects to select them.
 On the plan image, use the zoom tools to zoom in or out
 Click the Select Tool
  on the toolbar
 Draw a line/stripe through the object(s) you want to select
"Striping" works if you have "Inclusive" set as your roping method.
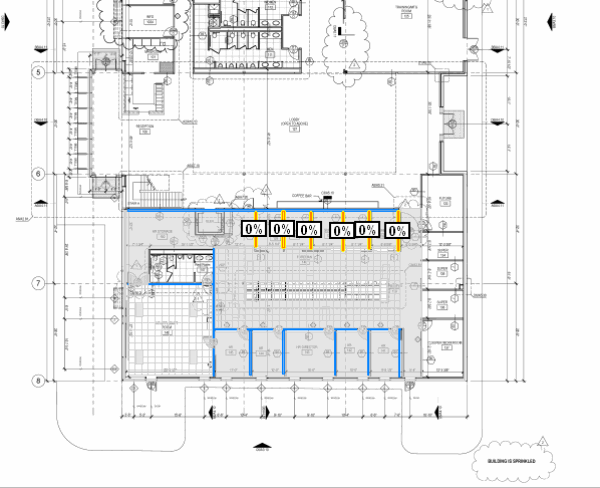
Again, selected objects turn yellow and display a Percent Complete box.
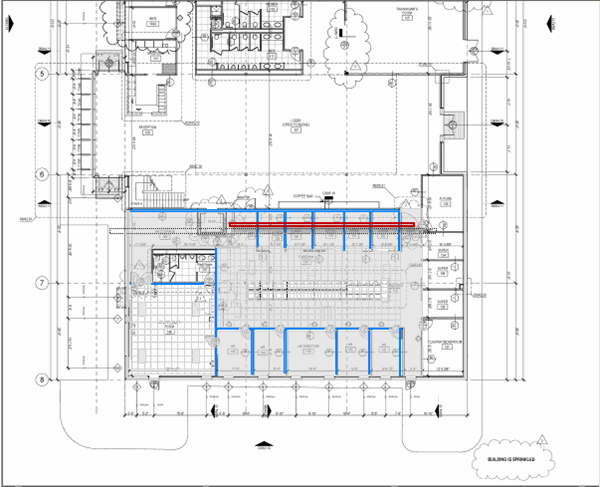
When you release the mouse or stylus, all objects the stripe is touching will be selected:
At the bottom of the window, the program displays the (B)udgeted and (R)emaining manhours for the objects you have selected. This is very useful in setting daily production goals for your crew members (lining out...). See the User Guide for more information on Lining Out Daily Work Crew.
De-selecting Objects
Selecting and unselecting objects works like a toggle. The first time you click on a takeoff object, it becomes Selected and shows a yellow highlight. Clicking the same object again de-selects it and the highlighting is removed.
Sometimes, it is easier to select a group of objects using Roping or Striping and then unselect one or two objects you do no want to include, as in the example below.
Here, we drew a selection box around all of the objects, then clicked on the one object we did not want to have selected.
Set Percent Complete
Lastly, you are going to enter percent of completion for the selected objects (how far along those objects are toward completion).
 Click the percentage of completion for the selected objects using the Context Menu or the Slider at the bottom of the screen
Notice the percentage boxes for all selected objects will change accordingly.
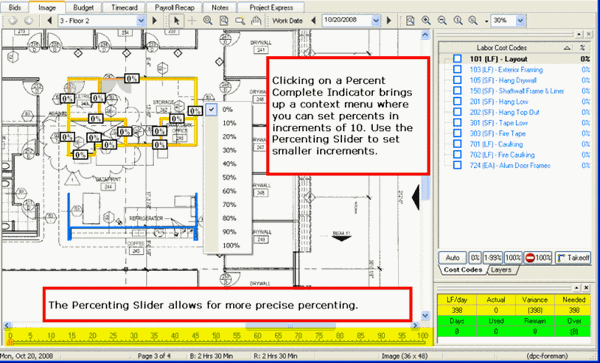
Notice also that the % column in the Labor Cost Code list updates.
Notice also that the Remaining Time (R:) changes to reflect how much work remains (see Related Articles for more information on "Line Out").
Repeat this process on all floors and for cost codes for which work was completed.
