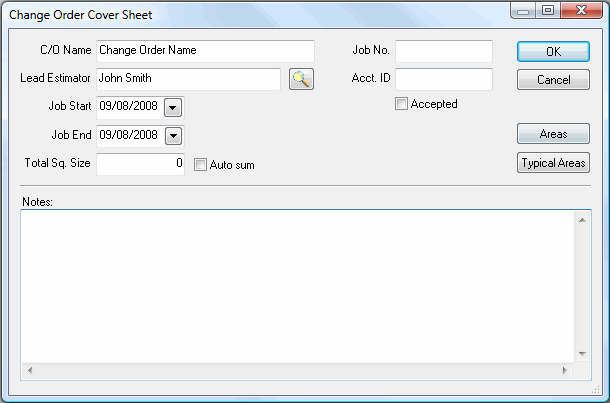
Enter a name for
the Change Order in the C/O Name
field.
Enter a job number
in the Job No. field, an account
identification in the Acct. ID
field , and Notes if you want
(Optional)
Enter the Job Start and Job
End dates in their respective fields, or click the arrow and select
a date from the calendar. (Optional)
Place a check in
the box next to Accepted if you
want to include the change order in the base bid’s grand total. The
Change Order will appear on the
Bid Summary Report.
Enter a value in
the Total Sq. Size field or place
a check in the box next to Auto Sum
to have the program calculate total size based on the values you apply
to your condition(s).
Document any important
information in the Notes field.
Click  . The
program will open the Conditions
tab.
. The
program will open the Conditions
tab.
Build conditions
for your Change Order as you would for a normal bid, and add bid costs.
Change
Orders appear directly below their base bids. If
you do not see a Change Order in the Bid Navigator, locate its base bid
and click on the plus sign (+) to the left of the base bid name. The
Change Order will appear below the base bid.
You can
come back to the Change Order Cover Sheet dialog to change acceptance
or any other field. Double-click on the Change Order in the Bid Navigator,
and the Change Order Cover Sheet dialog will appear. You can also toggle
between Accepted and Not Accepted on the Markups Tab by placing a check
mark next to the Change Order's name.
You can
Copy and Paste conditions to the new Change Order from the Base Bid or
other Alternates or Change Orders. See Copying
and Pasting Conditions for more information.