![]()
12.03.00 drawing area takeoff
![]()
![]() Drawing Area Takeoff
video
Drawing Area Takeoff
video
Area takeoff is anything quantified with a 'square' measurement. Building objects such as carpeting, roofing, flooring, concrete floors, and ceiling tile are examples of construction items taken off as Areas. Square footage, volume (using the Condition's Thickness), and perimeter (lineal footage) can also be calculated.
Before drawing ANY takeoff, be sure to set and verify the SCALE on EACH page. See Verifying the Scale of an Image for instructions.
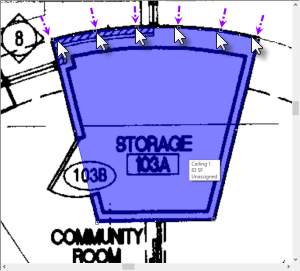
When an Area Condition is selected, hovering over a spot on the drawing automatically magnifies the region in a small pop-up box next to the cursor. This makes placing the cursor on the exact spot easier without having to zoom the page in closely.
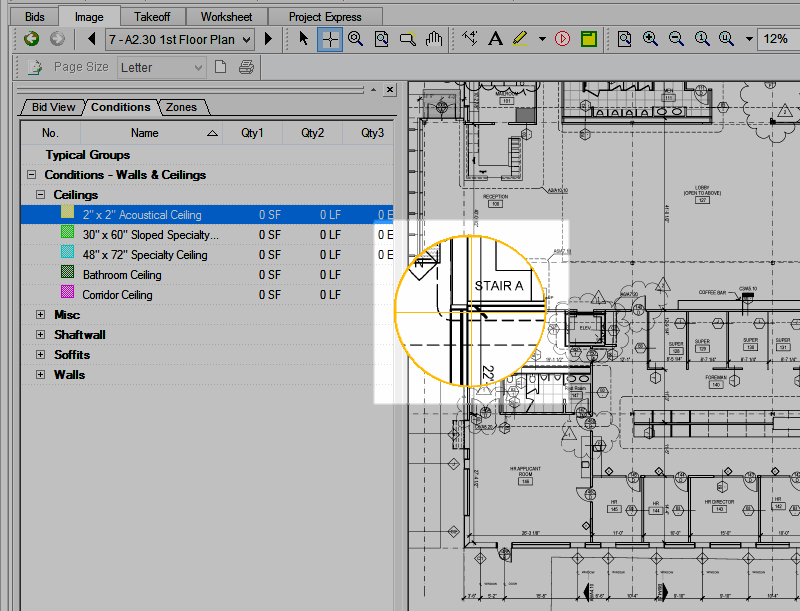
The auto-magnifying popup only displays when the page zoom level is less than the magnifier's "Default Auto Zoom Level" as set in Tools > Options.
To disable this auto-magnifying function, click Tools > Options, and set the "Default Auto Zoom Level" to '0'.
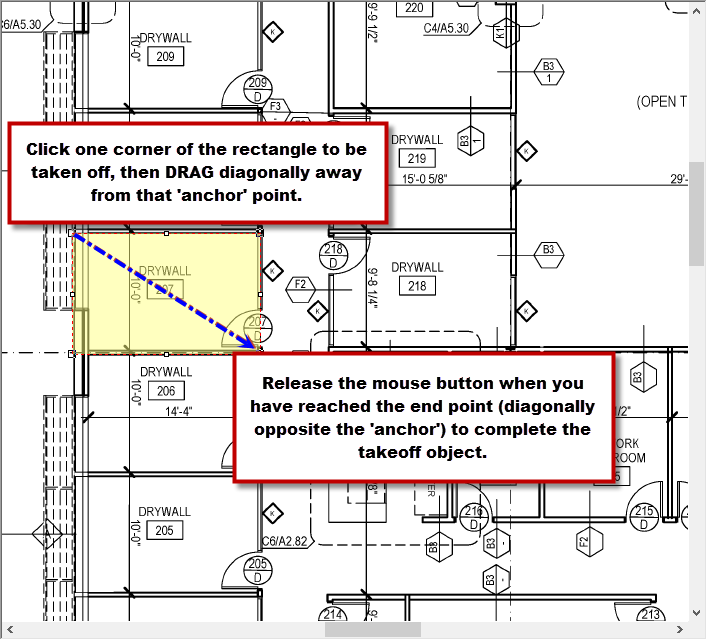
Single-Click Area Takeoff makes it easy to takeoff multiple rectangular areas that are not exactly the same size when copying/pasting won't work.
To draw a polygon (something other than a simple rectangle),
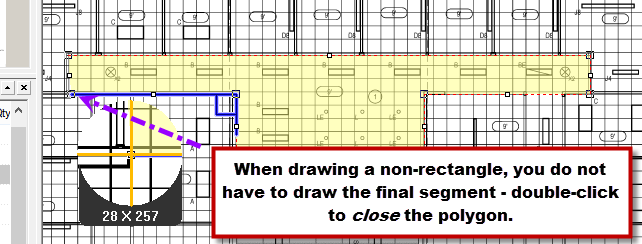
When taking off an area, it is not necessary to draw the last segment - double-click at the final point and On-Screen Takeoff connects the current point and the starting point (this is called 'closing' an area takeoff).
By default, when using a mouse, On-Screen Takeoff 'snaps' to 15 degree angles while performing Area takeoff (Point-by-Point). Hold down the <Shift> key to temporarily override the Snap Angle Indicator and/or Snap settings. These settings may be changed program-wide by clicking Tools > Options and changing Snap Angle settings and/or disabling the Right Angle Indicator.
To make drawing segments at right angles easier, the program displays the Right Angle Indicator and snaps the corners to 90 degrees by default.
To hide the Right Angle indicator, click Tools > Options and uncheck the Show right angle line indicator option.
When using the Right-Angle snap to draw a takeoff object, the segments may not be exactly the same length - although the image is a square, one segment may be fractionally larger than another. This can cause calculations to be a little higher if one of the results is Visible Grid or Visible Tiles and/or if the Condition is set to round segments. See Rounding Area Quantity for details on this option.
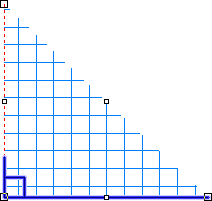
To takeoff an area with curved segments, follow the contour as closely as possible using short segments. Override the Snap Angle holding down the <SHIFT> key while drawing the segments or disable Snap Settings in Tools > Options.
The curved area above was drawn by drawing five short, straight segments (six clicks for the curve).
After an area takeoff object is drawn, it may be necessary to add additional vertices (think of a vertex as a joint between two segments of an area takeoff's perimeter) to change the shape or size of the area takeoff. To add a vertex, perform the following steps:
Once a vertex is added, to remove it, use the Selection
Tool ![]() to drag it on top of an adjacent vertex.
to drag it on top of an adjacent vertex.
Add as many vertices as needed (in example below, to add a 'bump-in' four vertices need to be added to the area takeoff segment).
 - indicating
the vertex is ready to be moved
- indicating
the vertex is ready to be moved
On-Screen Takeoff generates an unpleasant 'gong' sound when an Unaccepted Action is performed, for example, when the program does not accept a point when you are drawing Area takeoff. When you hear this sound, return to the last accepted point by hitting the <Esc> key and try clicking the point again (the <Esc> key backs-up the cursor position one point at a time).
The most common reason for being unable to set a final point to close an Area is crossing lines as shown in the screen shot below. In this example, point 4 cannot be set because it would cause the line 3-4 to cross line 1-2. It is very easy to cause this situation when completing the final segment - that is why it is advisable to allow On-Screen Takeoff to draw the final segment automatically by double-clicking at the last point.
