![]()
5.05.00 worksheet tab
![]()
![]() The Worksheet (or Pricing) Tab video
The Worksheet (or Pricing) Tab video
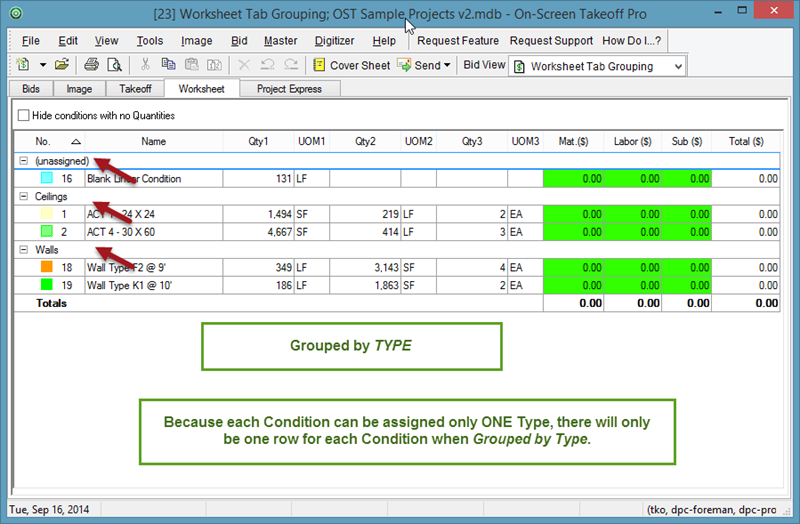
The Worksheet Tab enables the estimator to view quantity breakdowns of each condition according to results indicated in the Condition Properties dialog (i.e. linear feet, square feet, each). The Worksheet Tab can be grouped by Type or Page. The Worksheet Tab is set up in spreadsheet format so, like the Takeoff Tab, it is very easy to use.
See Price Using Worksheet Tab for information using the Worksheet Tab to generate a very simple cost estimate.
On the Worksheet Tab, it is possible to manually enter quantities (Qty 1, Qty 2, or Qty 3) for Conditions that have no takeoff associated with them. See Manually Entering Values on the Worksheet Tab for more information.
(The green columns are not highlighted above for particular emphasize, they are displayed this way in the program.)
To rearrange the columns select the header of the column to move and drag the column to the desired location.
To resize a column, click and hold on either side of the column header
to bring up the Resizing icon ![]() . When the Resize
icon comes up, drag the edge of the column to the left or right to achieve
desired width. See Price Using Worksheet Tab
for important information on moving columns.
. When the Resize
icon comes up, drag the edge of the column to the left or right to achieve
desired width. See Price Using Worksheet Tab
for important information on moving columns.
There are two different context menus on the Worksheet Tab. One is available when the user clicks on a Condition Number, Name, etc., the other when the user clicks on a Quantity for a Condition.
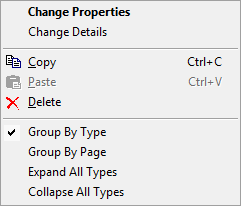
Deleting a Condition deletes ALL takeoff associated with that Condition and cannot be undone - it is permanent and immediate.
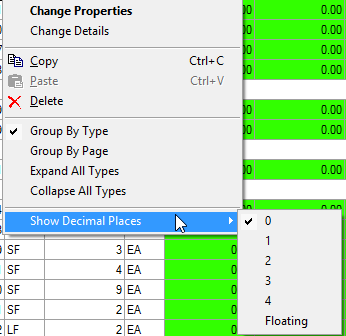
Includes the option to set the number of decimal places for each Quantity result column independently. Changing decimals on the Worksheet Tab does NOT change decimal place settings in the Conditions Window - only changing the decimal settings on the Takeoff Tab affects the Conditions Window.