Creating a Condition from Scratch
- To create a new Condition from scratch, you can either click the New Condition icon
 in the Conditions List, right-click anywhere in the Conditions List and select New > Condition, or press the <Insert> button on your keyboard
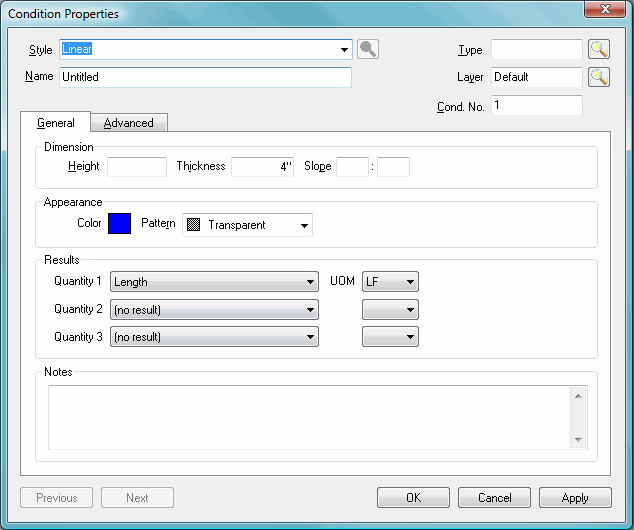
- The Conditions Properties dialog box appears.

First, you need to determine what Style of condition you are created - is it a Linear (wall), Area (flooring/ceiling), count (columns, etc) or attachment (like a window or a door).
 |
NOTE: You can also select the Style - Typical Groups. Please see Typical Takeoff for more information. |
Name your Condition. Some examples are walls, double doors, a metal roof, etc. It is recommended that you match the Condition name as closely to the description of the object being take off. For example, "10' 6" TYPE A GWB WALL" is more easily identifiable than "INT WALL".
Select a Type. This is optional, but recommended. The Conditions List, Takeoff tab and Worksheet tab can be grouped by Condition Type to make it easier to keep like-type conditions together (for example "Interior Walls, Flooring, Ceilings, etc).
Define Layers by selecting from the list or use the default. See Layers for more information. If no layer is specified, the Default Layer is used.
Condition Number (Cond.No.) is assigned automatically in sequential order; it can be changed to any unused number.
Set properties on the General and Advanced tabs. Settings on these tabs will be different for each type of Condition. The next several articles will explain how to setup the General and Advanced Properties for each condition Style.


