


Rotating Images
Some images downloaded from a Planroom or received from an architect can be oriented incorrectly when they are brought into On-Screen Takeoff. In some cases they may be upside down or rotated to the left or right by 90°.
 |
Additional Information: At times you may need to rotate a piece of takeoff (after copying and pasting for example) to match the plans. See Rotating & Spinning Takeoff for more information. |
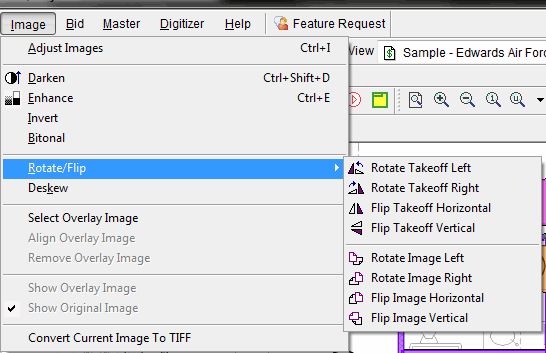
To rotate a single image, right-click on the image and select Rotate/Flip and you'll see a context menu that allows you to rotate and flip the image as needed.

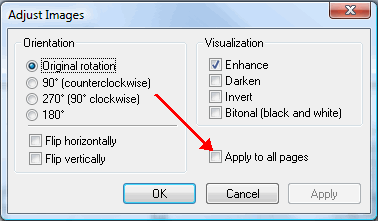
You can use the Menu or Image toolbar to make rotation adjustments. Click Image > Adjust Images to access the Adjust Images dialog box.

You can also select Image > Rotate/Flip.
Another option is to click one of the buttons on the Image toolbar.

If you want to rotate/flip ALL of the images in your project at once, you will use the Adjust Images dialog box and place a check mark in Apply to All Images.
 |
NOTE: Adjusting an image does not actually edit the image file - it only changes how On-Screen Takeoff displays the image - for example, rotating the image 90 degrees only instructs On-Screen Takeoff to rotate the image 90 degrees before displaying it. The original image will still be it the same orientation. |
Deskewing an Image (Straightening a Crooked Image) 