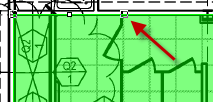
Sometimes, when you (or Takeoff Boost™) draws area takeoff, you realize you either missed a joint (corner, vertex, poly-point) or added one or more that you really don't need.
Adding a vertex (or vertices)
Adding a vertex to split a segment in two is easy:
Click on the area takeoff object. Notice, all the vertices (joints) become "active" (visible).

Next, locate the point on a segment where you want to add a vertex, the cursor changes to crosshairs with a small plus sign next to it.
Click wherever you want a new vertex added.

Repeat this process to account for the segments you need to add to adjust the shape of your takeoff (it's OK if you add too many, we show you how to remove an unneeded vertex below).
Drag the ends of the segments or drag the entire segment to adjust the shape of your area takeoff object. Remember, because each segment is connected to two other segments, moving one will adjust two other segments, sometimes not exactly how you were expecting.

Sometimes, your takeoff object requires more adjustments than it is worth and it is easier to delete the takeoff object entirely and draw it again from scratch.
Removing Unneeded Vertices (Simplifying the Perimeter)
There are two ways to fix unnecessary vertices.
You can select the area takeoff object, which 'activates' all its vertices. Then, click on the vertex you want to remove and drag it onto the next closest vertex - they will "combine" and the two segments will become one.

You can also use the "Simplify Tool" discussed in Related Articles to have On-Screen Takeoff attempt to remove as many vertices as possible while retaining the overall shape.
