As this technology is leading-edge, we feel it provides a great deal of value in its current state, however we are dedicated to improving the performance and results of
Takeoff Boost with future iterations.
Issue
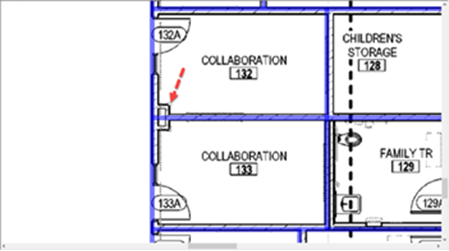
Sometimes, Takeoff Boost misses walls or sections of walls, specifically double walls such as in restrooms or exterior double walls.
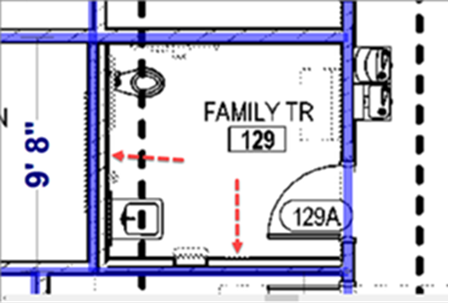
Takeoff Boost missed the double wall in a restroom
Takeoff Boost missed the double wall in an exterior wall
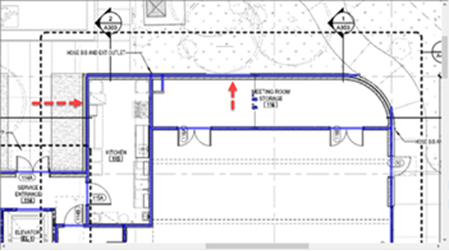
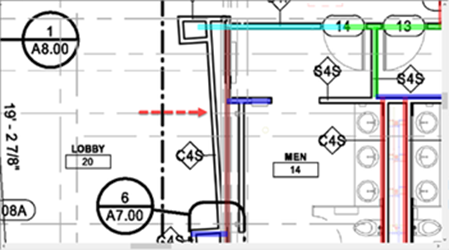
Takeoff Boost sometimes misses a section of an elevator wall adjacent to another interior wall.
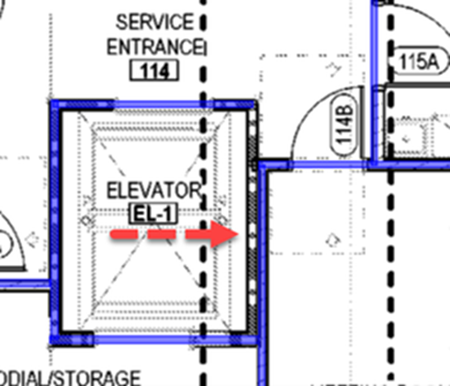
Takeoff Boost missed a section of wall surrounding an elevator
Takeoff Boost sometimes misses a section of a curved wall.

Example 1: Takeoff Boost missed the arc in this curved section of wall
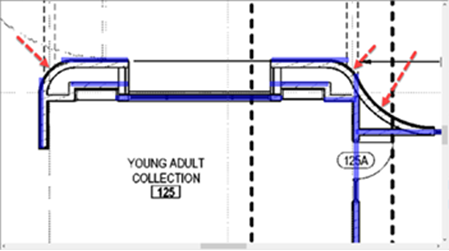
Example 2: Takeoff Boost missed the arc in this curved section of wall
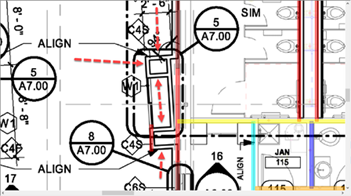
Takeoff Boost sometimes misses an angled wall, especially on rotated plans.
Example 1: Takeoff Boost missed this angled wall on a rotated plan
Example 2: Takeoff Boost missed this angled wall and some adjacent walls
Takeoff Boost sometimes misses a chase wall or a very short section of wall.
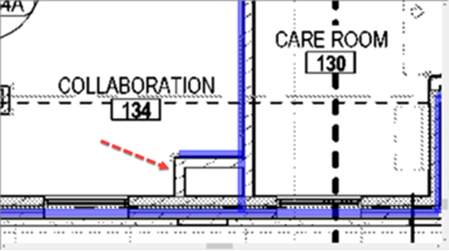
Example 1: Takeoff Boost missed this chase wall
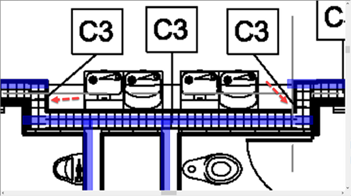
Example 1: Takeoff Boost missed a couple short sections of wall
Example 1: Takeoff Boost missed these corner chase walls
Takeoff Boost sometimes misses the double wall on a staircase.
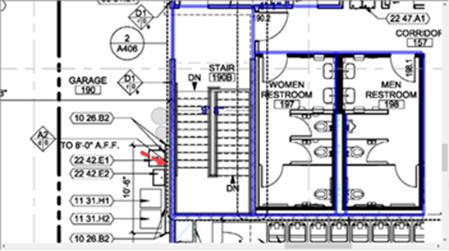
Example 1: Takeoff Boost missed the double wall on this staircase
Resolution
The resolution is to select the appropriate Wall Condition (or create a new one, if necessary) and draw the takeoff manually.
To select the same Condition as existing takeoff, just click on the takeoff and the appropriate Condition is selected automatically.
Check out Related Articles for details on drawing linear takeoff manually.

