After Takeoff Boost returns results to On-Screen Takeoff, you:
Starting with a new Plan, but again, concentrating just on the linear (Wall) takeoff, we're going to review it to see how closely it matches the Plan. Takeoff Boost does a good job of recognizing linear objects, but doesn't always place the takeoff exactly where an estimator would.
Our next steps:
- We want to review each piece of takeoff to verify it matches the Plan, as closely as possible.
What Needs to be Fixed?
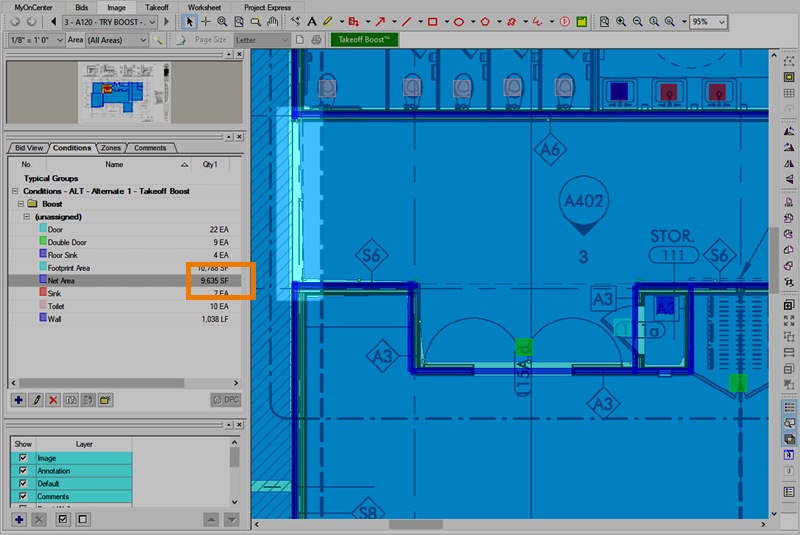
Let's zoom in on a floor plan we ran through Takeoff Boost. The takeoff object we are focusing on first is that Net Area object that was cut off because there's an overhead beam connecting two walls and Takeoff Boost wasn't sure if it was a wall or not. Also, the area takeoff doesn't quite reach all the way to the S6 Wall.

Take note of the Quantity for Net Area, it'll change as we make these easy corrections. Here are a few articles to help you adjust your takeoff:
Selecting and Editing Takeoff
Resizing Takeoff Objects
Copying, Pasting, and Moving Takeoff
Adjusting Takeoff to Match Plan
When reviewing the takeoff that Takeoff Boost created, you'll notice minor things that need to be corrected. As indicated above, this Net Area (which is the area measured between walls), doesn't quite match our plans.
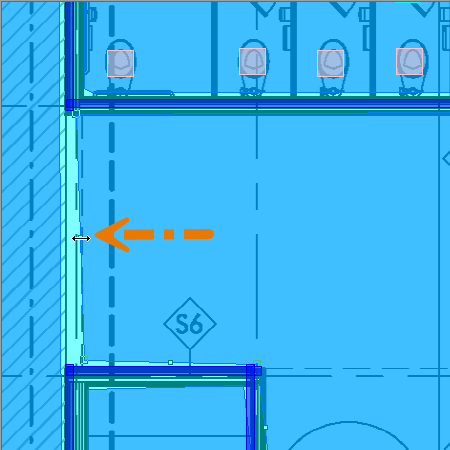
The first thing we are going to do is drag the left edge of the takeoff object so it covers that missed bit of area because of the perceived wall.

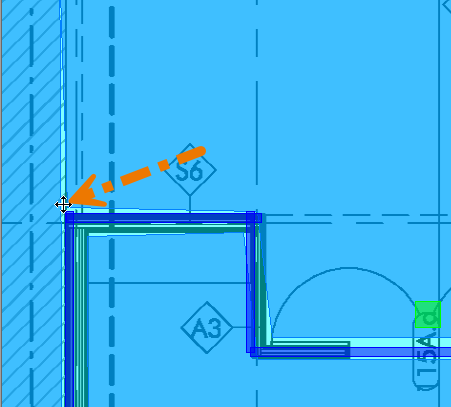
Next, let's fix that corner that just isn't quite right...

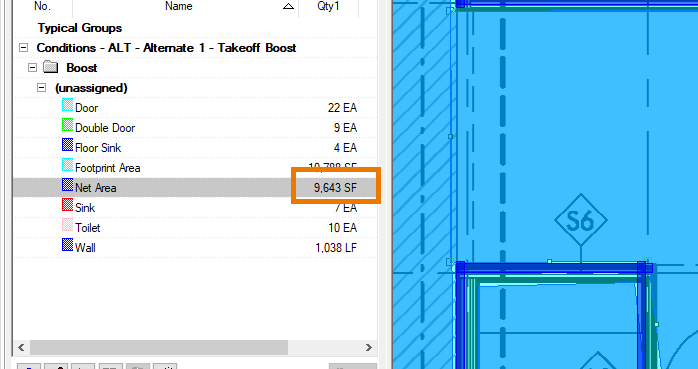
Notice the change in the square footage result? Not huge, but this was one correction.
Takeoff Boost's results would be "close enough" for scope assessment, but for a final bid, we might want make these minor corrections because they add up over a multi-page
project. (These changes
are minor, and overall, they'd probably average out, but we, like many professional estimators, like this to be as exact as possible.)

Other things you may need to adjust
Like we've said before, Takeoff Boost is pretty amazing, but it's likely you will have to create additional Conditions and draw some manual takeoff. For example, Takeoff Boost does not takeoff Windows, light fixtures, columns, etc. (for now...).
Other adjustments:
- The Doors that Takeoff Boost locates are taken off as Count objects, not Attachments. If you're working in framing/drywall/finishing, you may want to replace the Takeoff Boost Doors with Attachments, to account for reductions to a Linear Condition's Surface Area Results. (See Creating Attachment Conditions for more information on Attachments.)
- If you were an Acoustical Ceiling contractor - the Net Areas that Takeoff Boost returns are great, however, you'd need to adjust the Conditions to account for Grid and then you'd have align that grid to the Plan. See Drawing Gridded Areas and Aligning to your Plans for more information on gridded areas.)
- You may have to make minor adjustments to Walls, sometimes, as you can see in the screenshots above, because we disable the "Connect to" Advanced Property when creating a Takeoff Boost Condition, Wall takeoff objects sometimes run "past" their intersections. These are easy corrections to make, if you feel they are necessary.
- You can "split" linear and area takeoff objects into shorter or smaller sections, see Splitting Linear and Area Takeoff Objects for instructions.
