After Takeoff Boost returns results to On-Screen Takeoff, you:
We're going to continue with our example of a Drywall Contractor, focused on the wall takeoff that Takeoff Boost returned.
In the previous article, we updated the "Boost Walls" Condition and moved it out of the Boost folder. All the takeoff is still associated with that single Linear Condition, though.
Our next steps:
- We need to review the Plan to determine how many additional Linear Conditions we need to account for all the Boost takeoff that is not associated with existing the "Boost Wall" (we renamed that Condition to "Exterior Walls - 14' " in the previous article)
- Create those Conditions (see Related Articles for details on setting up Conditions if you need a refresher)
- Reassign the existing Boost takeoff to those Conditions
Review and Assess
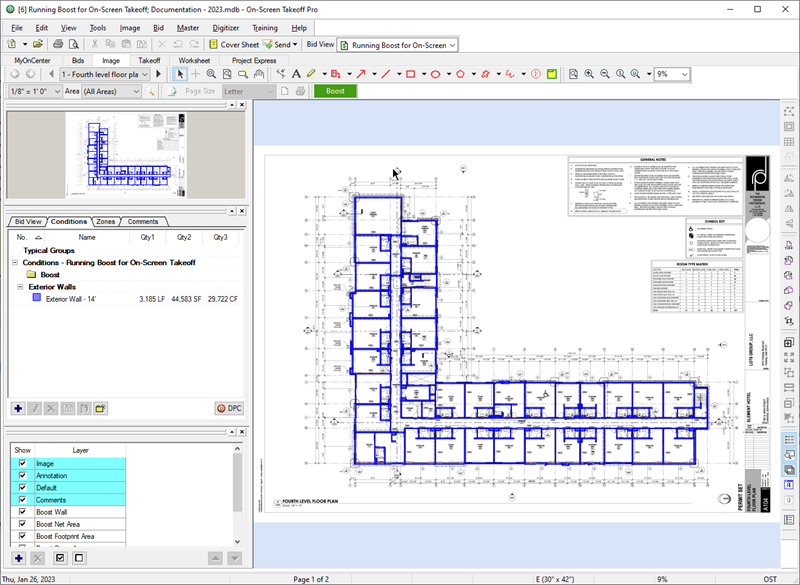
To make reviewing the Plan a bit easier, turn off all Layers that have takeoff on them (specifically, the "Walls" Layer we created in the previous article).
You probably already did a review of all the Plans, but we're just going to assume you've jumped the gun and couldn't wait and ran
Takeoff Boost as soon as you loaded the Plans, it makes explaining this workflow a bit easier.
With all takeoff hidden, we can clearly see there are two different types or styles of interior walls: firewalls (the ones with colored sections) and partition or standard walls (the bathrooms and storage areas).

Create Additional Conditions
We need to create two additional Linear Conditions:
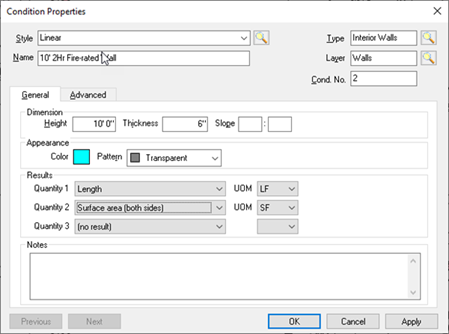
The first is a 10' fire-rated wall:
The second is the 8' partition wall:
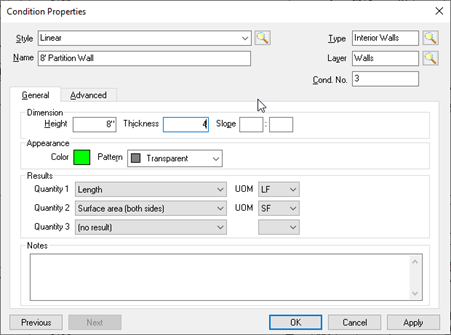
Notice, we set Condition Type to "Interior Walls" and Layer to "Walls" (all walls are on the same Layer).
We also set our Quantity 2 to "Surface area (both sides)" because both sides of these walls are drywalled (and painted), unlike our Exterior wall which would have drywall on only one side.
Height and Thickness are based on what the wall's dimensions show on the Plan.
Reassign Takeoff
Next, we are going to select all the fire-rated walls and re-assign them to the new Condition we just created.
- First, zoom in so you can see the individual takeoff objects more clearly.

There's a few ways you can select
takeoff, we cover this in
detail in
Chapter 9. For this article, we are going to use the click-to-select method and do one
takeoff object at a time, this is definitely not the fastest way to reassign a lot of
takeoff.
- Locate and select one of the fire-rated linear objects.
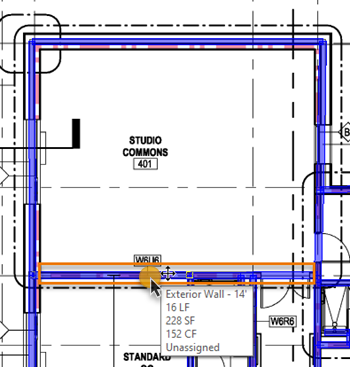
Notice, when you select it, your cursor changes and the takeoff object displays it's selection/move handles (little boxes at either end and in the middle).
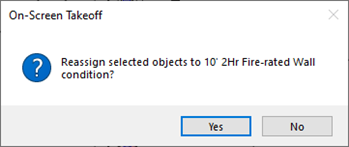
- Next, in the Condition Window right-click on the Condition to which you want to reassign this object (in our example: 10' 2hr Fire-rated wall); the Condition context menu displays.
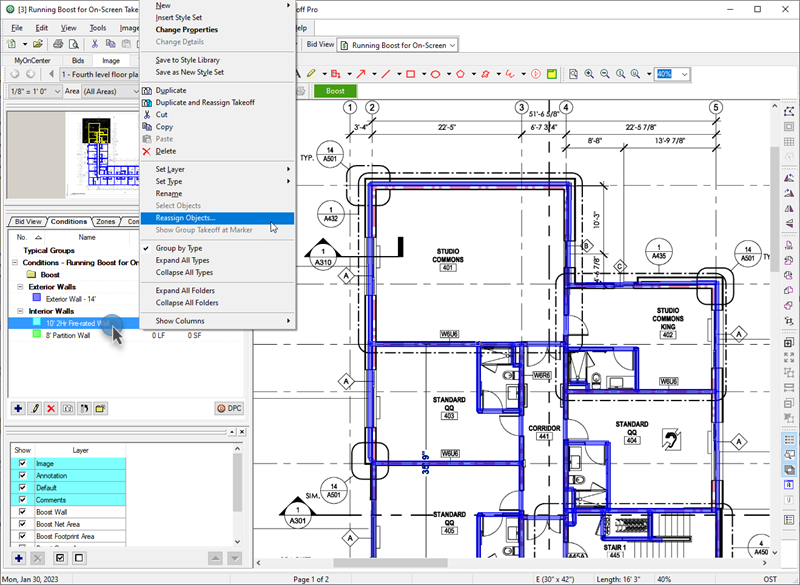
- Select Reassign Objects...
Notice that the Results for both Conditions are updated immediately...
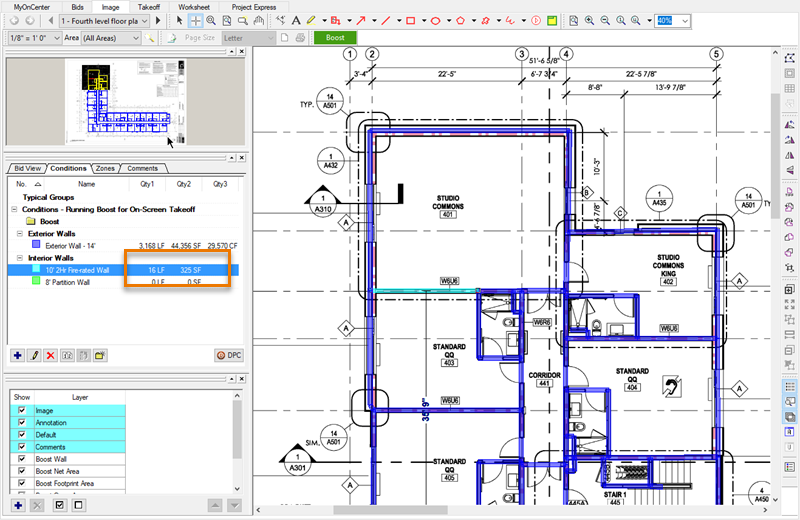
Notice also that the takeoff now picks up the color of our new Condition.
Let's do this with one piece of the partition wall takeoff, but this time, we're going to select two (adjacent) takeoff objects.
- First, again, grab the Select Tool (
 )
) - Click on the first object
- Hold down the <Shift> key on your keyboard
- Click on the second object you want to select

Notice, when you select more than one takeoff object, they are sort of highlighted in yellow (bordered, actually).
- Right-click on the partition wall Condition and select Reassign Objects, like we did for the first Condition.
After confirming, notice the updated Condition Quantities...

Using some of the other methods of selecting
takeoff (namely,
drawing a box to select multiple objects at once), we made quick work out of reassigning all the interior walls. First, we selected all of them and assigned them to the 10' fire-rated
Condition, then, we went back and selected just the partition walls and reassigned them to the Partition Wall
Condition. It's a two-step process but it ultimately saved several minutes trying to select just the 10' fire-rated walls without accidentally grabbing a Partition Wall
takeoff object.
For more information on using the Select and Reassign tools, see Related Articles below.
Continuing with correcting what Takeoff Boost returned, in the next article, we're going to cover making minor corrections to the takeoff itself.


 Editing and Moving Boost Conditions