| On Center Home | MyOnCenter Portal | Start an On-Screen Takeoff Trial | Request a Quick Bid Demo | Contact Us | SALES: 1-866-627-6246 | |

|
||
| Looking for help for one of ConstructConnect's Other products? | Login | |
| Table of Contents
|
|
||||||||||||
|
|||||||||||||||||||||||||
| Product documentation (user guides) describes functionality in the latest version of each major release and may not match the functionality in the version you are using. Please check the Product Information and Downloads pages by clicking one of the product buttons above. |
| Something Wrong with this Article? Let us Know! | The information in this site is protected by copyright by ConstructConnect. You may not reproduce, adapt, or publish any content from this site in whole or in part for any purpose, without the express written consent of ConstructConnect, Inc.Copyright 2024 - All Rights Reserved. |
| Knowledge Base by: KnowledgeBase Manager Pro v6.2.2 (Built with: JS.GUI - Rich Internet Applications) |

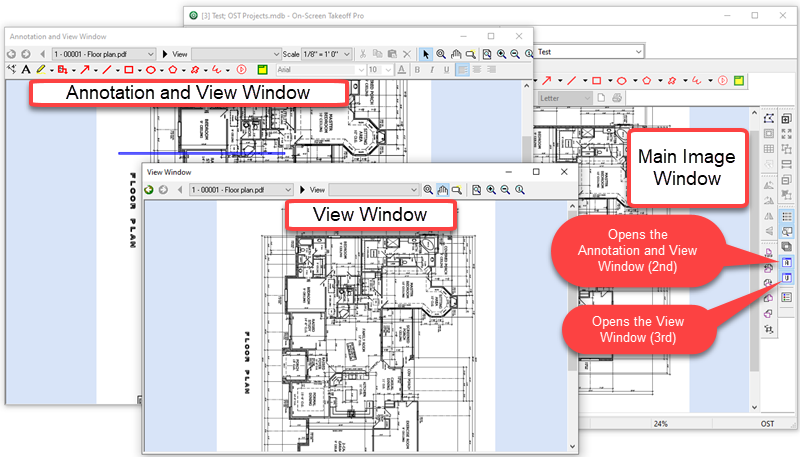

 Annotation and View Window