Annotations are graphical markups drawn on plans such as: Dimension Lines, Text, Highlight, Hot Links, and Named Views. Annotations are viewed/managed on Image Tab. Hot Links and Named Views are covered in the next article.
Annotations added by Foremen are included in the next DPC Change file sent back to the Project Manager.
The Annotation Tools are located on the Annotation toolbar. This toolbar is only active when the Bid is flipped (temporarily) to "Takeoff Mode" by clicking the TKO button  in the LCC Panel (on the Image Tab). While in Takeoff mode, the Forman will see colored takeoff and can add/modify Annotations. He or she can also use the Quick Takeoff (Measurement Tools) explained in Related Articles. (Foremen cannot unlock a Bid (to edit takeoff, for example), but they can flip between Takeoff Mode and DPC Mode to view takeoff, add/edit Annotations, and see Bid Area breakdown.)

Tips and Reminders
Annotations are not measurements and do not affect takeoff quantities or DPC production calculations
Annotation is stored on the Annotation Layer of a project - annotations cannot be assigned to other Layers
You can change the default Font/Color of Annotations in Tools > Options > Fonts/Colors
Dimension Lines
Dimension lines are simply reference lines drawn on a page to indicate distances between objects and to verify the scale on a page.
Click on the Dimension Line tool  then, simply draw the line in the Image Window.
To change the formatting of a Dimension line,
Change to the Select Tool 
Click on the Dimension line - the Text Format toolbar (see next section) displays
Adjust the font and format as needed
Click OFF of the Dimension line
Dimension lines automatically break at any piece of
takeoff they encounter to help you measure the distance between
takeoff objects. To draw a line 'over'
takeoff objects, draw it on a blank region of the
plan (where there is no
takeoff) and then just drag it to the location where it needs to be.
Text
Text annotation creates a note on your image/plan that can call out specific information or alert field staff to special requirements.
Click the Text tool  and draw a text box
Type in the whatever text to display
Click away from the text box and the Text Format bar opens
Make adjustments to the text formatting as needed

Highlighter
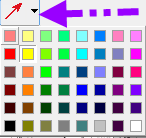
The Highlighter calls special attention to a section of the Image just like using a Highlighter pen. There are 48 colors you can choose for the Highlighter accessible by clicking the drop down arrow.
Click on the Highlighter tool  , then click on the plan and drag diagonally away from the starting point to draw a rectangle - release to finish.
Shapes

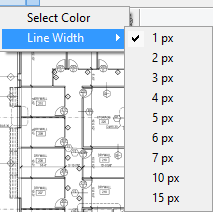
There are seven Shapes available for drawing Annotation, click the small downward facing arrow next to the button to select the color and line width for the shape. Defaults may be set under Tools > Options > Fonts and Colors.
Once a Shape is drawn on the plan, you can adjusts its size and position by using the Selection Tool and then adjusting the annotation as needed.
Shape Annotations remember their last setting. For example, if you change the color and line width in Bid "A", then open Bid "B", when you select the same
Annotation Shape, it is automatically set to the last color/line width you selected.
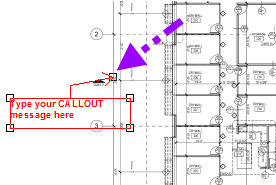
Callouts

Click the Callout button, then click on the plan to set the starting point (where the arrow will point) and drag away from this spot to draw the callout box. Then, type in the message and adjust font as needed.
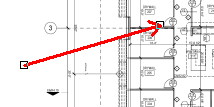
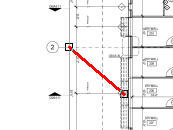
Arrows

Click the Arrow button, then click on the plan to set the starting point, click again to draw the ending point.
Lines

Click the Line button, then click on the plan to set the starting point, click again to draw the ending point.
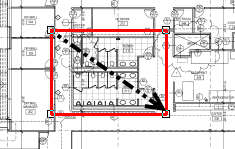
Rectangles

Click the Rectangle button, then click on the plan to set the starting point, hold down the mouse button and drag to the ending point. Release the mouse button to complete the Annotation.
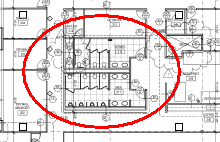
Ovals

Click the Oval button, then click on the plan to set the starting point, hold down the mouse button and drag to the ending point. Release the mouse button to complete the Annotation.
Freehand (Polygons)

Click the Freehand (Polygon) button, then click on the plan to set the starting point, click on each corner (vertice) to set additional points and then double-click to complete the Annotation.
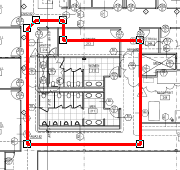
Just like Area takeoff, you cannot draw an 'uncloseable' polygon or cross lines. If On-Screen Takeoff generates a 'thunk' sound, that indicates that the segment cannot be drawn or the polygon cannot be closed. Press ESC on your keyboard to back-up to a point where you have not crossed lines or drawn a polygon shape that cannot be 'closed'.
Clouds

Click the Cloud button then click on the plan to set the starting point, click on each corner (vertice) to set additional points and then double-click to complete the Annotation.
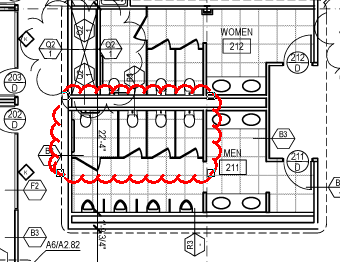
Just like Area takeoff, you cannot draw an 'uncloseable' Cloud or cross lines. If On-Screen Takeoff generates a 'thunk' sound, that indicates that the segment cannot be drawn or the Cloud cannot be closed. Press ESC on your keyboard to back-up to a point where you have not crossed lines or drawn a Cloud shape that cannot be 'closed'.
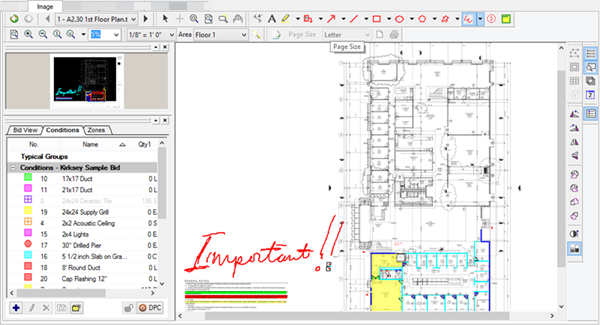
Ink

Click the Ink button then click on the plan to set the starting point, while holding down the mouse (of just pressing a digitizer pen to the screen), draw whatever you want on the screen. Double-click to complete the Annotation.
See Related articles for information on Hot Links and Named Views.
Sometimes the Annotation font is too big and may block other information/takeoff or it may be too small to read at normal zoom. Annotations such as Dimension lines, Area labels, Text Boxes, even the dimension lines On-Screen Takeoff automatically inserts between related takeoff objects, can be formatted so the font is legible yet does not block the image.
To Format Annotation Objects
Existing Bids
- Click on the Select tool
- Click on the Annotation object to adjust, in the example, an Area Label
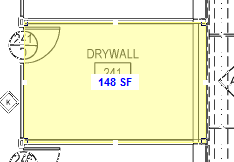
The Text Format toolbar displays (it may be docked or undocked, depending on its state the last time it was shown)
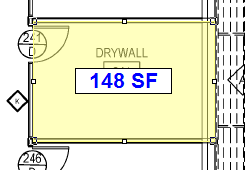
- Select the Font Style and Size
- Click away from the object to apply the changes
The selected annotation adjusts to the new Font Size:
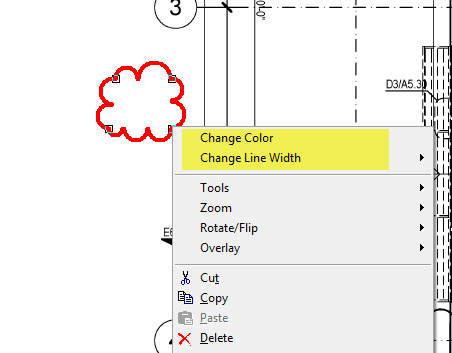
You can adjust shape annotation by right-clicking it and changing the Color or Line Width...
Future Bids
To adjust Annotation font formatting for all future (new) Bids:
- Click Tools > Options > Fonts/Colors
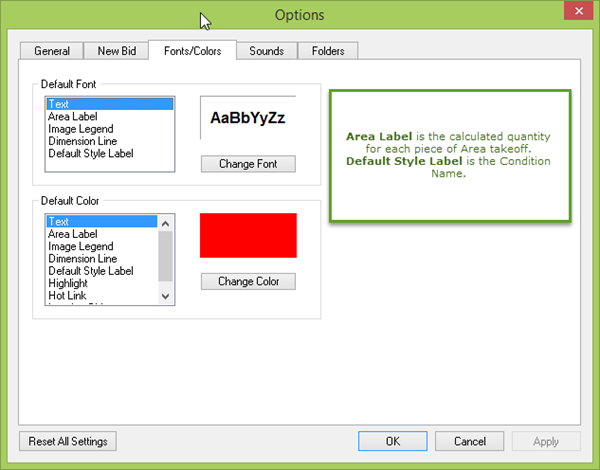
- Select the Annotation type in either the Default Font or Default Color box
- Click the Change Font or Change Color button
- Adjust the formatting as needed
- Click the OK
New Bids are created using these default settings - adjusting default settings does not affect existing Bids.
Shape Annotations (arrows, circles, clouds, etc.) retain their last format settings from use to use. For example, if you set a Shape
annotation to Purple with a Line Depth of 6, that setting is retained until you change it again.


 Viewing Comments