| |
| |
Digital Production Control - 05.02.03 Percenting Step 3 - Select Which Objects to Percent - DPC
| Views: 368 Last Updated: 08/09/2024 12:15 pm |
0 Rating/ Voters
|
     |
| Be sure to rate this article 5 Stars if you find it helpful! |
Once you select an LCC from the list, takeoff objects for that selected Labor Cost Code become activated. This doesn't mean they are selected, just that they can be selected.
On the plan image, use the Zoom tools to zoom in or out so to see the objects to percent.
Click on an activated object to select it, click again to deselect a selected object. Only objects that are selected (highlighted in Yellow) are affected by setting percents.
Select all the objects associated with the selected Labor Cost Code(s) to which a percent complete is to be applied, but only select multiple objects if the same percent is being applied to all.
The rest of this articles detail various shortcuts for selecting objects to percent that will make your job much easier. These methods for selecting objects are optimized for using a Stylus or a Mouse.

At the bottom of the window, the Status Bar displays the (B)udgeted and (R)emaining man-hours for the selected objects. This is very useful in setting daily production goals for crew members (line-out). See Related articles for more information on 'lining out' daily work to keep your budget 'on track'. Selecting Objects - Roping
Use Roping to select all objects inside or touching a box you draw on the screen. By default, anything Touching the box (whether inside the box or just touching the perimeter) is selected. You can change this to "Inclusive" (objects must be completely inside the box) by clicking Tools > Options and changing the Roping Method.
To rope objects:
On the plan image, use the Zoom tools to zoom in or out
Click the Select Tool  on the toolbar on the toolbar
Draw a box around the objects to select them (the actual selection box is a thin black line, we've colored it in red and show click-points with a blue indicator to make it easier to see what is going on)

Once selected, objects turn yellow and display a Percent Complete box.
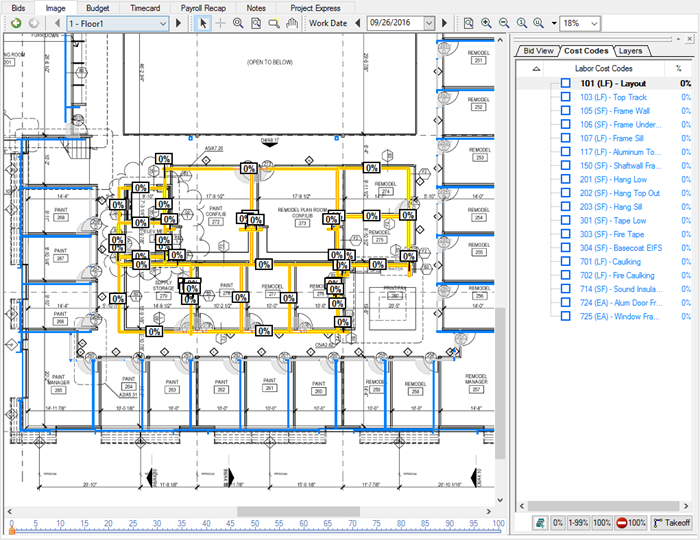
Notice that all the objects contained within the box drawn as well as those simply touching the box are selected. This is because we set Tools > Options Roping Method to 'touching'.
Selecting Objects - Clicking
Use the Selection Tool to select objects that are not easily roped.
On the plan image, use the zoom tools to zoom in or out
Click the Select Tool  on the toolbar on the toolbar
Click on an object to select it - click on subsequent takeoff objects to select them as well
To deselect an object, click on it again
Once selected, the objects turn yellow and display a Percent Complete box.

Selecting Objects - Stripe
Draw a 'stripe' through objects to select them. This is the same as Roping a box, but selects objects over a narrower band.
On the plan image, use the zoom tools to zoom in or out
Click the Select Tool  on the toolbar on the toolbar
Draw a line/stripe through the object(s) to select them
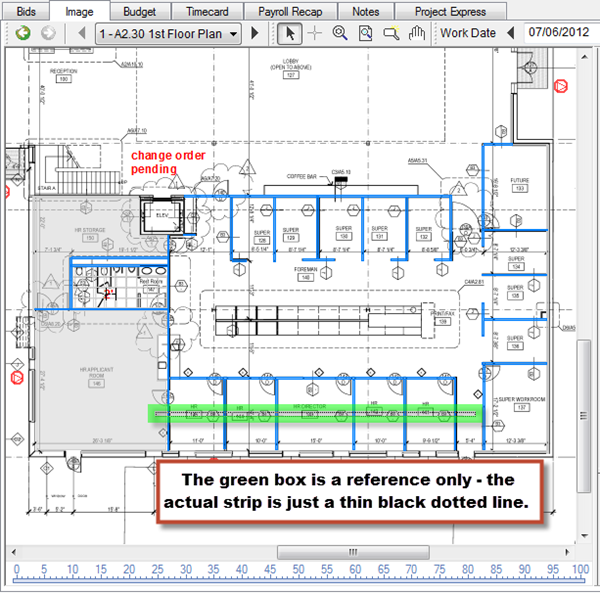
When the mouse button (or stylus) is released, all objects the stripe is drawn through are selected (turn yellow and display a Percent Complete Box).
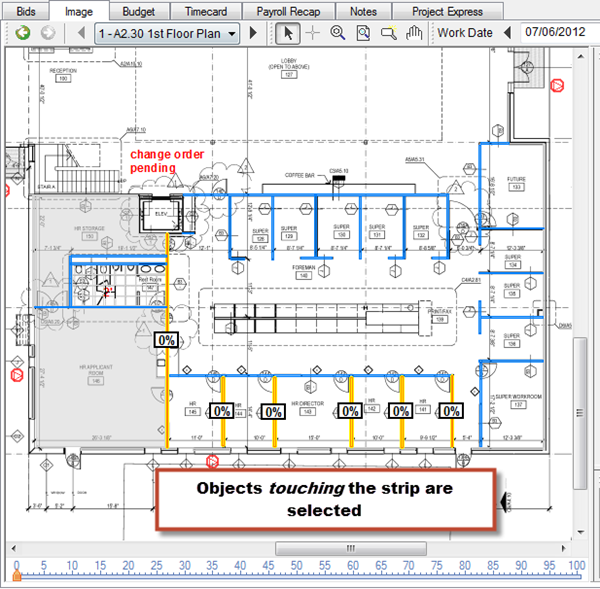
This only works if the Roping method is set to "Touching".
Selecting Objects using the Control Buttons
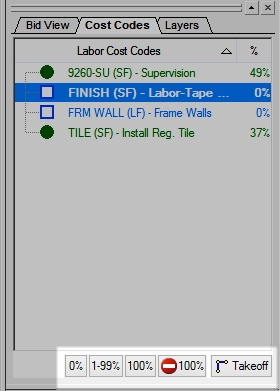
There are four control buttons at the bottom of the Labor Cost Code window that provide quick selection of takeoff objects (the Multi-Code and Takeoff buttons are not object selection buttons).
|
Button |
What it does/How it is used... |
 |
Selects any takeoff object(s) for the selected LCC on the current page that is set to zero (0) percent complete (objects not percented or those percented, then returned to "0") |
 |
Selects any takeoff object(s) for the selected LCC on the current page that is greater than zero (0) percent complete but less than 100 percent complete. Basically selects everything that already has a percent set but that is not completed. |
 |
Selects any takeoff object(s) for the selected LCC on the current page that is complete (100%). |
 |
Hides all takeoff objects associated with the highlighted Labor Cost Code that have a percent complete equal to 100%. (Hides COMPLETED objects) This is a toggle button, clicking once Hides 100% objects, clicking again Unhides them. |
When using the 0, 1-99 and 100% buttons, the Image zooms in/out to display the region of the image that contains all selected objects.
Unselecting Objects
Selecting and unselecting objects works as a toggle, the first time an object is clicked, it is Selected and shows a yellow highlight. Clicking the same object again unselects the object and the highlight is removed.
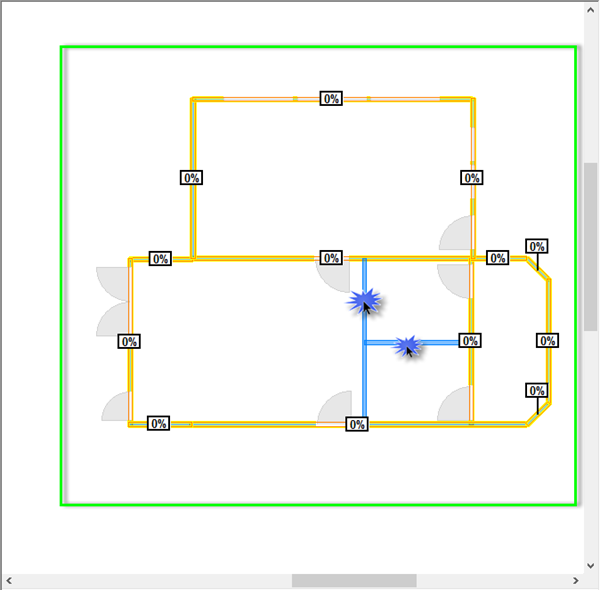
Sometimes, it is easier to select all objects via roping and then unselect one or two objects that do not need to be percented, such as in the example below.
Draw a selection box around all of the objects (shown in light green)
Then click on the objects (blue) that should not be selected
|
|
|
