The menus (File, Edit, View, etc.) along the very top of the application provide access to many tools and options you use while working your job. (The Digitizer menu is discussed in the On-Screen Takeoff User Guide only - digitizers are not used when working on a bid in DPC Mode.)
Many menu commands appear in the toolbars as well. If a menu selection has an Icon (Picture) next to it - there is a toolbar button available for that command. There are shortcuts for many actions! These are helpful in saving time and increasing efficiency. See the previous and Related Article for more information.

The name of the current Bid number and name, the database name, and the application name always show in the Title Bar.
In this article (and most in this User Guide), features relevant to using Digital Production Control functions are detailed - other functions are discussed in the On-Screen Takeoff User Guide.
Foremen - you need to understand the File and Bid menus, pretty much everything else you need is on one of the toolbars.
File Menu
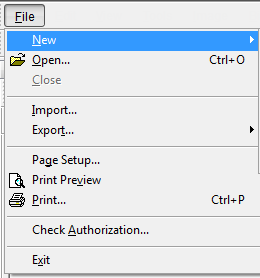
The File menu provides the ability to open and/or create Bids, Databases, Alternates, and Change Orders. It also provides access to printer functions and access to the Check Authorization dialog box (licensing).
|
Selection |
What it does/How it is used... |
|
New |
There are several options available. Most likely, the Project Manager would be using these - to create a Change Order, for example. See the On-Screen Takeoff and Quick Bid User Guides for assistance. |
|
Open |
Launches the Open Database dialog box to open/close/manage available databases |
|
Close |
Closes the selected Database |
|
Import |
Imports a Bid Package (OSP), DPC Bid Package (DPM), or DPC Changes (DPC) file |
|
Export > To Bid Package |
Exports the current Bid to a Bid package (.osp file) - only available to Project Managers |
|
Page Setup |
Accesses printer options for layout, orientation, etc. |
|
Print Preview |
Preview the print job |
|
Print |
Send current preview or tab to a printer |
|
Check Authorization |
Opens the Authorization dialog box |
|
Exit |
Exits the program (you can just click the red X in the upper-right corner) |
The Edit Menu
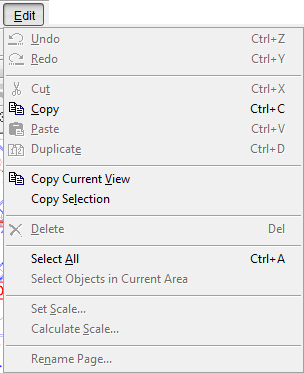
The Edit menu provides access to basic editing commands (such as copying and pasting, selecting objects, and setting scale).
|
Selection |
What it does/How it is used... |
|
Copy Current View |
Copies current view as a bitmap for pasting in an e-mail or a Word document. |
|
Copy Selection |
Copies selection made with roping as a bitmap for pasting in a different application. Select this option, then draw a box around what is to be copied and then right-click over the selection and select Copy. Then, paste the copied information into an e-mail or Word document. |
|
Delete |
Deletes the selected item. It is easier to use the Delete button  on the Main toolbar. on the Main toolbar. |
|
Select All |
Selects all objects for the selected Labor Cost Code (LCC) on the current page. (<Ctrl> + <A>) |
|
Select Objects in Current Area |
Selects all objects on the current page associated with the active Labor Cost Code. (Area assignment is irrelevant on the Image Tab in DPC Mode.) |
The View Menu
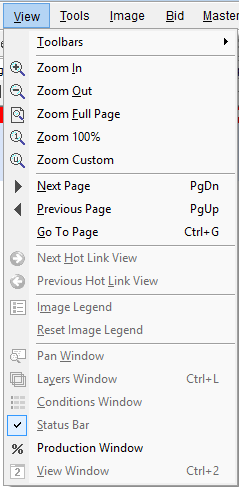
The View menu provides options for changing the page, zoom level, and customizing the view of certain windows and toolbars. Click View > Toolbars to see a list of all the available toolbars. Toggle the check mark for a toolbar to show/hide it in the Main window.
Some tools and/or toolbars are only available with specific licenses/features (tko, dpc-foreman, dpc-pro). Also, in DPC Mode, the Main and Tools toolbars are locked 'on'.
|
Selection |
What it does/How it is used... |
|
Toolbars |
Show/Hide the various toolbars available in Digital Production Control |
|
Zoom In |
Zooms in on the current image view in small increments |
|
Zoom Out |
Zooms out of the current image view in small increments |
|
Zoom Full Page |
Zooms to a full page view of the current page |
|
Zoom 100% |
Zooms into a scaled view of the current Image View |
|
Zoom Custom |
Zooms to a customized percentage set by the user |
|
Next Page |
Opens the next page in the project |
|
Previous Page |
Opens the previous page in the project |
|
Go To Page |
Changes to a specific page in the project |
|
Forward Button(Next Hot Link View) |
Advances to the next available page in the history of viewed pages - only active if the Back button has been used - works like the Forward button in an Internet browser |
|
Back Button(Previous Hot Link View) |
Navigates to the last viewed page - like the Back button in an Internet browser |
|
Production Window |
Toggles the Production Window On/Off |
<
The Tools Menu
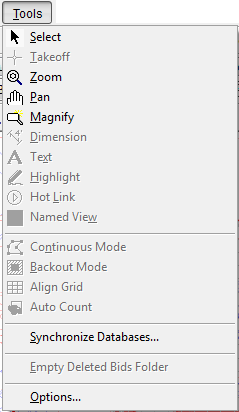
The Tools menu provides access to various tools used on the Image Tab such as the Takeoff, Annotation, and Zooming tools. The Tools menu also includes important database management tools and dialogs. Many tools are unavailable in DPC mode.
There are two active sections to the Tools Menu:
- Main Tools
- Database Management and Options
Main Tools
|
Selection |
What it does/How it is used... |
|
Select |
Changes the mouse pointer to Select Mode - use this tool to select Conditions, takeoff objects and to select commands/buttons. |
|
Zoom |
Changes the mouse pointer to Zoom Mode - left-click to Zoom In and right-click to Zoom Out, draw a box around an area of the image to zoom in on it. |
|
Pan |
Changes the mouse pointer to Pan Mode - use this tool to pan (move) the current view around the page. |
|
Magnify |
Changes the mouse pointer to Magnify Mode - use this tool to magnify a region of plan without zooming in. |
Database Management - Program Options
|
Selection |
What it does/How it is used... |
|
Synchronize Databases... |
Allows user to synchronize all or some of a selected source database to a target database. |
|
Empty Deleted Bids Folder... |
Open the Options dialog for modifying defaults and preferences for the application. |
The Image Menu
The Image menu provides access to various Image manipulation tools. Images may be darkened, rotated, inverted, and enhanced. Some options are unavailable in DPC Mode and are managed by the Project Manager/Estimator. Ajusting image(s) in DPC only affects the way the program displays the image(s), it does not actually edit the image.
Project Manager Note DPC Foreman do not have access to Overlays. If the
Overlay image is from the '
current set' you need to make it the base
image for that page before sending the
project to the field.
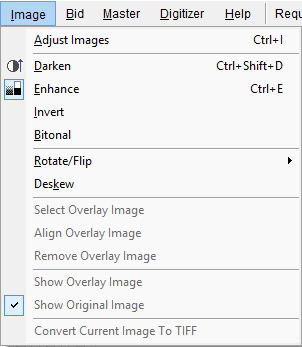
|
Selection |
What it does/How it is used... |
|
Adjust Images |
Adjust the image properties on a single page or all pages - allows darkening, enhancing, etc |
|
Darken |
Adjusts the darkness of the image. |
|
Enhance |
Auto adjusts (enhances) the lines in the image that may have missing dots or inconsistent patterns. |
|
Invert |
Reverses (inverts) the black on white properties for the image. |
|
Bitonal |
Turns a color image into a black and white (bitonal) image. |
|
Rotate/Flip |
Contains commands for rotating and flipping both takeoff objects and images that are displayed on the Image Tab. |
|
Deskew |
Allows manual alignment of the plans to a drawn horizontal reference. |
The Master Menu
The Master menu provides access to all the tables of the current database. Master database tables hold information used in all bids in the database. The selections in the Master menu are also referred to as Master menu tables. These tables store information that is used to create and edit bids.
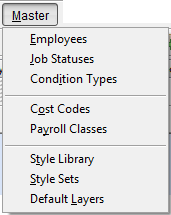
Master Tables are covered in the next Chapter.
Foreman, you need only be familiar with
Employees because you will likely add employees (work crew) to the
project. You can access and edit Work Crew (Employees) from the Bid
Cover Sheet and on the Timecard Tab.
The Bid Menu
The Bid menu provides access to several bid configuration commands and bid level functions.
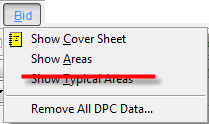
|
Selection |
What it does/How it is used... |
|
Show Cover Sheet |
Displays the Cover Sheet for the active job |
|
Show Areas |
Displays all Bid Areas used in the active job |
|
Show Typical Areas |
Not used in DPC projects. |
|
Remove All DPC Data |
Only available to the Project Manager. Removes all Digital Production Control percenting and timecard information for the current job, then the Bid is returned to "Takeoff" mode.
Removing DPC data is immediate and permanent - you will lose all previously entered percenting and timekeeping. |
The Training Menu
The Training menu provides access to online resources such as the Training Videos, this User Guide, and a form where you can submit a "How Do I...?" request to our Training Department.

Each option opens in your default web browser and requires an active internet connection.
The Help Menu
The Help menu provides access to this online User Guide (F1/Help), links to submit requests for Support and make Suggestions about the software, and a link to the DPC Frequently Asked Questions. You can also see version of the product (About Digital Production Control).
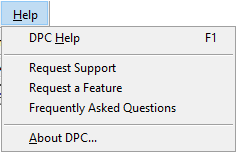
Help, Support, Feature, and FAQs all open in your default browser and requires an active internet connection.
