When using Repeating Pages, the takeoff only exists on the Typical Page therefore only takeoff on the Typical Page can be assigned to an Area (the usual way, covered in Related articles). To assign takeoff on Repeating Page to different Bid Areas, use the Virtual Page Area Assignments function. Virtual Page Area Assignments tell OST that takeoff allocated to Area "X" on the Typical Page belongs in Area "B" on Page B, in Area "C" on Page C, and so on.
In our example (the previous articles), our building consists of a single 'level' of Bid Areas, Floors 1 - 8. In this case, we don't need to assign takeoff to a Bid Area on the Typical Page itself - it's all assigned to "Unassigned" and we can map that "Unassigned" to Floors 2, 3, 4, and 5 using the Virtual Page Area Assignment.
However, if the takeoff on the Typical Page is allocated to multiple Bid Areas (for example, rooms or wings), you should draw all the takeoff, allocate it to the correct Bid Area, and then come back to the Virtual Page Area Assignment dialog so you can map multiple Bid Areas on the Typical Page to their corresponding Bid Areas on the Repeating/Virtual Pages.
To assign "virtual" takeoff that only resides on a Typical Page in an Alternate or Change Order, a single piece of takeoff must be placed on the Typical Page in the Base Bid - this can be a 'dummie' Count object that only activates the Virtual Page Area Assignment function for the Alternate/Change Order.
When you use Repeating Pages, you complete the takeoff on the Typical (or master) page first. Once the takeoff is complete, assign the takeoff on that Typical Page to the appropriate Bid Area(s). Then, return to the Cover Sheet and setup Typical Pages and Virtual Area Assignments. You can always go back and make edits to the takeoff/Bid Area allocation on the Typical Page, but this process makes using Typical/Repeating Pages easier.
Virtual Area Assignments
- Click
 from the Main toolbar - the Cover Sheet dialog opens
 - Expand the Repeating Pages under a Typical Page - notice each Repeating Page has an Areas button (not to be confused with the Bid Areas button on the right side of the Cover Sheet dialog box)
- Click this Areas button to open the Virtual Page Area Assignments dialog box
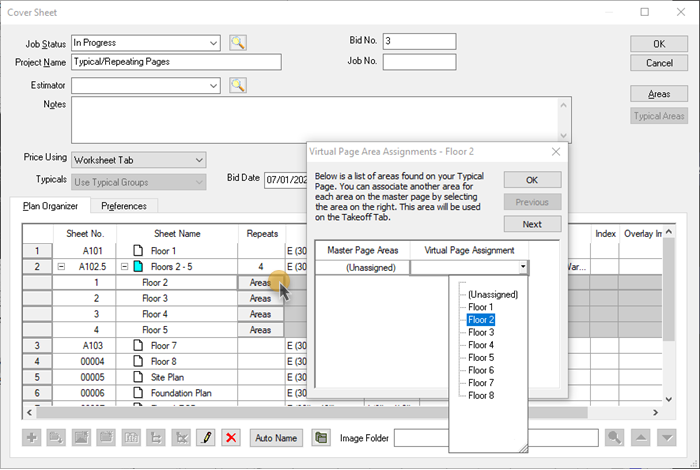
Example of a Typical Page where the takeoff was never assigned to a Bid Area and everything on the Repeating/Virtual Page will be allocated to one Bid Area.
Example of a more complex Virtual Area assignment. There are 10 sub-areas we want to track on the Typical Page.
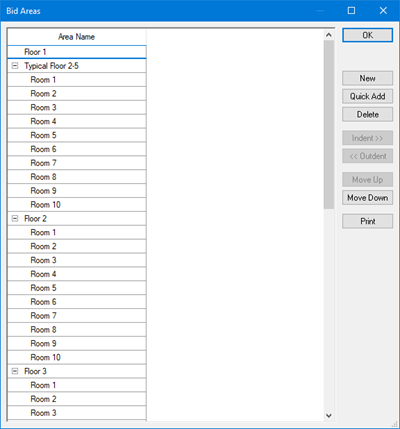
In this case, we're going to map Virtual Areas for each Repeating/Virtual Page.
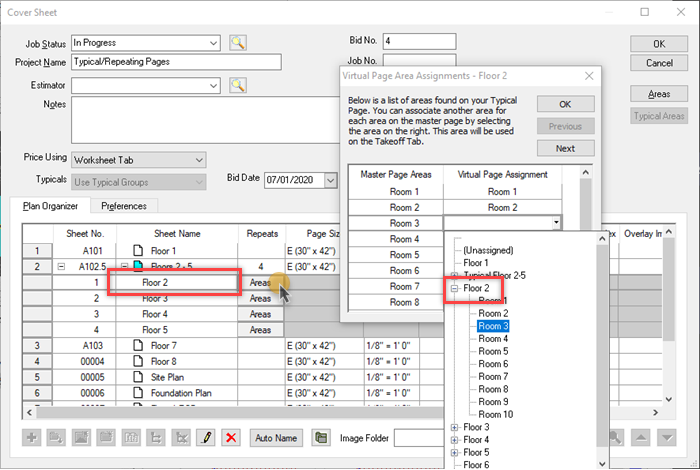
The dialog displays a Master Page Areas column and a Virtual Page Assignment column. "Master Page" refers to the Typical Page itself - where the takeoff was drawn. "Virtual Page" refers to the particular Repeating Page listed at in the title bar of the dialog box (we named it "Virtual Page - Floor 2" in our example).
- The Master Page Areas column lists all Bid Area(s) to which takeoff is assigned on the Typical Page - in this case, we created Bid Area named "Master Page" to which we assigned all takeoff on the Typical Page
- The Virtual Page Assignment column is a drop down list of all the Areas in the Bid (in our example, we created Bid Areas "Floor 2" through "Floor 6" to which we will assign the takeoff on the Virtual Pages)
Areas used on the Typical Page appear in the Master Page Areas column and can be associated with a different Area for each Repeating Page.
In the screen shot above, takeoff that is assigned to the Bid Area "Master Page" on the Typical Page is assigned to the Bid Area "Floor 2" on the Repeating Page named "Floor 2". For subsequent floors, assign takeoff to the appropriate Virtual Page Bid Area.
To re-assign other Repeating Pages, click the  and
and  buttons and repeat the process above.
Successive pages are automatically assigned to the Next Area in the Bid Area list when using the Next button but you must click "Next" through the entire list of Virtual Pages to setup this assignment.
Example: When we assign the takeoff on Virtual Page 2 to Floor 2, when we click Next, Virtual Page 3's Virtual Area Assignment is displayed and "Floor 3" is selected automatically. Moving to Virtual Page 4 automatically selects "Floor 4" and so on.
Takeoff Totals
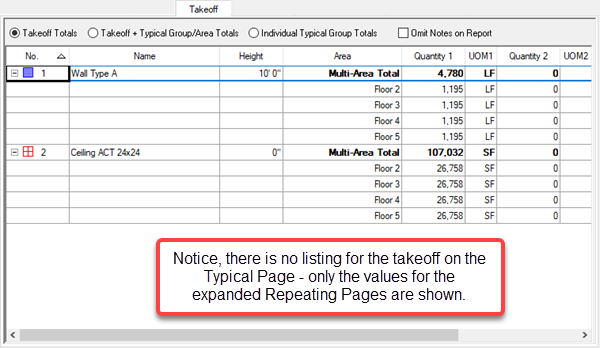
Remember, takeoff only resides on the Typical Page and that "typical" takeoff is not included in the Takeoff Tab totals. The Takeoff Totals shown on the Takeoff Tab represent the Typical Page takeoff extended out to the Repeating Pages.
Takeoff Tab example showing each Repeating Page allocated to Bid Areas appropriately named (Floors 2 - 5):
Takeoff Tab not grouped
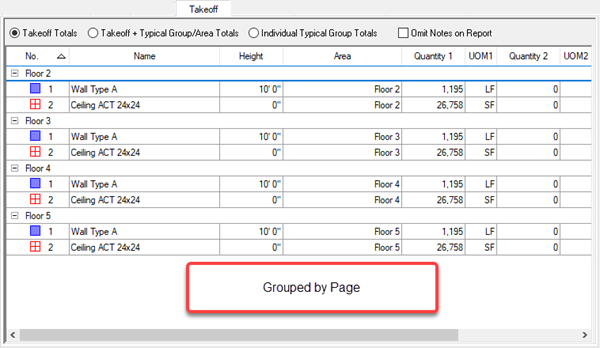
Takeoff Tab grouped by Page (which happens to be the same name as the Bid Area associated with the Page)
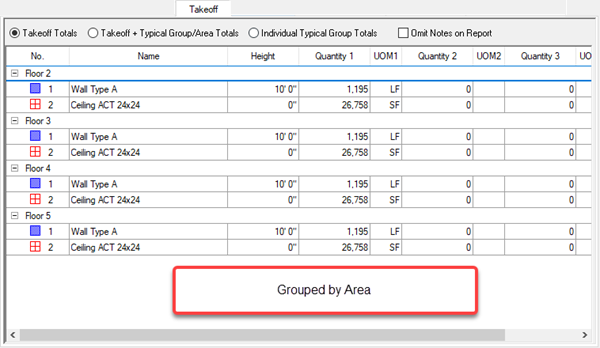
Takeoff Tab grouped by Area (which happens to be the same name as the Page)
See Related articles for more information on how to view summary information on the Takeoff Tab.
