| |
| |
On-Screen Takeoff - 09.04 Rotating and Spinning Takeoff Objects - OST
| Views: 325 Last Updated: 11/12/2024 01:18 pm |
0 Rating/ Voters
|
     |
| Be sure to rate this article 5 Stars if you find it helpful! |
Takeoff can be rotated around a central axis or spun in place individually or as a group. See Related Articles for a refresher on selecting takeoff. Rotate TakeoffA single piece of takeoff or multiple takeoff objects may be rotated around the same central axis. This works well to align a room of takeoff, for example, pasted from another page. - Select the takeoff or a group of takeoff objects
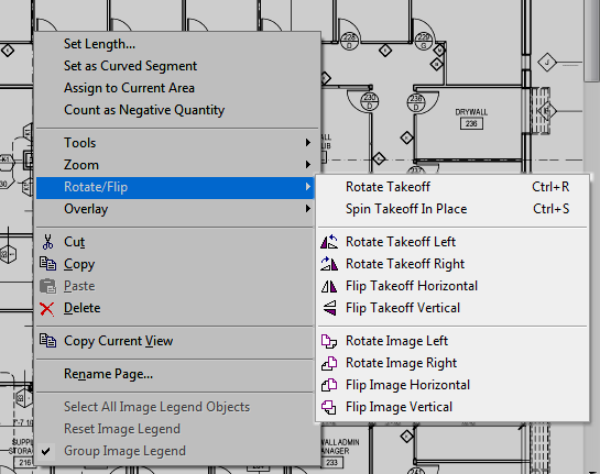
- Right-click on the selected takeoff to view the Context Menu, or click one of the Rotate Takeoff buttons on the Rotate/Flip toolbar (see Related articles)
- Select Rotate/Flip in the menu and a sub-menu appears - the context menu that appears for each selected takeoff object is slightly different depending on what type of takeoff is selected. It can differ slightly between types such as Areas and Linears or if the takeoff is in a Typical Group Frame. No matter the type of takeoff selected, each variation of the menu includes the Rotate/Flip option.
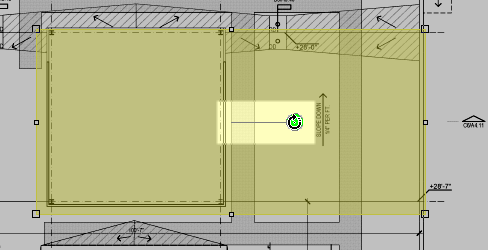
- Click Rotate Takeoff - the Rotate/Flip handle appears (shortcut key <CTRL> + R)

- Click and hold down the left mouse button on the green circle of the handle and drag the mouse around - rotation snaps to the Snap Angle degree set under Tools > Options, by default 15 degrees. Hold down the <Shift> key while moving the mouse to temporarily override the Snap To setting. To change the Snap Angle for all Bids, databases click Tools > Options and adjust the Snap Angle setting. See Related for more information on setting program options and user preferences.
- Release the mouse button - the takeoff is rotated.
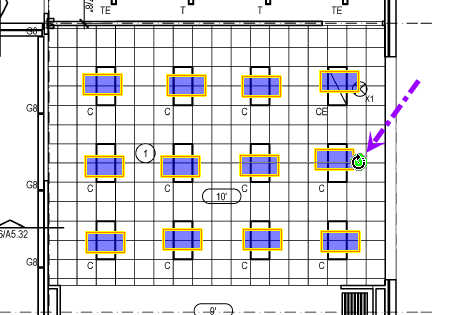
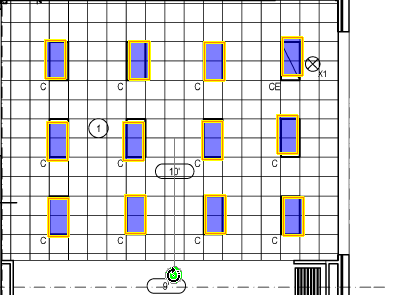
Spin Takeoff In PlaceSpin in place is a little different than rotating. Sometimes, it is necessary to rotate multiple takeoff objects on their individual centers. For example, let us say a Count Condition is setup and the shape is actually directional such as a triangle or rectangle. Takeoff all the objects, then select the objects that are in the wrong orientation/direction and spin them individually until they match the image. - Select the takeoff or a group of takeoff objects
- Right-click on the selected takeoff and the context menu appears

- Select Spin Takeoff in Place in the context menu (or press Ctrl + S), the Rotate handle appears

- Click and hold down the left mouse button on the green circle of the handle and drag the mouse around
Each piece of the takeoff in the group spins in place on its own center axis
- Release the mouse button when the objects are in the correct position
|
|
|
