Zones are drawn very much like a polygon Area takeoff - you mark the corner points that define your Zone and double-click to close the Zone (see Related Articles for a refresher on drawing Area takeoff).
Zones are used to designate takeoff into phases, usually, and are useful because they can split takeoff, unlike Bid Areas where an entire object can be allocated to one and only one Bid Area (with the exception of Counts and Attachments, of course - they are either in a Zone or not).
First, set up your Zones (see the previous article). In this example, we are taking off the 2nd floor of an office building which will be built in phases. We already assigned all the takeoff to appropriate Bid Areas (Floors, Buildings, etc.) but we are going to use Zones to create Phases.
First, we perform our takeoff on the 2nd floor plan and the 2nd floor reflected ceiling plan (assigning to appropriate Bid Areas, as needed - Zones do not take the place of Bid Areas, they allow you to break out your takeoff with even more granularity).
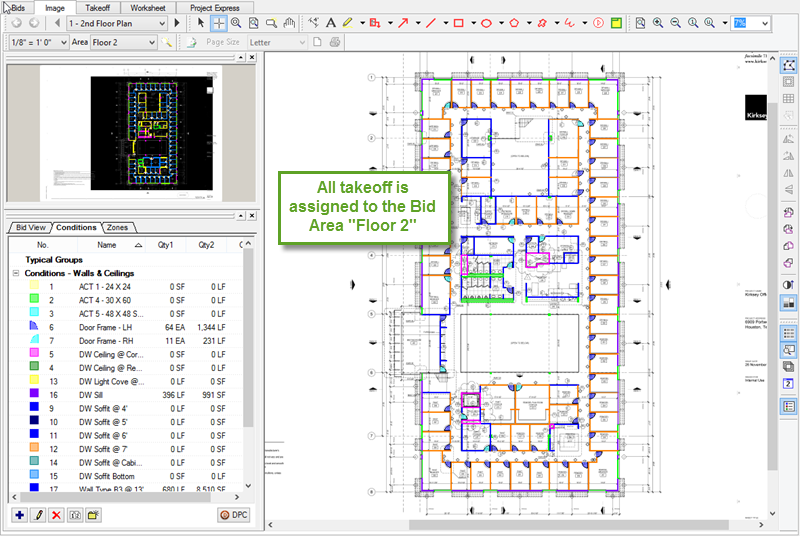
2nd Floor floor plan showing all takeoff assigned to Floor 2 (colored when "Floor 2" is the selected Bid Area)
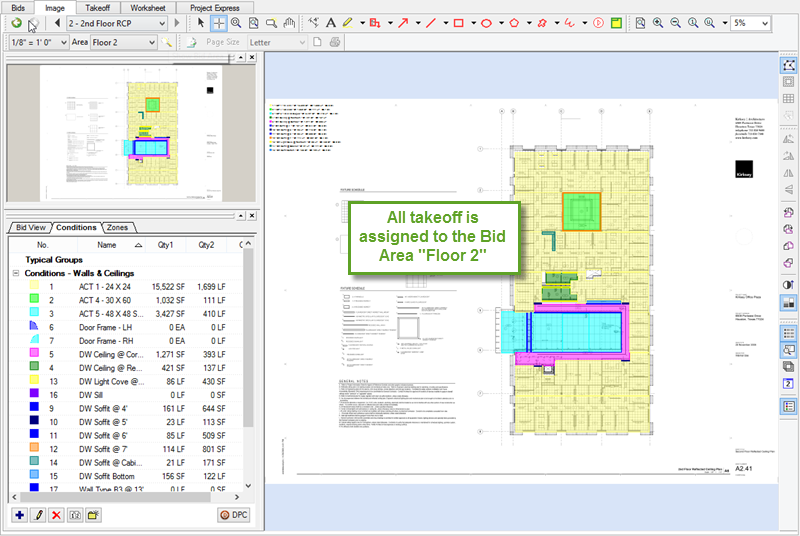
2nd Floor reflected ceiling plan showing all takeoff assigned to Floor 2 (colored when "Floor 2" is the selected Bid Area)
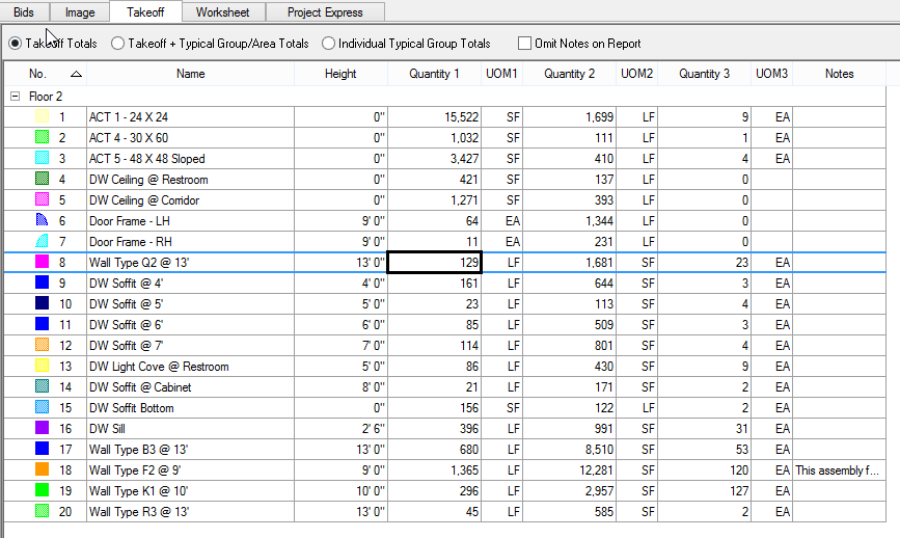
On the Takeoff Tab, we can see the breakdown by Areas (in this case, there is only one Bid Area, Floor 2)...
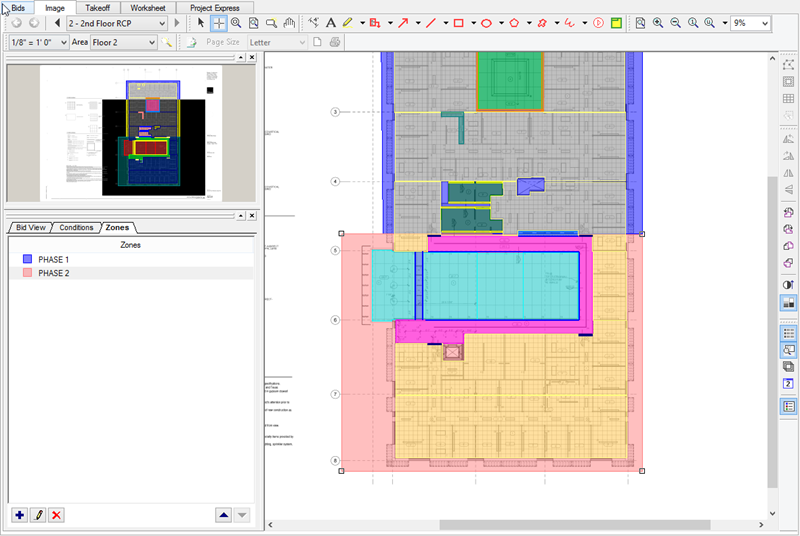
Now, we head back to the Image Tab where we created our two Zones...
Using the first Zone, PHASE 1, we draw a box that encompasses the upper part of the plan, ending just below the rest rooms - this is all the construction that is going to be completed in Phase 1 of the project.

Now, click on PHASE 2 and draw a Zone that encompasses the rest of the takeoff.
Remember, Zones can touch but they cannot intersect. You may have to practice a few times to get your Zones drawn properly but the outcome is worth the effort.
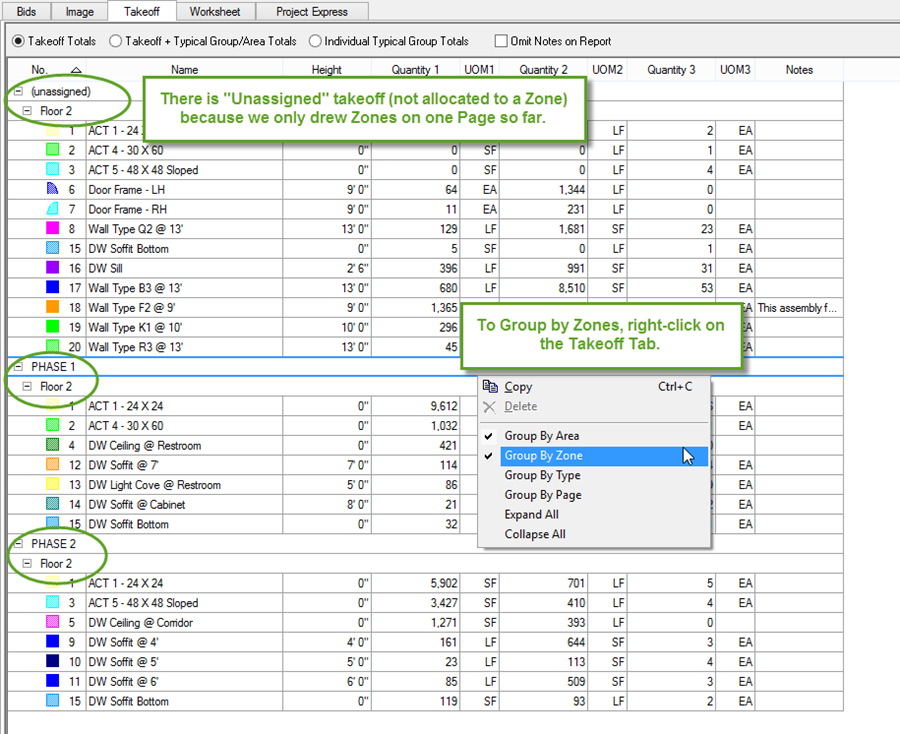
Now, click on the Takeoff Tab to see the fruits of your labor...
In the next article, we show you how to Copy and Paste Zones to make it easy to apply the same Zones to other, similar plans.
Splitting Takeoff Objects Between Zones
One of the key differences between Zones and Bid Areas is that you can split a takeoff object, such as a wall or ceiling, between two zones.
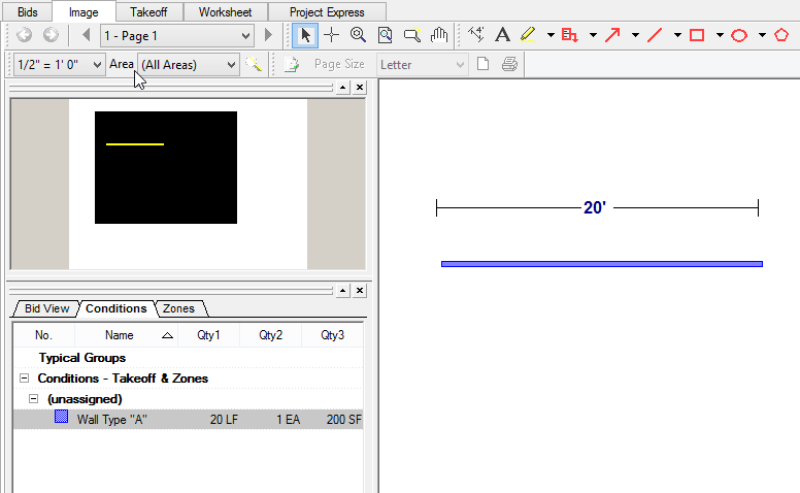
Let us consider a piece of linear takeoff:
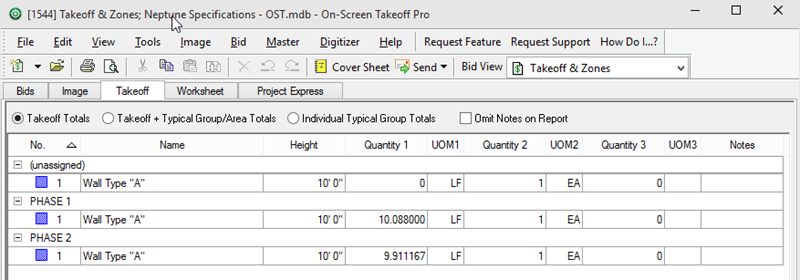
We've drawn 20' of linear wall in the example below. Because it is one object, it can only be assigned to a single Bid Area but we want to 'split' this object between two phases. Instead of redrawing as two segments, we can use a Zone to split the takeoff quantity.
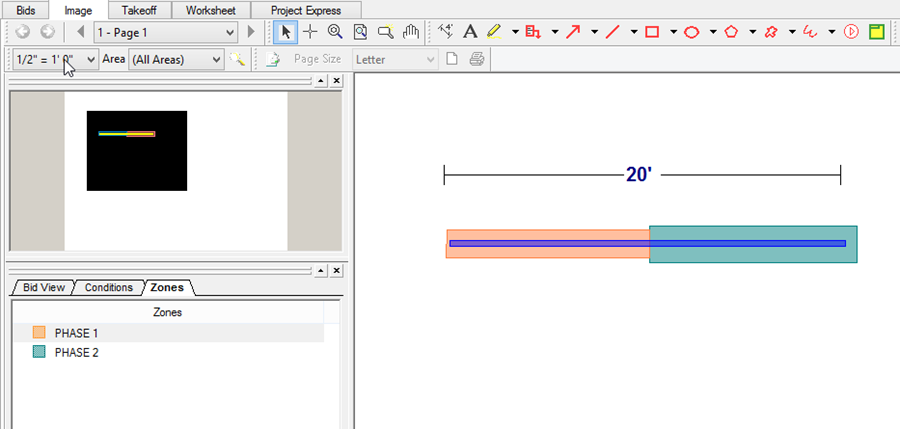
We create two Zones (PHASE 1 and PHASE 2) and then draw a Zone (see above) so that some of the takeoff object is in each Zone.
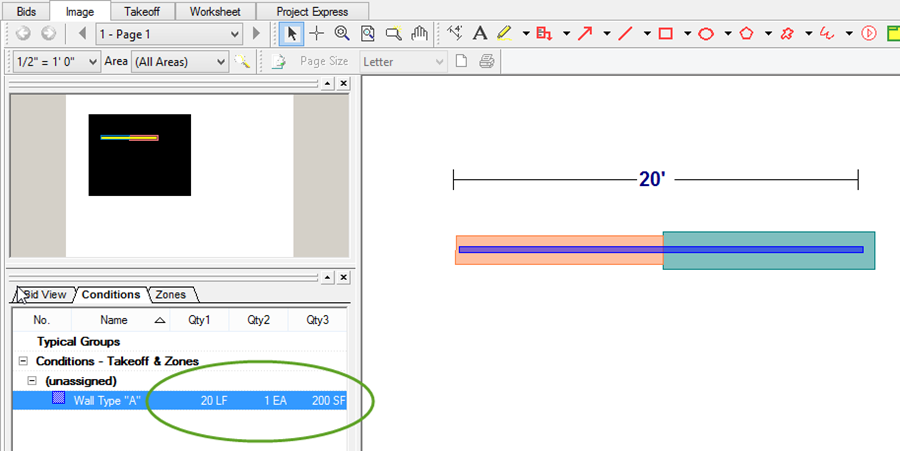
Notice that in the Conditions List, the quantities remain the same:
On the Takeoff Tab however, you can 'split' that single piece of takeoff between two Zones (be sure Group by Zones is selected):
(Because one or two pixels of the object may not be included within a Zone, there is a "0" value for "unassigned" - this is normal.)
Unaccepted Actions (cannot close Zone)
On-Screen Takeoff generates an unpleasant 'gong' sound when an Unaccepted Action is performed, for example, when the program does not accept the closing point when you are drawing a Zone. When you hear this sound, return to the last accepted point by hitting the <Esc> key and try double-clicking the final point again (the <>Esc> key backs-up the cursor position one point at a time).
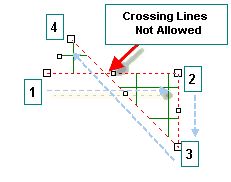
The most common reason for being unable to set a final point to close a Zone is crossing lines as shown in the screen shot below. In this example, point 4 cannot be set because it would cause the line 3-4 to cross line 1-2. It is very easy to cause this situation when completing the final segment - that is why it is advisable to allow On-Screen Takeoff to draw the final segment automatically by double-clicking at the last point.
Known Issue - Zones on the Takeoff Tab
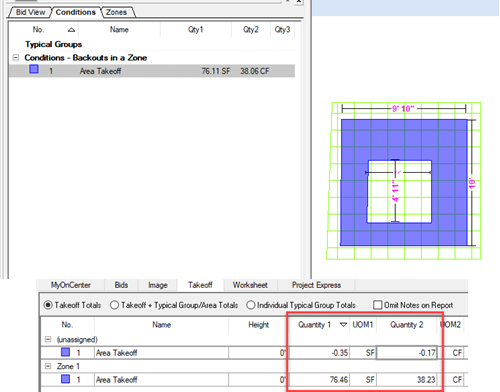
If you draw a Sloped Area takeoff object, then a backout, and then draw a Zone around everything, on the Takeoff Tab, if you group by Zone, you will see two rows of Results - this is a display issue only - the value is correct on the Worksheet Tab and in the data transferred to Quick Bid.


 Creating a Zone