| |
| |
On-Screen Takeoff - 04.02.09 Image Tab Takeoff Mode Toolbar - OST
| Views: 290 Last Updated: 12/19/2024 02:14 pm |
0 Rating/ Voters
|
 |
| Be sure to rate this article 5 Stars if you find it helpful! |
The Takeoff Mode Toolbar provides options for performing or editing takeoff.
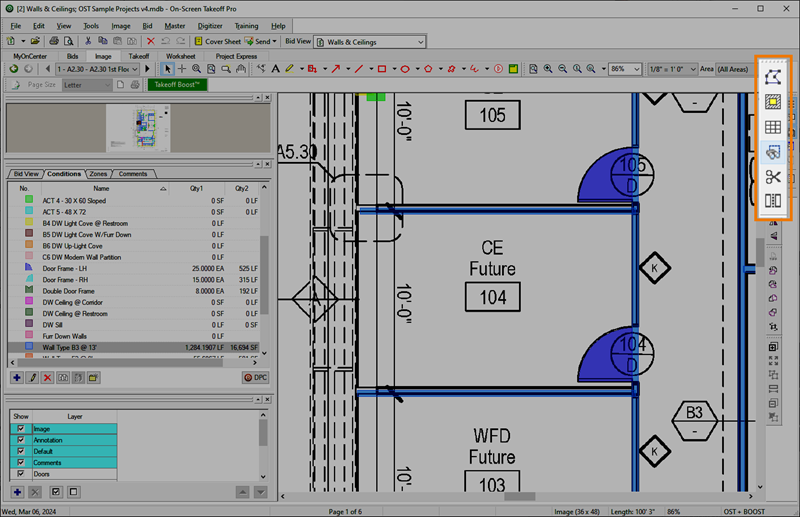
By default, this toolbar is docked on the right-side of the application.
|
Button Icon |
What it does/What it means... |
Function |
 |
Continuous Mode |
When you are drawing linear takeoff, you can use Continuous Mode if you are drawing several, connected segments. |
 |
Backout Mode |
You can use Backout Mode on existing area takeoffs to deduct or 'cut out' some of the area (think about an inset to a ceiling or floor that is a different material). |
 |
Align Grid Mode |
When drawing area takeoff, if the Condition is configured to account for a grid, this tool allows you to align that grid so it matches the plans. Only active when you select a single gridded area takeoff. |
 |
Auto Count |
Activates the Auto Count feature which allows a user to select part of a drawing and run a search of the plan for matching patterns and then places a Count takeoff object there (only active when you select a Count Condition). |
 |
Split (Linear) Segment Takeoff |
When you have one linear takeoff object selected, click this button and then click on the object where you want to "break" it in two. |
 |
Split Area Object |
When you have one area takeoff object selected, click this button and then draw a line through the object where you want it split. You can drag it over a complex shape to create multiple area objects, however you cannot split a takeoff object that includes a backout (you must delete all backouts first, then split the object, then you can redraw the backouts). |
 |
Simplify Area Object |
When you have one area takeoff object selected, click this button and On-Screen Takeoff will remove unnecessary vertices from the perimeter segments (leaving you with longer, straighter segments - easier to adjust). |
The shaded buttons are only available to users under a current Maintenance Subscription, see Why Renew Your On-Screen Takeoff, Quick Bid, and Digital Production Control Maintenance Subscription? - DPC OST QB for more information.
See Related Articles for all the details on performing (drawing) takeoff.
|
|
|

 Boost Toolbar