You can modify Proposal templates to fit your particular needs. You can add and delete fields, copy and paste fields from one location to another, change the layout or look of the template, change the name of a template, and/or modify the template in any way necessary. We cover adding a company logo to your templates in the next article.
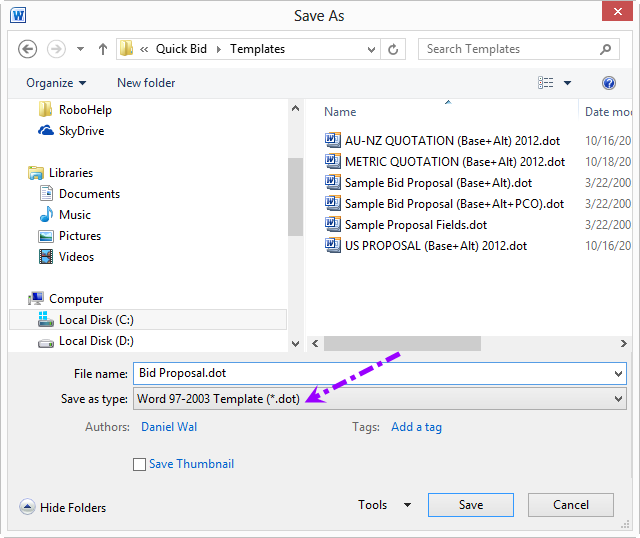
For Quick Bid to find customized templates, they must be saved in the Template sub-directory of the Database folder. In addition, when editing a template, make sure the field names are spelled correctly - if a field name is misspelled, Quick Bid will not recognize the field and it will not populate with Bid information.
You must have a fully-licensed and locally-installed version of Microsoft Word installed to use or modify Proposals (Student, Home, or any trial editions will not work with Quick Bid Proposals). Microsoft Word is neither included with Quick Bid nor supported by On Center Software.
By Default, the Templates folder is located at C:\OCS Documents\Quick Bid\Templates. This can be changed by clicking Tools > Options > Folders.
In addition to the templates stored in this folder, there is a file named "Available Proposal-Quotation Fields.dot" - this contains all of the fields available for modifying or creating new proposal templates.
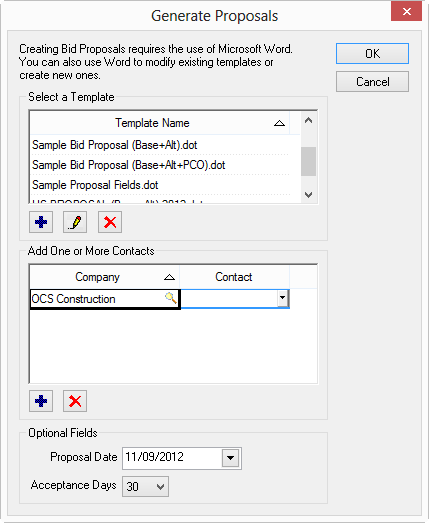
Template Control Menu
There are three template control buttons that provide quick access to adding, editing, and deleting proposal templates:

- Add
 - opens Word and allows an estimator to create a new proposal from scratch - the list of available fields is located in the template "Sample Proposal Fields"
 - Edit
 - opens the selected template in Word for editing
 - Delete
 - deletes the selected template - this deletes the actual *.dot file and cannot be undone - not recommended
Edit a Proposal Template
Click the Proposals button or click Bid > Generate Proposals - the Generate Proposals dialog displays

Double-click on a template in the Select a Template field - Microsoft Word opens the template file
Modify the template as needed - a list of all proposal fields is located at the bottom of this article
Once all changes to the template are done, click File > Save As - the Save As dialog displays (be sure to use "Save As" so that the original template is not altered)
Enter a name for the customized template and set the File Type to *.dot or *.dotx (Word Template)

The new template displays along with the original templates in the Quick Bid Proposals list.
If new or edited Proposals are not being shown in the Proposals list in Quick Bid, verify that all template files are stored in the correct folder (by default "C:\OCS Documents\Quick Bid\Templates") and that they are saved as a Document Template (.dot or .dotx file format, not *.doc or *.docx files).
After editing a Proposal template, if information is missing when a Proposal is generated, verify that all the merge fields are still intact and they are spelled correctly. A good way to check this is to refer to the edited templates and then the original Sample templates. If there are fields in the original that are not contained in the edited version, they were deleted or moved and need to be restored.
When making large-scale changes and customizations to proposal templates, it is best if someone with advanced Microsoft Word skills makes these changes.
We recommend that you backup all templates before making any changes in case something goes wrong. Never overwrite the
proposal files installed with Quick Bid.
