The Reports you generate in Quick Bid can be printed or exported - depending on your needs and what your customer requires.
If you are working in an
Alternate or
Change Order, when you run a Report, it is for that child bid. To run a report on the Base Bid with or without accepted child bids, select the Base Bid from the
Bid Navigator, and then open the Reports dialog box.
Printing Reports
To print a report(s) click the Reports icon or click Bid > Print Reports - the Bid Reports dialog displays.
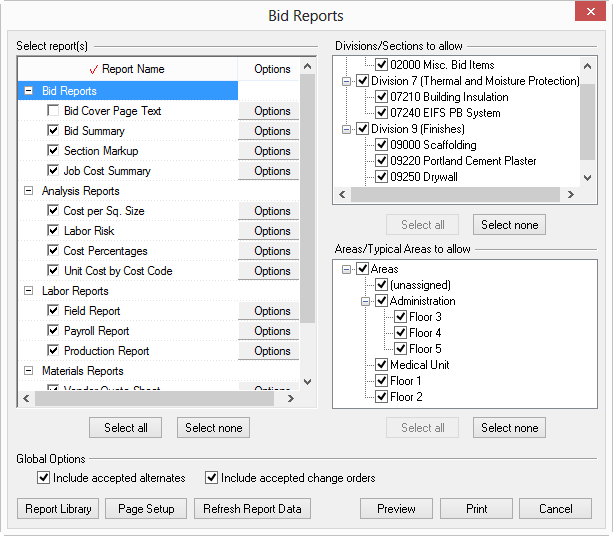
Set Report Options (see Related articles) and then click Preview to view the report on your screen before printing. If the report is displayed satisfactorily, send it the printer by clicking the Print button  .
.
On Center recommends you always preview>reports before printing them - why waste time, toner, and paper on a report if you forgot to set an option. Make sure the report looks the way you expect before sending it to your printer. Better yet, save the paper and toner and export the Report to a PDF and then e-mail to whoever needs it.
Exporting Reports
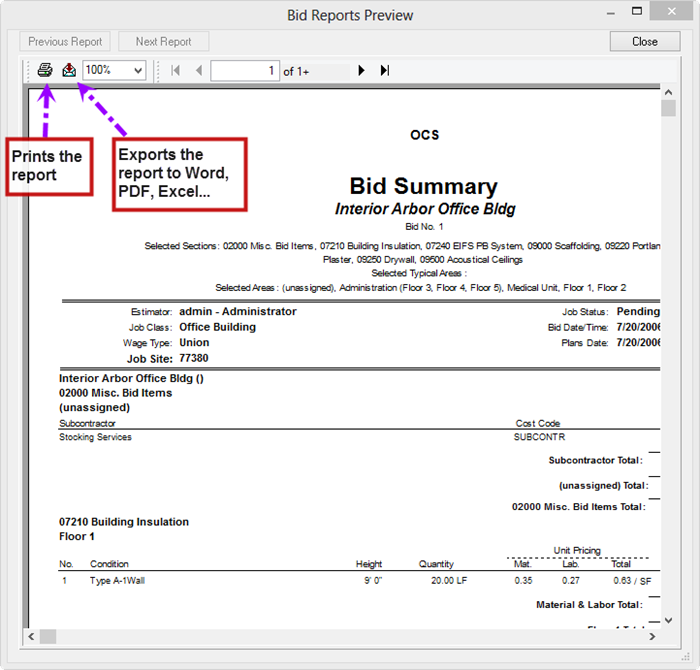
Quick Bid reports can be exported to other programs such as Microsoft Word, Microsoft Excel, Adobe Acrobat, etc., from the Bid Reports Preview dialog. Follow the steps above to open the Bid Reports, then Preview your report.
On Center tests exporting reports to Adobe, Excel, and Word only - other exports may work but they are not tested.
Click the Export Report button  in the upper left corner of the screen - the Export dialog opens

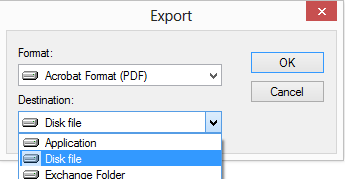
Select the Format to which the report is to be exported by clicking the drop-down arrow for the Format list - the most common exports are to Acrobat (for e-mailing to General Contractor or Client), Excel, and Word.
Select the Destination where to save the export file by clicking the drop-down arrow for the Destination list - the most common are Application and Disk File
- Application exports the information directly to the corresponding application. Whatever that application is (Adobe Reader, Excel, Word, etc. must be installed on your computer - Quick Bid does not include this software.
- Disk file saves the exported information to a file that is usable in the format selected (like a PDF or XLS file). Quick Bid prompts for the location where the file is to be saved - be sure to keep track of where this file is being saved so it can be located after export. By default, exports are saved in your Windows Temp directory, the recommended location is your Windows desktop.
Click OK
In the Export Options dialog, choose which pages of the report to export and any other options then click OK - (the Export Options dialog is different for each of the different Formats available).
If you've selected Application, the appropriate application opens with the report data loaded (be sure the appropriate application is installed on the computer)
If you've selected Disk file, the Select export file dialog opens - browse to the location where to save the export and click Save - the export is now saved in this location in the chosen file format (recommend the Desktop)


 Printing and Exporting the Conditions Tab and Condition Details Reports