It is important that when you are creating your Bid Areas, if you delete an Area or Sub-area, you must close the Bid Areas dialog box before adding additional Bid Areas. Changes only get stored to the
database upon closing the dialog box and adding/deleting/adding can cause problems to how your data is stored and may cause some reports to calculate incorrectly.
Adding Bid Areas
If you are using Quick Bid and On-Screen
Takeoff interactively, you must create, edit, delete Bid Areas and
Typical Areas in On-Screen
Takeoff. Please see the On-Screen
Takeoff User Guide for details on creating Bid Areas and
Typical Areas.
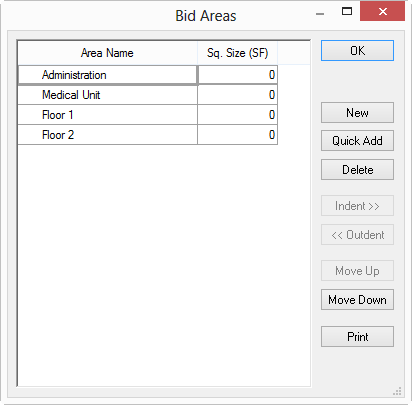
To open the Bid Areas dialog box,
- Click Bid > Show Areas, or
- Click the Areas button on the Cover Sheet, or
- Click the Lookup button
 next to the "Area" field in a Condition Detail

Click New and enter the name of the area, or...
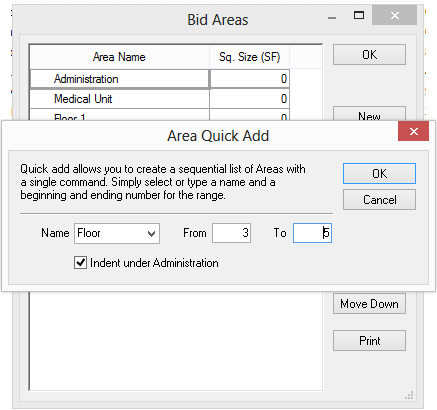
Click Quick Add to add several like Areas at once (for example, to add floors 3 - 5 to an existing Bid) then select a name from the Quick Add dialog drop down list, or type in a custom Area name

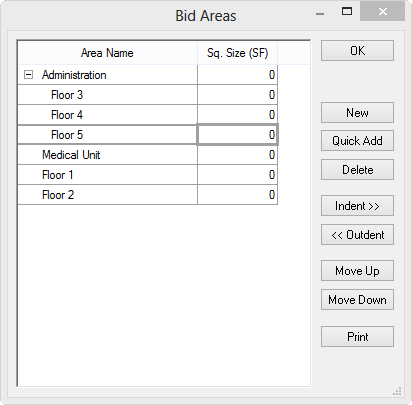
To add multiple subsets to an existing Area (as shown below), select the parent Area in the list then click Quick Add (notice that "Indent under Administration" is checked - if the check is removed, the new Floors are added at the same 'level' as the Administration, if left checked, the new Areas are indented under the currently selected Area ("Administration"), but you can move them anywhere in the grid)

Click OK - the Areas are added.
Enter in the area size (SF in the example above) so Quick Bid can track the cumulative total area of your project. This is needed for some analysis reports (see Related articles for more information on Reports).
Use the Up and Down buttons 
 to move Areas up or down in the list.
To delete a Bid Area, highlight the desired area and click Delete.
To print the Area dialog box, click Print, and a print preview displays for review. Click the Print icon  to print or the Export Report icon
  to export the file to .pdf.
Sorting/Managing Bid Areas
Bid Areas can be grouped in a logical manner with parent child relationships. Any area can be made a sub-area of a larger area by Indenting and Outdenting. An example of this would be when bidding a 10 story building with 8 apartments on each floor. First use Quick Add to create floors 1- 10, then create 8 apartments within each floor. This allows more specific data to be generated in Bid Reports - costs and estimates could be determined for each Floor or per Apartment using this method.
To indent or outdent an Area to assign it to a parent area, highlight the desired area and use either the Indent or Outdent buttons. A Plus sign (+) next to any Area Name indicates that there are subordinate areas within that defined area.
On-Screen Takeoff Zones
When you create Zones in On-Screen Takeoff, they are transferred to Quick Bid as top-level Bid Areas so you can group/sort using them.
