Question
Can I use On-Screen Takeoff to measure Rolls and Seams?
Answer
Yes!
Although this is a fairly long article, once you get the hang of the process, you will be taking off rolls and seams quickly.
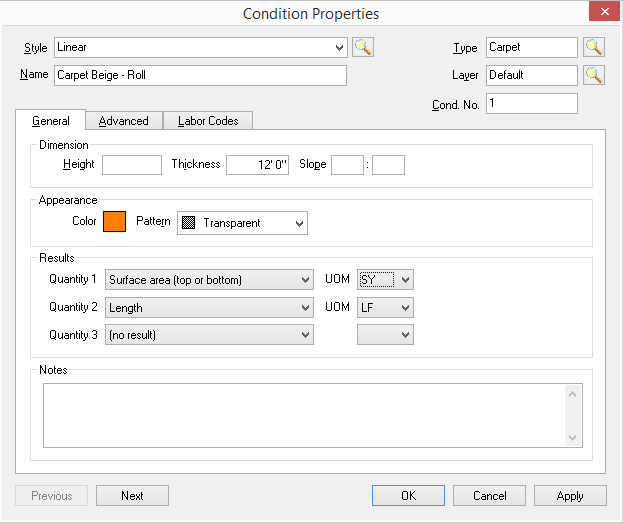
First, you will create A Linear Condition to measure the total rolls of flooring
Set the "Thickness" to the width of the Roll
Set Qty 1 as Surface Area Top OR Bottom (Square Foot or Yard or Meter) to calculate the Total yardage
Set Qty 2 as Linear (LF or m) to calculate the # of rolls
Next, take a look at your project plan to determine how you plan on installing the carpet. This may take a little trial and error, but after a few tries, you'll see how it works.
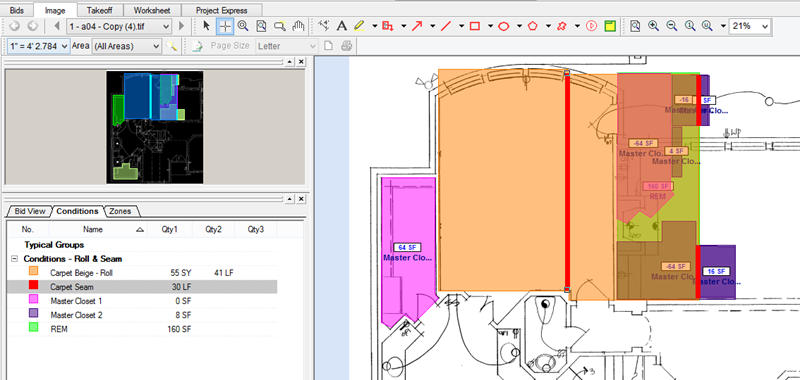
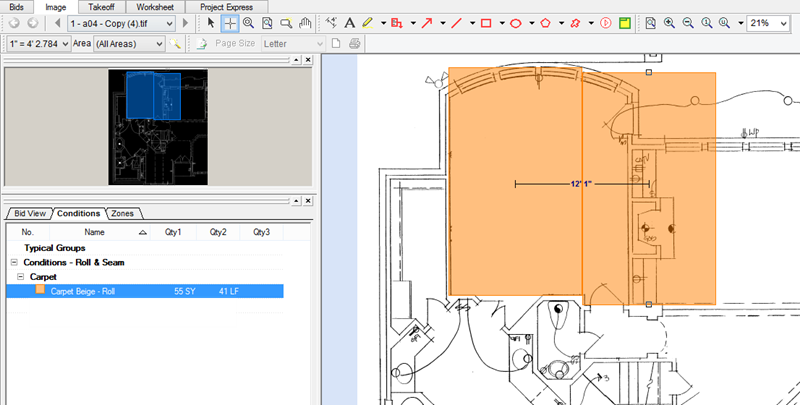
We've taken off the master bedroom in the example with seams running the length of the room in this example (Option 1):
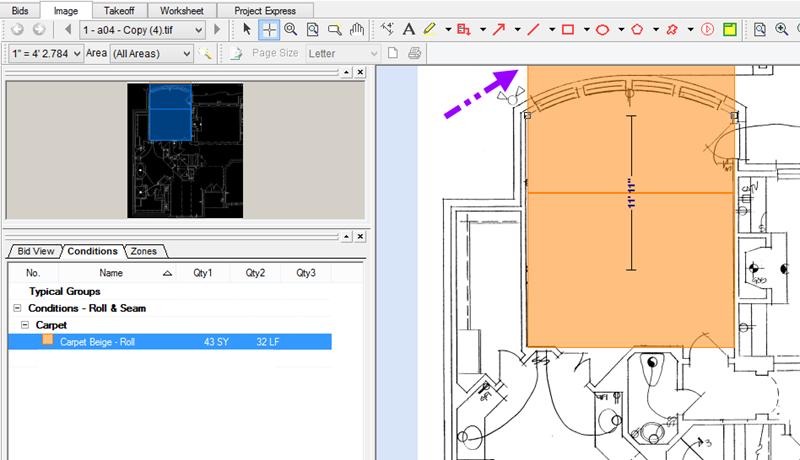
And along the Width of the room in this example (Option 2):
Notice that in Option 2, the top most piece of takeoff actually goes off the page That's OK, it is still included with the total although it makes optimization a little more difficult.
So, let's choose Option 1 from above...
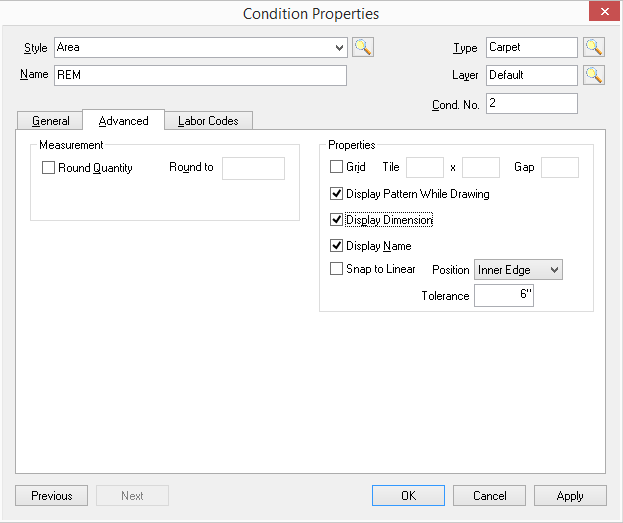
Now, create an Area Condition named REM X (you can number your remnants if you like, in this example, we are not going to, just to make it easier to follow).
You will only need to track the total AREA of this Condition so leave Qty 1 as SF or SY or M2.
On the Advanced tab of the Condition, check the "Display Dimension" and "Display Name" options.
Also set this to a different color than the Roll Condition to make it easier to tell the two takeoff objects apart.
So, now, using this second (Area) Condition, takeoff the remnant.
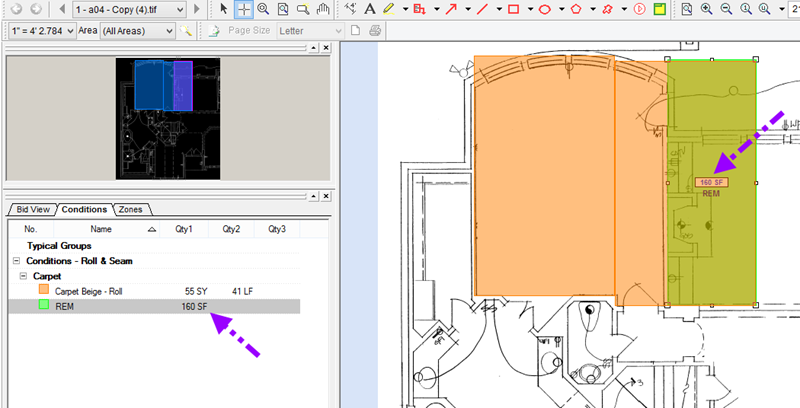
So, now we know we have 160 SF of remnant with which to play.
Now, where can we use those? This is where the process gets just a little tricky...
We want to use up that 160 SF of course, but we cannot forget about the SHAPE of the remnant.
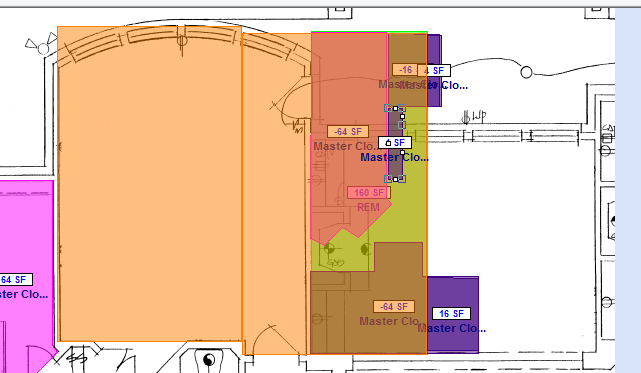
This means, we need a few more Conditions - one for each use of the Remnant. Our first one will be to takeoff that master closet to the left of the bedroom...
Again this is going to be an Area Condition, Qty 1 set for Area (SF, SY, M2).
You may ask yourself "Why do I need to create a new Condition for each remnant reuse?", well, it is just to keep it clear - you could use one Condition to takeoff all the re-used areas, but you will lose a bit of color-coding (you wouldn't know, for example, by quickly looking at the takeoff which object you forgot to account for).
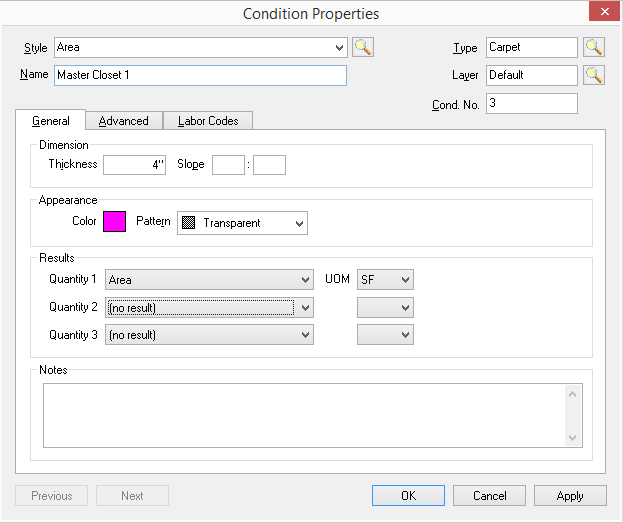
On the Advanced Tab, be sure to turn on Display Dimension and Display Name.
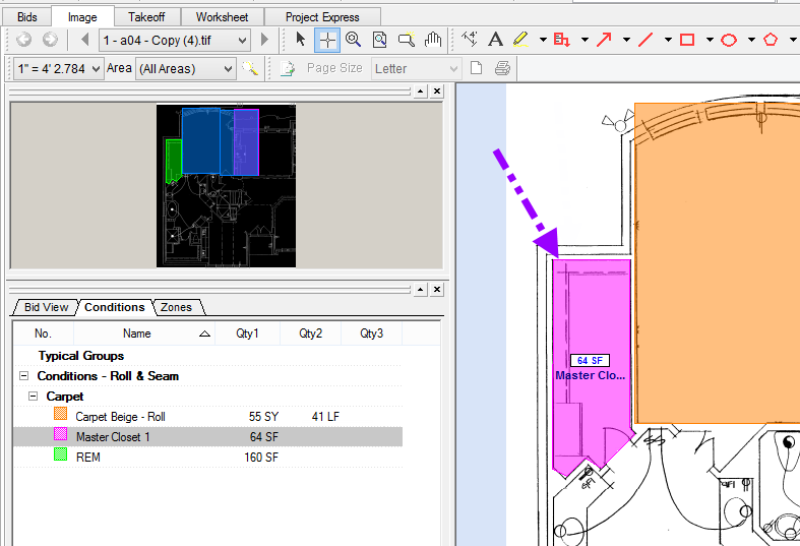
Now, takeoff the closet...
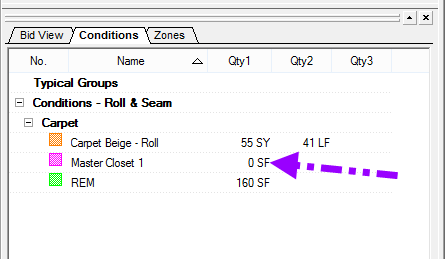
Now... copy and paste that piece of takeoff and drag it over your Remnant takeoff. Set that piece of takeoff as Negative quantity.
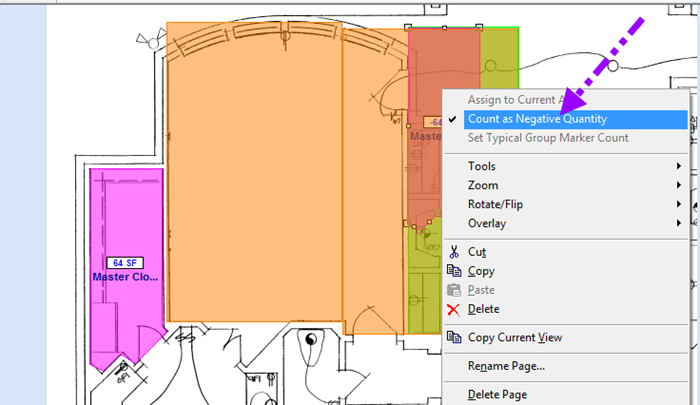
You are goal is to make sure that any remnant 'reuse' Conditions show "0" quantity, this means you've accounted for them within the Remnant object so you are not using more than the remnant amount.
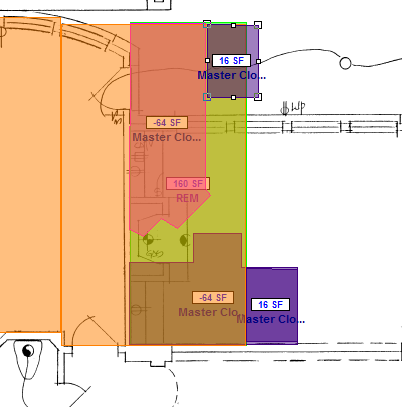
Let us say you want to know if there is sufficient remnant left to carpet the "Hers" closet in that en-suite.
Let us create another Area Condition same settings as the previous, except color and name.
So, now that we've taken off that closet, let us Copy and Paste that takeoff object and see if it fits WITHIN the remainder of the remnant...
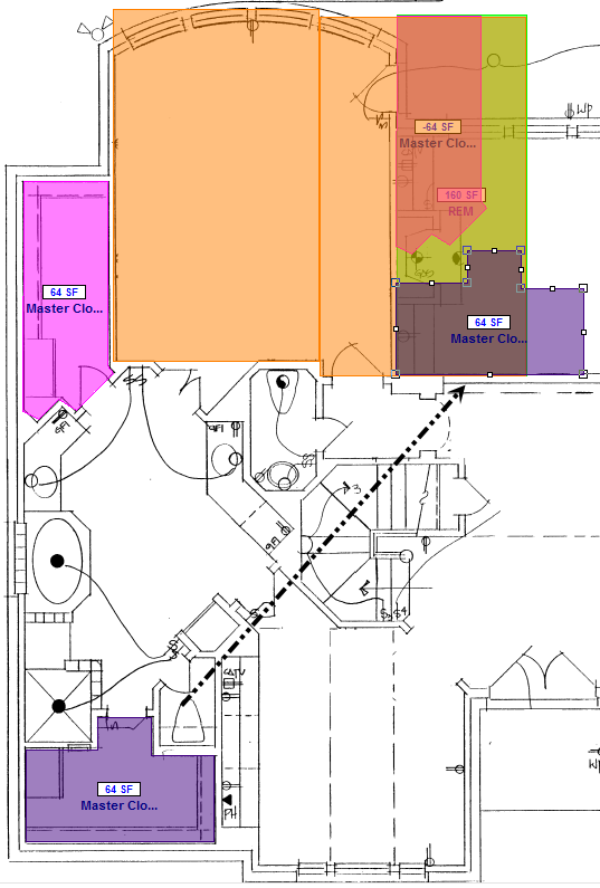
It's pretty clear that even if we rotated this takeoff object, there's just no way it is going to fall within the boundaries of the remaining remnant (it obviously cannot use remnant already used by the first closet). So, you'd delete off the Pasted object and leave the closet takeoff until you have a larger piece of remnant or decide you have to use a new roll to carpet the 2nd closet.
Now, if these were the only places you were using carpet, you'd probably be able to use up that remnant but it would create a few extra seams in the 2nd master closet. You would simply use the same Condition a couple more times...
First, set the Pasted object to negative... this zeros out your quantity for Master Closet 2.
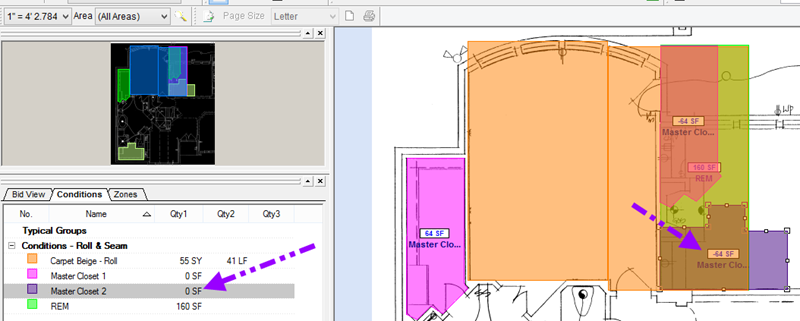
Now... using that same Condition, takeoff the portion of the Pasted object that didn't fit within the remnant...

Copy and Paste this and try to fit it within the unused portion of the remnant:
Repeat for the unaccounted for portion of that last piece:
You can see you will be able to finish the carpeting even though you will have at least 2 additional seams.
Now, what about those Seams?
That's pretty easy.
Let's create a Linear Condition named Carpet Seams (remember, we are keeping this relatively simple, you will have to scale up everything for real-world takeoff).
Simply takeoff all seams to generate a final total of seams. Don't forget those little seams you created in the 2nd closet...