![]()
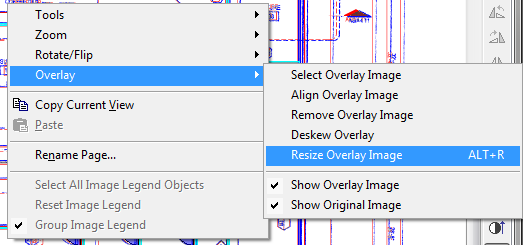
10.02.00 selecting and resizing overlays
![]()
![]() Overlays video
Overlays video
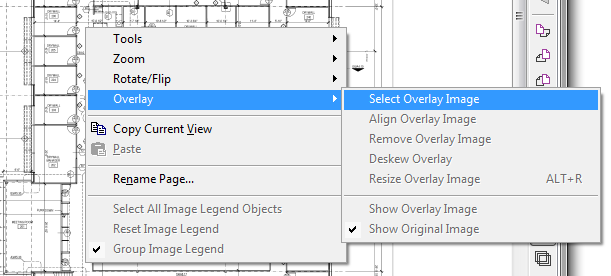
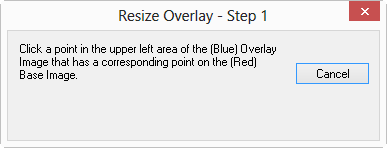
The Overlay feature allow an addendum drawing to overlay the Base image, making it easy to identify changes. Think of this like placing two drawings on top of one another and being able to see changes between the two. Although Overlays can be assigned on the Cover Sheet the instructions below are geared toward doing it on the Image Tab so the "Resize Assistant" is invoked.
Additions appear in BLUE (only on the overlay image) and deletions appear in RED (only on the original (or BASE) image).
Only one overlay image can be associated with a single base page. If there are multiple addenda for the same page, the base page must be duplicated, and then each addendum overlaid on a copy of the original.
An Overlay cannot be an indexed (multi-page) file. Each Overlay must be a single page file (an example of an indexed file is a single PDF file that contains multiple pages - in this case, only Page 1 can be displayed as an overlay. Use an external PDF viewer to extract the individual pages, if necessary).
When adding an overlay to a page on the Image Tab, the program automatically attempts to resize the overlay to match the base image. It is possible to adjust the overlay manually using the steps below to fine-tune the image.
When an Overlay is added to a base image on the Image Tab, or resized, a copy of the overlay image is saved as a tiff in a folder named "Overlays" and all changes are saved to that tiff file. The Cover Sheet is updated to indicate the overlay file is the tiff (the original overlay file is not altered). Adding Overlays directly on the Cover Sheet does not automatically create a tiff copy - unless the Overlay is resized.
Overlay images are always displayed in grey-scale, regardless of whether the image file is color.
At VERY high zoom, pixel-level differences are bound to occur - this is simply the nature of digital imagery. The Overlay function is designed to show you differences in the plan at reasonable zoom and will highlight ANY changes, even a pixel out of place, between the Base and Overlay images.
When you add an overlay to a project using this method, On-Screen Takeoff makes a COPY of that overlay file and places it in an "Overlay" folder in the "Image Folder" as indicated on the CoverSheet. Any alignment or resizing changes are made TO THAT copy. If you add an overlay via the Coversheet, bypassing the copy-creation process, alignment/resizing is made directly to the file you add. If you've used this file as the Base Image or Overlay on another Page, you will be resizing/aligning it anywhere it's used. It's best to add Overlays via the Image Tab.
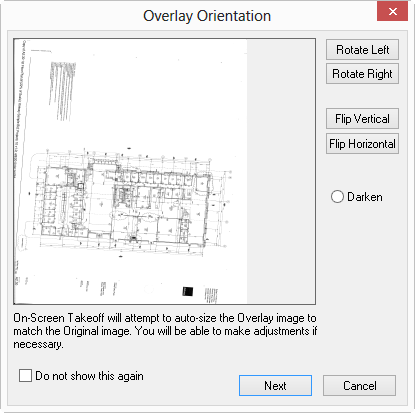
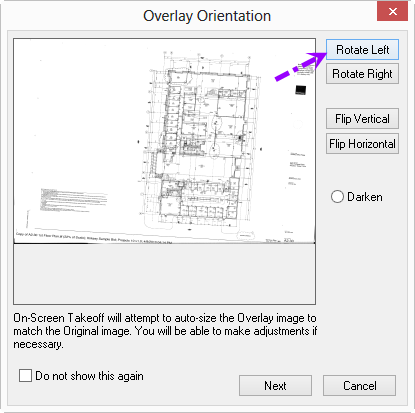
To disable this Wizard, click the "Do not show this again" checkbox and then click Cancel. If you disable the Overlay Wizard, you can turn it back on by clicking Tools>Options and changing the selection for "Show all Quick Start Wizards" to a checkbox.

Select Yes to open the Deskew Image window
Click
on the Select tool ![]() ,
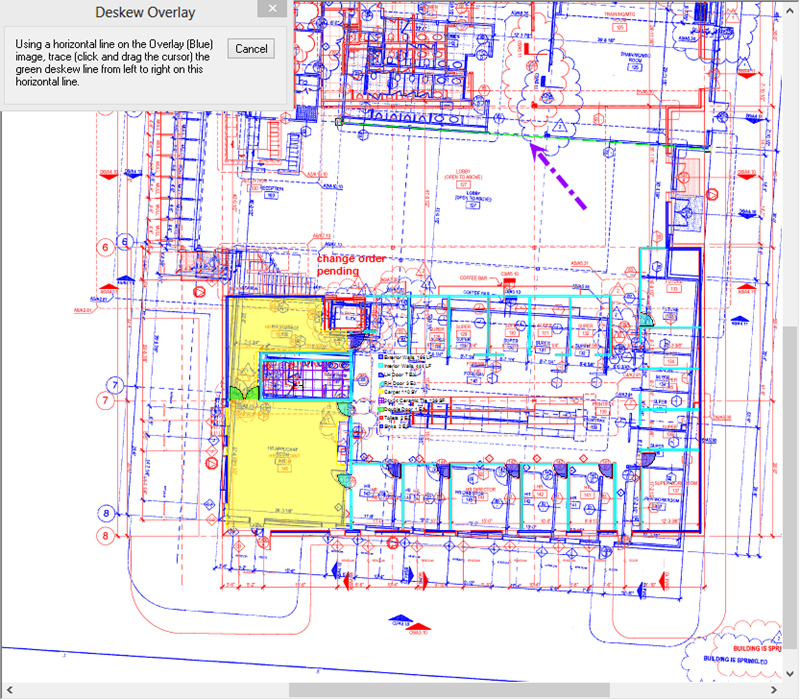
find a horizontal line on the overlay image (BLUE),
and then click and drag to trace the line from left to right - use
the longest horizontal line possible for the most accurate deskewing)
,
find a horizontal line on the overlay image (BLUE),
and then click and drag to trace the line from left to right - use
the longest horizontal line possible for the most accurate deskewing)
On-Screen Takeoff deskews the drawing to make that drawn line horizontal
Once the image is deskewed, a prompt asks if the image needs to be resized - the program automatically tries to matchup the base image and the overlay, resize manually if the results are unsatisfactory


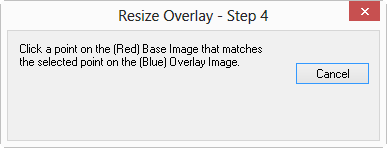
and the program matches those two points...

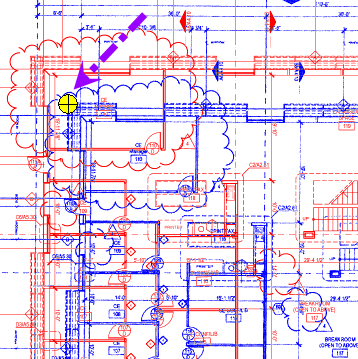
The large crosshairs icon is placed on the overlay image
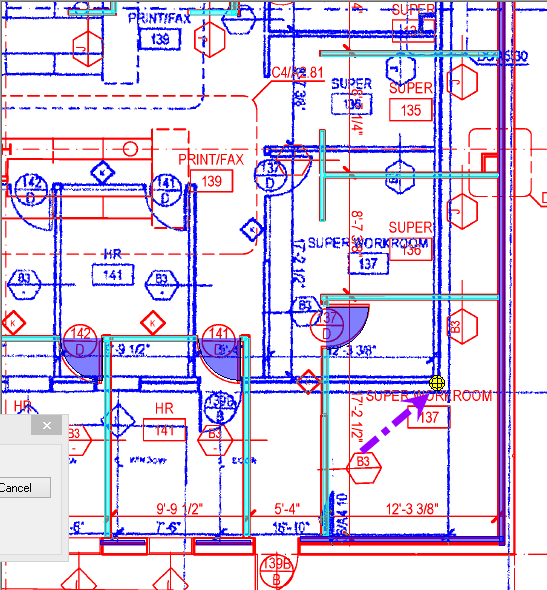
The addendum drawing is overlaid on top of the base image, deskewed, and in the selected orientation:
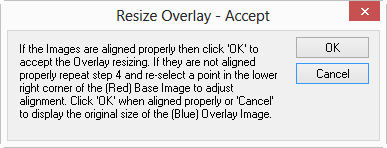
The images may NOT align perfectly, this could be due to variations in how the overlay image was created. Use trial and error to get the two images to match up as closely as possible.
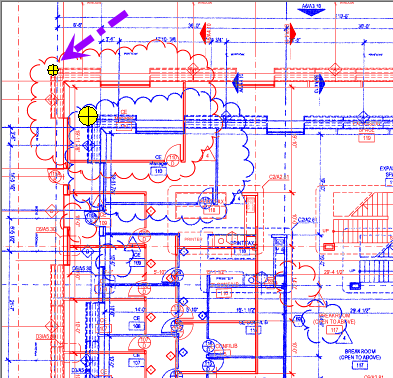
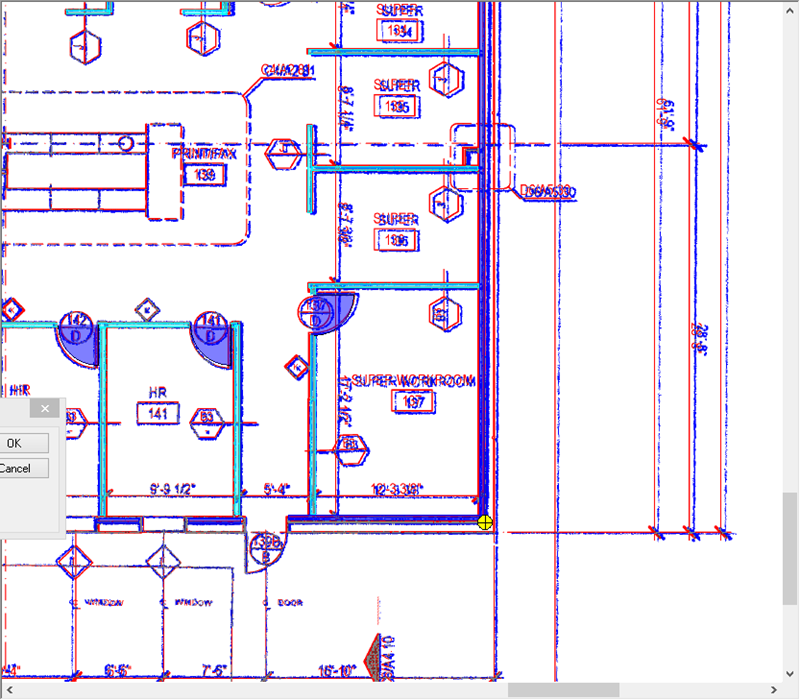
The overlay image may be a different size or DPI than the base image, causing the overlay to appear much smaller or larger than the base image. If resizing is skipped during the "Select Overlay" process or Overlays are added via the Cover Sheet, the overlays may be resized manually on the Image Tab.

In the example above, notice that the overlay (blue) is much smaller than the base image - use the Resize Overlay Tool to resize the overlay manually.
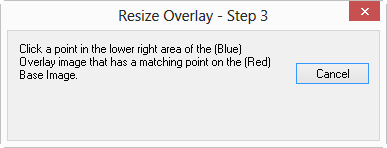
Changes made to the overlay during the resizing process are saved to a tiff stored in the Overlay folder (a sub-folder created where the original overlay file is located).