With On-Screen Takeoff you can add digital photos to any Bid for reference,
or to enhance a presentation.
Adding a Photo to a Project
- In On-Screen Takeoff create a new Bid or open the Cover
Sheet for an existing Bid
- Click the Add New Image Page button

- In the Add Images window, select All Files (*.*)
from the Files of type drop down menu to select the
photograph (most digital photos are saved in BMP, JPG, or GIF formats
- selecting All Files displays these file types in
the Add Images window)

- Locate the folder where the photo is stored, then select it
- Click Open to finish adding it to the Bid
A link to the photo is added and shows in the Pages Grid in the Cover
Sheet (just like any other image file).
Open the Bid, select the photo from the Pages drop down on the Image
tab
Linking to a Photo in a Project
Once the photo is added to a Bid, create a link to it from any electronic
blueprint page (in the same Bid).
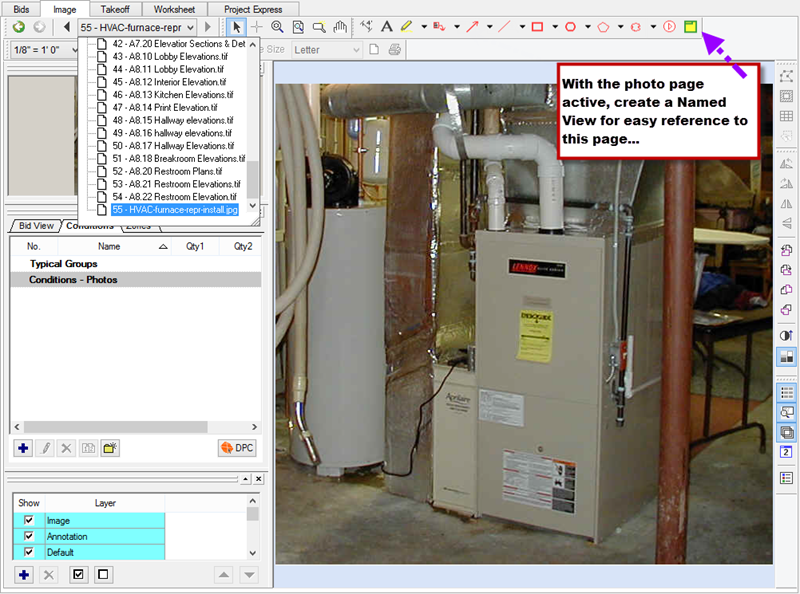
- On the Image Tab, navigate to the page containing the photo
- Click the Named View button on the Annotation
toolbar (see Using Annotation for details on
creating Named Views and Hotlinks)
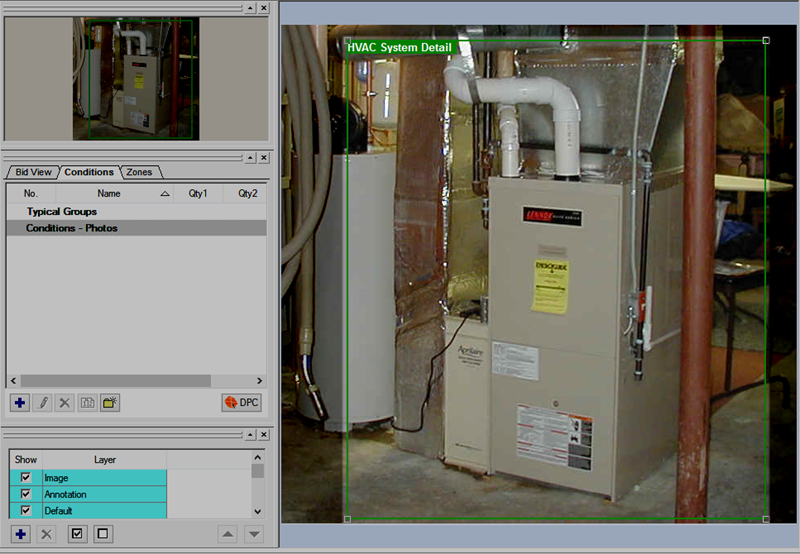
- Draw a box around the image (or a portion of the image), and give
it a unique name
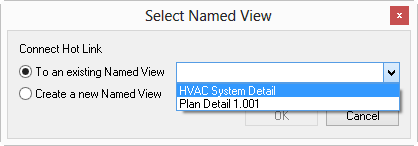
- Browse to the electronic blueprint page the image references, and
click the Hot Link button
- Click on the image where the Hot Link is
to be placed, and then select the Named View
from the drop down menu to connect the Hot Link to the Named View
created above
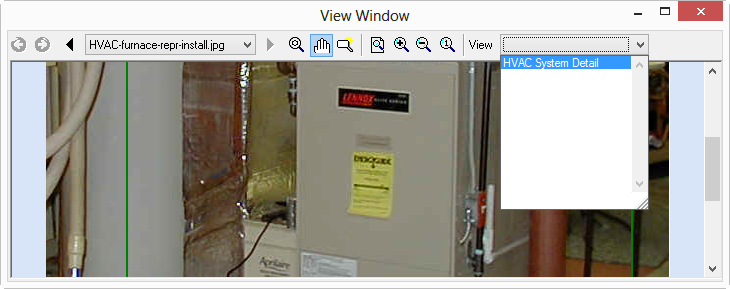
To open the photo as a Named View, selecting the Hot Link icon on the drawing.
This opens the View Window to the selected image.
Using
Folders to Organize Your Plans