Setting the Takeoff Area
Before you can start performing takeoff using a digitizer, you need to tell On-Screen Takeoff what area of the Active Region of the digitizer you will be using. Input made outside this region will be ignored by On-Screen Takeoff.
- Place your drawing on the active region of the digitizer making sure to line up the drawing edges as squarely as possible with the grid lines of the digitizer
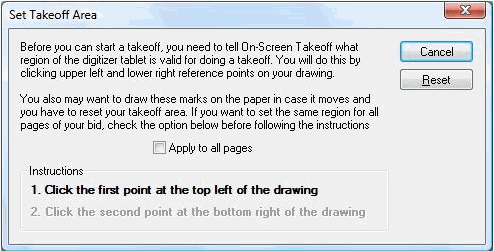
- In On-Screen Takeoff, click Digitizer > Set Takeoff Area

- The Set Takeoff Area dialog appears.

- Put a check next to Apply to all Pages if you want to set the takeoff area for all pages in your project - If you want to set the takeoff area for the current page only, leave the box empty

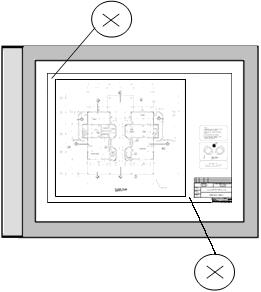
NOTE: Using a pencil, place an X in the upper-left and lower-right locations of your drawing as shown below. These are reference marks to help you determine where your takeoff area is if you have to come back to this drawing to do further takeoffs. 
- Click the X in the upper-left corner (the dialog box will update if the point is successfully stored) and then the X in the lower-right corner to set your takeoff area
- The dialog box will close if the process is successful - Your drawing is now ready for takeoff

NOTE: Any stylus movement outside this region will be ignored by On-Screen Takeoff.
- Repeat the steps above for each page in your project if you did not apply the settings to all pages
 |
Additional Information: If you are unable to Set the Takeoff Area, review Troubleshooting Your GTCO Digitizer for assistance. |


