If you are doing a complex takeoff, your Image view can start to get a little busy. Using Layers, you can show and hide your takeoff so your workspace stays organized, especially for residential plans where many sections are shown on the same plan. For example, if you are takeoff off walls, ceilings and floors all on the same page, what you see on your screen can get a little too overwhelming. Assigning your conditions to the Walls, Ceilings and Floors layers would allow you to 'turn off' layers on which you are not currently working.
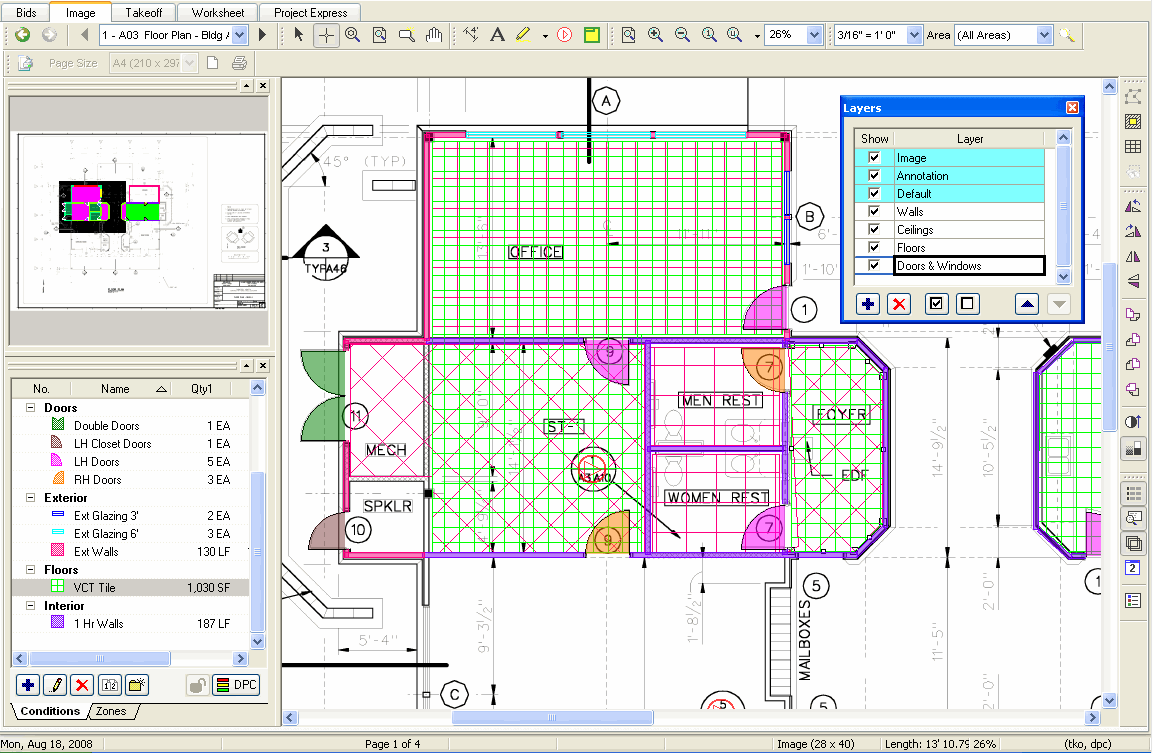
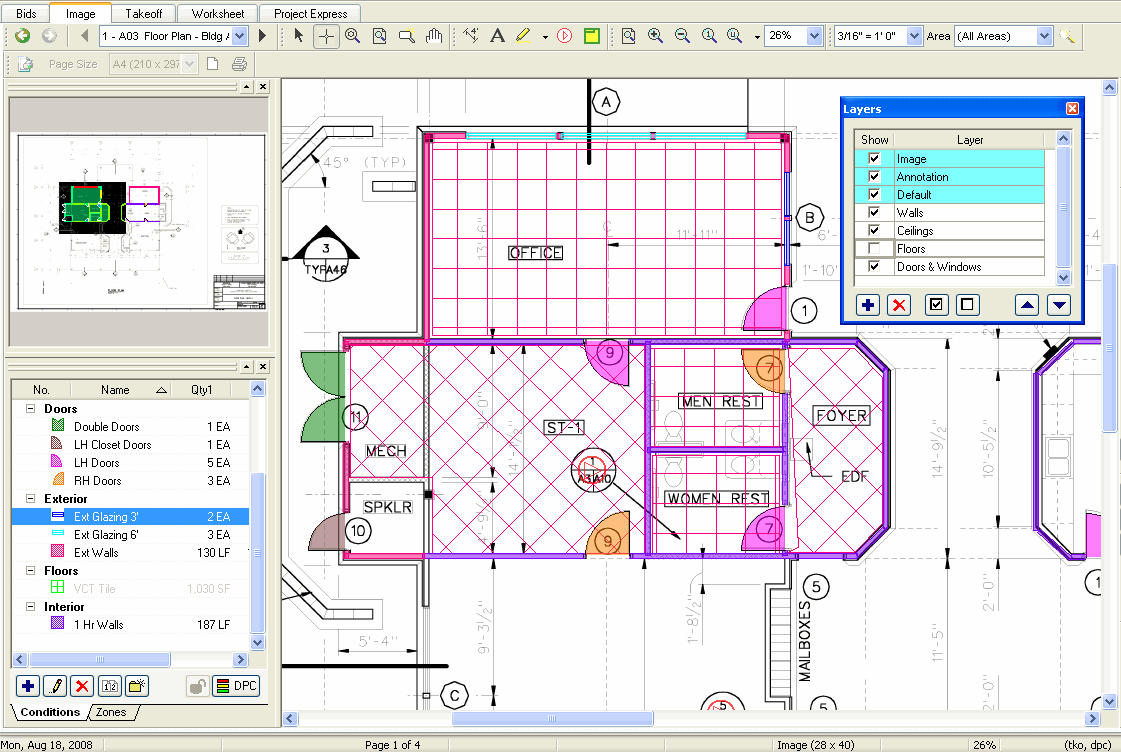
In the following example, you'll see a relatively simple takeoff project. The first image is All layers showing while the second shows you how much cleaning your workspace is when you hide the layers you don't need.
All Layers On. Notice, even with this very simple plan, it's starting to get a little busy.
Now, we're going to hide the floor, so we can add in the lights. Notice, the quantity for the flooring is unaffected, but it is greyed out. The Condition is greyed out because it is on a Hidden layer. Hiding the flooring layer makes it much easier to see the existing ceiling.
Sometimes, you will need to add a layer to a bid that does not already exist in the Default Layers list. Remember, layers added to a bid do not affect the Default Layers list nor do layers added to the Default list affect current bids.
To create a new Layer
in a Bid, click the Layers icon, ![]() , and the (Bid)
Layers dialog appears.
, and the (Bid)
Layers dialog appears.
You can dock and undock the Layers window if you choose.
Or click the Lookup
tool, ![]() , next to the Style field
in the Conditions Properties
dialog to open the Bid Layers
dialog.
, next to the Style field
in the Conditions Properties
dialog to open the Bid Layers
dialog.
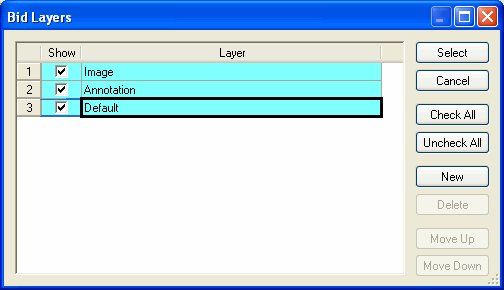
Although these two dialog boxes look
a little different, they are reading from the same list of Bid Level Layers.
The Bid Layers dialog box simply has Text Buttons versus the control buttons
of the Layers dialog box.
Click ![]() or
or  to add a row.
Type a name for your new Layer. The Show check box next to the Name field is checked by default.
The buttons located at the bottom of the Layers dialog perform the following functions:
 enables you click the show
all or show none box.
enables you click the show
all or show none box.
 will delete
the layer.
will delete
the layer.
 allows you to move
up and move down while
selecting a Layer.
allows you to move
up and move down while
selecting a Layer.
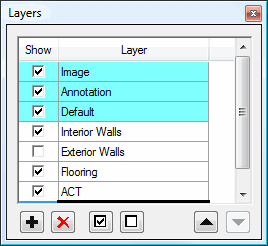
To view a Layer, place a check mark in the Show checkbox.
To hide a Layer from view, clear the Show checkbox. This does not delete the information. It merely hides this Layer until it is re-attached.
You can delete a Layer from the current Bid that is not in use. This has not effect on takeoff, it merely moves all takeoff that currently resides on that layer to the Default layer.
To assign a newly-created Condition to a Layer, type in a Layer name in the Condition Properties Layer field
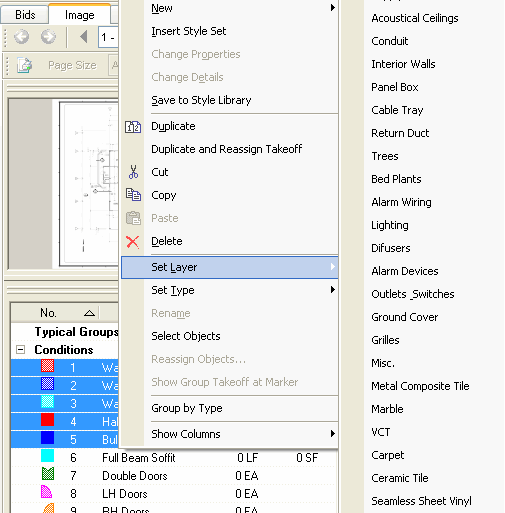
Assign a Layer to an existing Condition by right-clicking on the Condition in the Condition List and click Set Layer. Put a check next to the Layer name you want to assign the Condition to.
You can also select multiple conditions before Assigning a Layer - use the Ctrl and/or Shift key and select all the Condition for which you need to set Layer. Then, follow the instructions above.