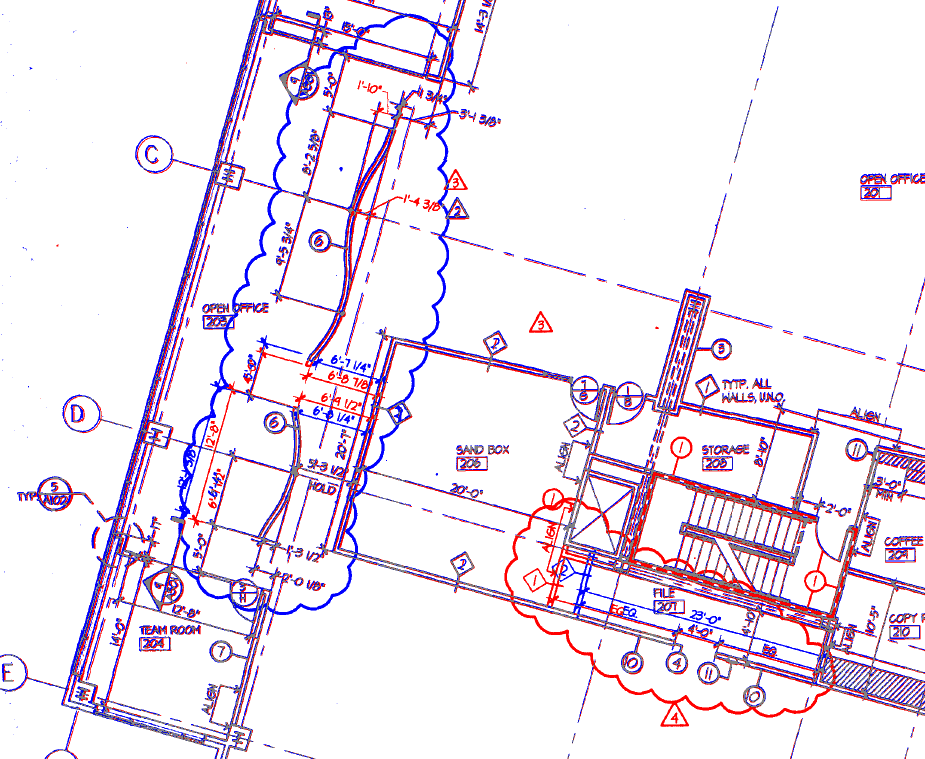
Right-click anywhere on the image and click Select Overlay Image. The Add Image dialog comes up.
Browse to the addendum drawing, select
the file, and click  .
.
The addendum drawing is overlayed on top of your original image.
The Overlay feature allows addendum drawings to overlay existing images making it easy to identify changes.
Additions appear in blue and deletions appear in red.
Overlay images must be the exact same size and have the same scale as the original image. On-Screen Takeoff cannot edit or manipulate the size/scale of overlay images.
To select an Overlay Image
Right-click anywhere on the image and click Select Overlay Image. The Add Image dialog comes up.
Browse to the addendum drawing, select
the file, and click  .
.
The addendum drawing is overlayed on top of your original image.

The addendum may not line up exactly with the original when it is first selected. To align the overlay drawing to the original, right-click anywhere on the image and click Overlay > Align Overlay Image. A line with green circles at either end is displayed - this is the alignment tool.
The move handle  moves the overlay image up-down and side-to-side.
The arrow keys on your keyboard can 'nudge' the overlay image if the alignment is only slightly off.
The rotate handle  spins your overlay image along the center axis.
Adjust the image until it is predominately grey.
Once the images are aligned, deletions are shown in red and additions in blue. Adjust your takeoff as needed.
Page rotation and takeoff alignment is based on the original or base image. Selecting to display ONLY the Overlay, may cause takeoff to rotate out of alignment with the image. Turning the Original image back on will correct the display.