On-Screen Takeoff - 11.07.05 Adding Multiple Overlays to a Bid (using the Cover Sheet) - OST
AA-04338
Using the Select Overlay process on the Image Tab works great if for assigning one or two overlay images. But what if you need to add 20, 50, or more Overlay images to your project? Selecting each overlay on the Image Tab would be fairly time-consuming. It is faster to use the Cover Sheet to add numerous overlays to the project then copy and paste the link(s) into the Overlay field.
We are assuming your Overlays are stored in one common folder, if they aren't, we recommend that you create an "Overlay - Originals" folder as a subfolder in the folder wherever your image files are stored. Copy all Overlays into that Folder before continuing.
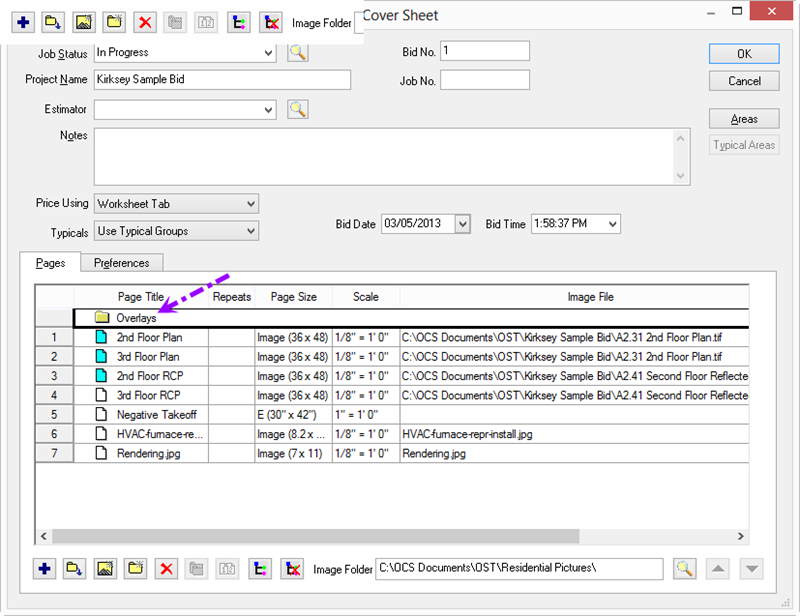
- Open the Cover Sheet for the project
- Add a folder named Overlays (this is just to make it easier to keep track of the base images and the overlay images)
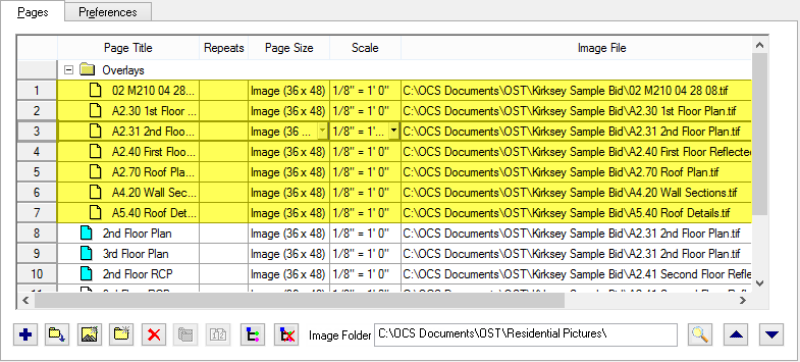
- Use the Auto Add function to add all Overlay images to this folder (assuming all Overlays are of the same file type). See Related articles for information on adding Plans/Sets to a project.
- Copy and paste the file path for each overlay page and paste it into the Overlay Image field for the appropriate base image.
The easiest way to do this is to click on the Image File name (in this example, "C:\OCS Documents\OST\Kirksey - Documentation\Set2\A2.30 1st Floor Plan.tiff"
- Press <Ctrl> <C> (the shortcut to copy).
- Click in the Overlay Image field (in this example Page 7 - A2.30 1st Floor),
- Press <Ctrl<> <V> (the keyboard shortcut to paste) and the path for the Overlay image is pasted into the Overlay Image cell in the grid
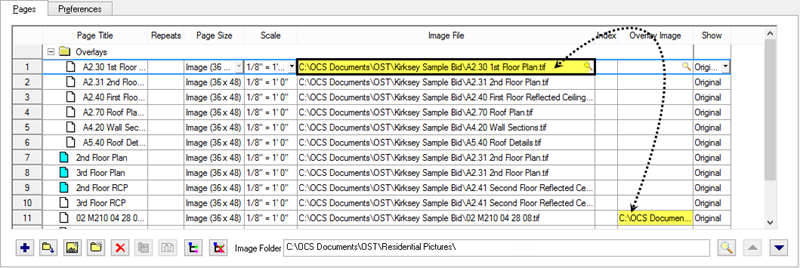
- Set the Show field to "Original", "Overlay", or "Both" for each page (to display the base image and Overlay, set the Show column to "Both")
- Repeat this process for each Overlay, copying and pasting the Image File path into the Overlay cell for each page (yes, this is a little tedious, but it is significantly faster than adding each Overlay, one-at-a-time, on the Image Tab)
- Set the "Show" field to "Both" (this way, the base and Overlay images are shown on the Image Tab)
- Return to the Image Tab and make adjustments to the Overlay sizing and position as (see previous articles for instructions)
The automatic Overlay Orientation, Deskew, and Resize screens are not shown when adding overlay images via the Cover Sheet. If the rotation or sizing of the overlay is incorrect, manually Align and/or Resize the Overlay image from the Image Tab, see previous articles for more information.
Overlays added directly via the Cover Sheet are not optimized for viewing/printing when the Original Image is turned off. If you need to view or print Overlays without the Base Image, they must be added via the Image Tab Overlay Wizard, discussed in previous articles.
 Aligning Overlays to Match the Base Image Aligning Overlays to Match the Base Image |
Converting Overlay Files to TIFF  |