Every Bid, Alternate, and Change Order includes its own Cover Sheet. The Base Bid's Cover Sheet stores Bid specific information and includes links to the images used in the project. Alternates and Change Orders (Child Bids) share most of the Base Bid's information so their Cover Sheets are much simpler, see What are Alternates and Change Orders? for details).
There are three sections to the Cover Sheet:
- General Bid Information (the top section) - general information about the project including name, Job No., Notes, etc. (explained below).
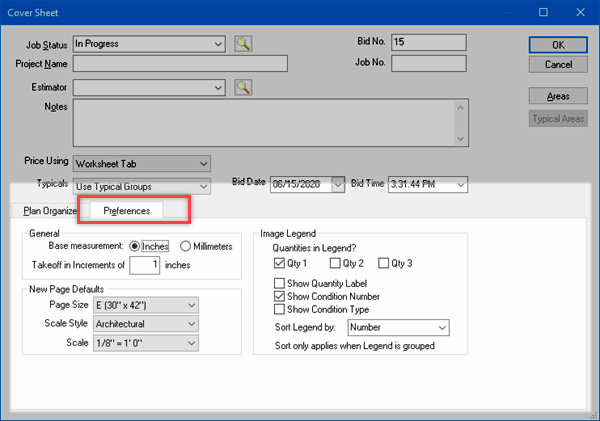
- The Plan Organizer tab - where you "add" plans/images to your project; we cover adding plans in the next article.
- The Preferences tab - where Bid-level settings are changed (explained below).
If you open a DPC
project's
Cover Sheet, you see two additional tabs - these are discussed in the Digital Production Control User Guide.
General Bid Information
The top half of the Cover Sheet includes "general" information about the bid/project. Although "Project Name" is the only required field, we recommend filling in as much detail as possible. You can filter the Bids Tab by Estimator, Job No., and Job Status, and even group it by Job Status, if you like (see Related Articles for details).
| Field | Description |
|---|
|
| Job Status | Identifies the current status of the job. For example: Bidding, Pending, Sold, etc. There are several ways to assign an existing Job Status: - enter the first few letters of the status name,
- choose use the drop down list to view existing status
 , or , or - click the Lookup Button
 to open the Job Statuses dialog box, then select a Job Status from the current list to apply it to the current Bid by clicking it once, then clicking the Select button to open the Job Statuses dialog box, then select a Job Status from the current list to apply it to the current Bid by clicking it once, then clicking the Select button
Job status is shown on the Bids Tab, and you can even Group the Bids Tab by Job Status to keep your Bids organized. See A Detailed Look at the Bids Tab for more information. When you create a new Bid, it's Job Status is set to the top Job Status in the Master > Job Statuses dialog box. |
| Bid No. | Auto-populates, but can be changed to any unique number available in the database. This number is based on the Next Bid Number stored under Tools > Options > New Bid. When using SQL databases, the Bid number assigned when a new Bid is created will not be used again (it is 'burned'), even if the new Bid creation is cancelled. The Bid number should not be changed when you first create a Bid - it may be changed to an unused number after you close the Cover Sheet and save the new Bid. |
Project Name | Enter a name for the project here - limit: 75 characters. Required field. Project Names must contain only standard alpha-numeric English characters - never use Special Characters such as #, % or and -, any of the '< Shift> + Number' combinations or any brackets or back/forward slashes. See CLS - File Path and File Name Character Limitations for more information. |
| Job No. | The Job Number can be any alpha-numeric entry and is for reference only. (50 character limit) |
| Estimator | Select from the list or add a new one. |
| Notes | Notes that are displayed on the Bids Tab - these can be anything important about the job. |
| Price Using | Select the method for pricing the Bid. Available options may change depending on which On Center Software programs are installed and licensed on your computer. By default, "Worksheet Tab" is selected. See Pricing Options, in Chapter 14, for more information. |
| Worksheet/Database | Displays the file pathway for the database or Excel file used to price this Bid. This field does not appear when "Pricing Using Worksheet Tab" is selected. |
| Typicals | Select whether to use Typical Groups or Typical Areas in a Bid. The choice of Typical Areas or Typical Groups/Pages must be set when first creating a new Bid. These options are mutually exclusive. If any page is set to 'repeat', "Typical Areas" is disabled. Related articles for information on Typicals. |
| Bid Date/Time | Defaults to current date/time for new, blank Bids.
Set by the planroom or DFS when using OSX Projects but can be adjusted by the end user. However, if you receive an update from the planroom, the Bid Date will change back to the Bid Date indicated by the planroom so you will be aware of any changes to bid timeframe as indicated by planroom.
|
| Areas | Opens the Bid Areas dialog, see How to Use Bid Areas for more information. |
| Typical Areas | Open the Typical Areas dialog (disabled if "Typicals" is set to Typical Groups), see Typical Takeoff (Maximizing Your Efficiency) for more information. |
See Related Articles for more information about setting up Masters (such as Job Statuses and Estimators). Master records can be added "on-the-fly" as you create and work in a project so you do not to setup all Job Statuses or Employees before you start a Bid.
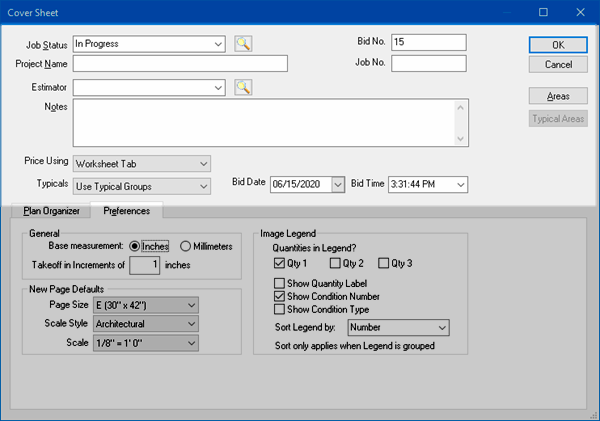
Bid Preferences
The Cover Sheet Preferences tab sets or modifies preferences for the current Bid. These settings default to whatever is set on the New Bids Tab under Tools > Options when the project is first created. See Related Articles for more information on Program Settings and User Preferences.
To modify settings for a particular Bid, open the Bid’s Cover Sheet and select the Preferences tab. Select or type in preferences for each field.
| General area |
|---|
| Base Measurement - Choose whether to use inches or millimeters as the base measurement for takeoff quantities. Selecting inches applies Imperial measurements while millimeters applies metric measurements to all takeoff quantities. |
Takeoff in Increments of inches
(or millimeters) - Enter a value in inches (or mm for Metric databases) for the smallest unit of measurement for takeoff objects. |
| New Page Defaults area |
|---|
| Page Size - Select the default page size for all newly added pages. If the page size cannot be determined from the drawing or a blank page is added it default to this size. |
| Scale Style - Select default scale style for newly added images. |
Scale - Select the default scale for all newly added pages. It is vital that you verify the scale on every page before performing takeoff or your results will be incorrect. See the articles that follow for instructions. See What is Scale and Why is it so Important? for more information about setting and verifying Scale. |
| Image Legend |
|---|
| Quantities in Legend - Each Condition you create can generate up to three Results - you can select which Results to show in the Image Legend. |
| Show Condition Number - When checked, includes each Condition's Number in the Image Legend. |
| Show Condition Type - When checked, includes each Condition's Type in the Image Legend. |
| Sort Legend by: - Select how you want the Image Legend sorted (by Number, Name. or Condition Type). Sorting only works when the Image Legend is grouped as a single block. |
See Adding the Image Legend to Pages for more information on the Image Legend.
A project is not very useful until you add (link to) plans (unless, of course, you are using paper plans and a digitizer, see Related Articles for more information on Plan Organization and using paper plans and a digitizer). In the next article, we walk you through adding an initial plan set to your bid.


 Creating a Project (Bid) in OST