Possibly the most important part of creating a Condition is defining what it takes to build the Condition - the Materials and Labor (and, of course, the Markups and Indirect Expenses, but those are applied automatically usually). The Item Detail Grid, located at the bottom of the Condition Details window, is where the components of a Condition are defined.
Item Detail Grid Detailed
Let us look at a very typical, simple Condition, a common Wall (Wall Type K1 @ 10', to be specific).
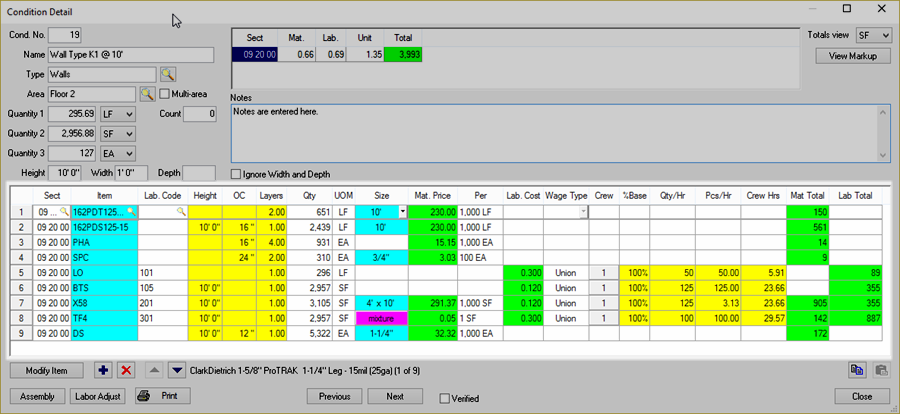
Every 'component' of a Condition is driven by an Item Code (Master Items was detailed in the previous Chapter, if necessary, please review). In this example, there are nine Items added to this Condition that cover almost every aspect of building this particular Condition. It's a wall, right, so we have Track (162PDT125-15), Studs (162PDS125-15), screws to connect the studs and track (PHA), concrete shots and pins (SPC) to attach the bottom track to the floor, Labor to layout where the walls are going (LO), the labor to frame the track and studs (BTS), drywall/wallboard and the labor required to hang it (X58), screws to attach the drywall to the framing (DS), and the tape, mud, and labor to tape and float the seams (TF4).
Some of these Items are just Materials (such as the Studs), some are Labor only (the layout and framing for the studs) and some are Material and Labor Items (drywall and tape/floating). Combined, this Condition accounts for the Materials and Labor required to build 295.69 (rounded to 296) LF of "Wall Type K1 @ 10'". (If you also performed Painting services, you might include the materials and labor for painting in this Condition - but you'd be wearing an awful lot of hats at that point!).
The Detail Area uses a grid divided into columns to display information for Items entered on each row. These columns hold Item codes, default settings, cost tracking information (Cost Codes), Material and Labor values as well as production information.
When an Item code is entered into the Detail Area, information for that Item is pulled from the Master Items List unless the Item has already been used in this Bid. The defaults are displayed to show how the quantity was calculated. The height, on-centers, layers, and even the quantity can be changed. Changing these values only affects this use of the Item - even if the same Item is used in the same Condition or any other Conditions within the job. Exceptions: Material Pricing and Crew - there is only one Material Price for a Bid and only one Crew makeup for an Item.
Colors are used in the Condition Detail Item Grid to help you identify certain fields.
The following is the list of Item Detail Area column headings and their descriptions. This list provides details about the different fields and how they are populated and modified.
|
Column |
Description |
|
Sect |
Displays the section number which defaults from the Master Item record. Section numbers may be changed within the Condition without affecting the Master record. |
|
Item |
Displays the Item code and functions as the main entry field for a detail item. |
|
Item Description |
Displays the full name of the Item. You can hide this column by right-clicking within the Grid and unchecking "Show Description". |
|
Lab. Code |
Displays the Item’s default Labor Cost Code if labor is associated. Also allows direct entry changes if Item uses materials and labor. This entry can be modified if needed without affecting the Master Items List. |
|
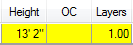
Height |
Displays the Item’s height - If the Item is set up as Horizontal and Continuous, this field will be disabled from direct entry changes. |
|
OC |
Represents the on center value for a material Item. |
|
Layers |
Displays the number of layers or rows applied to this Item. For example, a standard wall would have 2 layers of gypsum board, one for each side of the wall. |
|
Qty |
Displays the line item's calculated quantity if possible. - If the cell contains a Red "0", that indicates that the quantity must be entered Manually because the Item is setup for Direct Entry.
- A Blue quantity indicates that the Item quantity was direct entered and not calculated (see additional notes at the end of this article regarding direct entries)
- A Red cell with a zero ("0") value indicates that Quick Bid is unable to calculate the Item quantity due to an inconsistency in how the Item is setup. For example, the Item is setup as a Linear (LF) for UOM to calculate off of Quantity 1 but Quantity 1 is an EA (count) (or Quantity upon which the Item calculates is blank/not specified).
|
|
UOM |
Represents the Unit of Measure specified for this Item’s quantity (this often times is different than the Condition's UOM, that's OK...) |
|
Size |
Displays the Size of the Item. To change the size, click the arrow and select a new size from the menu. Quick Bid will attempt to match the Size to the Condition's Height, if applicable. If your preferred size is not in the list, click New and enter your new size in the dialog that displays. |
|
Mat. Price |
Displays the default Material Cost for this Item. This number can be modified if needed. Material prices displayed here come from the Bid Item record. If you highlight the price and enter a new value, a dialog window will ask to update the Master Material price. If you select Yes the price is updated within the current Bid and update the Master price. If you select No, only the current Bid is updated - the Master price remains unchanged. Updating the Material price affects every use of the Material in the current job, updating the Master affects future jobs, but Existing Bids are never changed. |
|
Per |
Displays the method calculating the Material pricing for the Item. |
|
Lab. Cost |
Displays the cost of Labor associated with this Item. (This is derived from the Wage information for the Crew as defined on the Payroll Tab). |
|
Wage Type |
Shows the Wage Type used for this line Item. |
|
Crew |
Displays the number of workers in a crew. Click the button to see what Payroll Classes are assigned to the crew. |
|
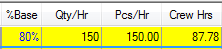
%Base |
Displays your adjusted labor production as a percentage of the original production (as defined in the Master Item). Any percentage above 100% of your base default rate is flagged in red while less than 100% is flagged in blue. This column allows you to change your base default production rates with a percentage entry. When a labor Item is entered into the Condition, it defaults to its base production rate. That’s represented as 100% in the % Base column. To increase your base production by 10%, you would enter 110% at the %Base column. Entering 50% at the %Base column would reduce your base production rate by one half.
Remember, changing production within a Condition Detail only affects that line Item and will not change any other use of that Labor Item in this Condition or elsewhere in the current job. |
|
Qty/Hr |
Shows the quantity being installed per day or hour. Click on the column header to toggle from hours to days and vice versa. |
|
Pcs/Hr |
Shows the pieces being installed per day or hour. Click on the column header to toggle from hours to days and vice versa. |
|
Crew Hrs |
Shows the time required to install the condition quantity based on the production entered. This can be viewed by hours or days. Click on the column header to toggle from hours to days and vice versa. |
|
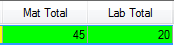
Mat Total |
Displays the total Material Cost for this line item (Item Qty x Mat. Price ÷ Per).
Subtotaled at the bottom of the Mat Total column. |
|
Lab Total |
Displays the total Labor Cost for this line item (Item Qty** x Lab.Cost). **If you do not apply Labor to Waste (option set in Bid's Cover Sheet), you must deduct the Waste Qty first if you are trying to double-check the program's calculated Labor Cost.
Subtotaled at the bottom of the Lab Total column. |
|
Item Total |
The total of Material and Labor for each line Item and then a grand total at the bottom of the Grid. This does not include Markups or Indirect Expenses, this is 'raw cost'. |
There may be times when it doesn't appear that Quick Bid is calculating your Labor correctly. This happens when you have the option to "Apply labor to waste quantity" checked in the Bid's
Cover Sheet, see
Setting Bid Preferences on the Cover Sheet for more information.
Entering Item Quantity Manually
You can always override an Item's calculated value by directly entering an amount.
When entering direct values for an Item detail, there are a few things to remember:
- The Item Quantity is formatted BLUE to indicate it is a manual entry (override value)
- Quick Bid creates a ratio between the manually entered value and Condition Quantity 1 - for example, if Condition Quantity 1 is set to 100 and one manually enters in 50 as the Item Detail Quantity, a 2:1 ratio is established; if Condition Quantity 1 is changed to 400, then the Item Detail Quantity calculates to 200
- To reset the calculation to Item Default, enter "0" in the Item Quantity field


 denotes a mixture. (A mixture is a yielded Item, see Related articles for more information on Item Sizing).
  Condition Detail - Section Totals and Unit Costs