Adding one or two contacts into the Masters using, as documented previously, is fine, however if you have to add dozens or hundreds of contacts, it would take hours. We are happy to tell you, Quick Bid supports importing Contacts which makes building your Contact list easy and efficient.
You import Contacts using a specially-formatted CSV file (Comma Separated Value). Format the CSV file following the instructions below - please follow these instructions carefully to ensure your CSV file is corrected formatted. We've included a template file named "Contacts-Import.csv", located in the "OCS Documents\Quick Bid" folder, as an example. (If you've deleted that file by accident, you can download a copy here: https://downloads.oncenter.com/Downloads/QB/Templates/Contacts-Import.csv.)
First, define the fields to be imported - if you are not going to use a field, you do not have to define it. The only required field is "Company" - if you are adding 'sub-contacts' and a "Company" doesn't exist with that name, then one will be added. We recommend specifying a "Contact Type" for all Contacts because this designation affects program Lookups.
There are 22 contact fields required for import:
- First Name
- Last Name
- Title
- Department
- Work Phone
- Home Phone
- Mobile Phone
- Pager
- Home Fax
- E-mail Address
- Company (this is a required field; if the Company doesn't exist already, it will be added)
- Business Street
- Business Street 2
- Business City
- Business State
- Business Postal Code
- Business Country
- Business Phone
- Business Fax
- Web Page
- Notes
- Contact Type (if this Contact Type doesn't exist in the database, it will be added during the import process)
Field names (in the header row) must be entered exactly as the text above (without the notes, of course).
Create the Import File
In Notepad
Using Notepad or any other text/data editor, create a CSV file.
The first row in the text file defines the fields to be imported - type each field name separated by a comma (not all 22 fields must be included, but be very careful with spelling and comma placement - we recommend you use the template file).
Each subsequent row includes the actual contact data that will be imported.
Notepad example:
- Each field (in the first row) is separated by a comma
- Each data row includes an entry for each field (even if the entry is blank), followed by a comma

Do include a space after any commas separating the different fields.
Do not use commas in any data (the information to import) - additional commas in the CSV will cause the import to fail. If necessary, go back and add commas to the Contacts in Quick Bid after importing the CSV file (this is a "comma separated" file - only the commas used to define fields are permitted).
Once all data is entered in this format, save the file (as a CSV if it is not already saved).
You are now ready to import your contacts list (csv) into Quick Bid.
In Excel
In Row 1 (yellow highlighted below) enter in each of the Field names to be imported.
Move to Row 2 (green=data), enter data for each Field (your Excel file will not be color-coded).
Leave cells blank for which there is no data to import.
Move to Row 3, 4, and so on, entering in the data fields.
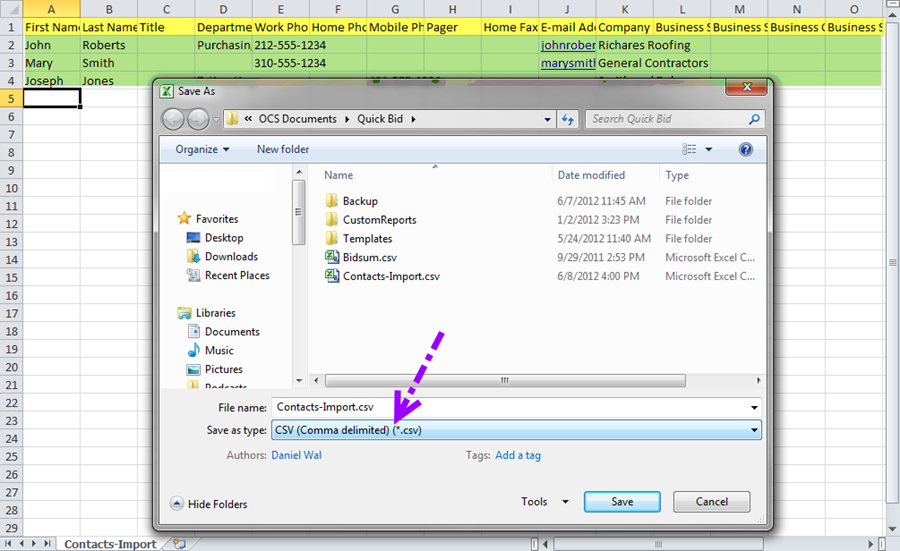
Notice on the second data set there is no information available for "Department" - that is OK. For each Field (column) defined in Row 1 there must be an entry in the data section, even if that entry is blank.
Do not use commas in any data fields (the information to import)- additional commas in the CSV will cause the import to fail. If necessary, go back and add commas to the Contacts in Quick Bid after importing the CSV file (this is a "comma separated" file - only the commas used to define fields are permitted).
Click "Save As" and select "Comma Delimited" or "CSV" from the File Type drop down.
Confirm that you want to save the Excel file as a CSV file, if necessary.
You are now ready to import your contacts list (csv) into Quick Bid.
Import the CSV File
Open Quick Bid and click Master > Contacts - the dialog opens.
Click the Import button.
Click OK on the notification dialog box.
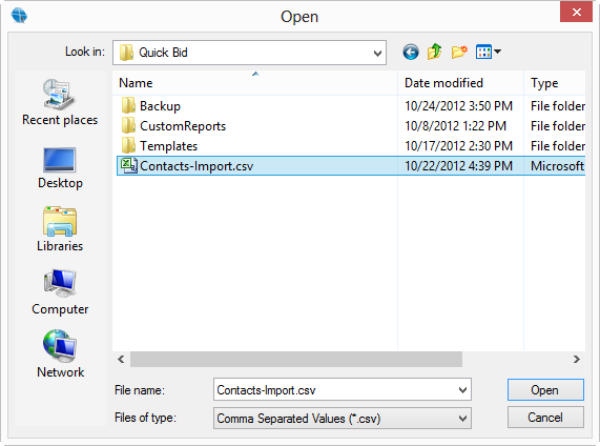
Browse to the location where you saved the CSV file and select it.
Once the import is complete, a confirmation displays.

If an error message is displayed, check the QuickBid.log file in the program's installation directory (usually "C:\Program Files\Quick Bid 4") for details. Make sure all field names are spelled correctly, that there are place-holding commas for fields without data, and that no data fields contain commas.


 Company Contacts (Contacts of a Contact)