
5.02.01 Importing Contacts
Adding one or two contacts manually is fine, however if you have to add dozens or hundreds of contacts, it could become very tedious. Luckily, Quick Bid supports importing Contacts which makes entering your contact list easy and efficient. Contacts are imported using a CSV file (Comma Separated Value). Format the CSV file following the instructions below - please follow these instructions carefully to ensure your CSV file is corrected formatted. A template file named Contacts-Import.csv is located in the "OCS Documents\Quick Bid" folder as an example.
First, define the fields to be imported - if you are not going to use a field, you do not have to define it. The only field that is REQUIRED is "Company" - if you are adding 'sub-contacts' and a "Company" doesn't exist with that name, then one will be added.
There are 22 contact fields available for import
First Name
Last Name
Title
Department
Work Phone
Home Phone
Mobile Phone
Pager
Home Fax
E-mail Address
Company (This is a required field; do not include "This is a required field" in the field name. If the Company doesn't exist already, it will be added)
Business Street
Business Street 2
Business City
Business State
Business Postal Code
Business Country
Business Phone
Business Fax
Web Page
Notes
Contact Type - if the Contact Type specified in the CSV file is not listed in the Contact Types List (Master) within the database, it is automatically added during the import process
Field names (in the header row) must be entered exactly as the Bolded text above - do not include the notes or comments in parentheses.
Notepad example:
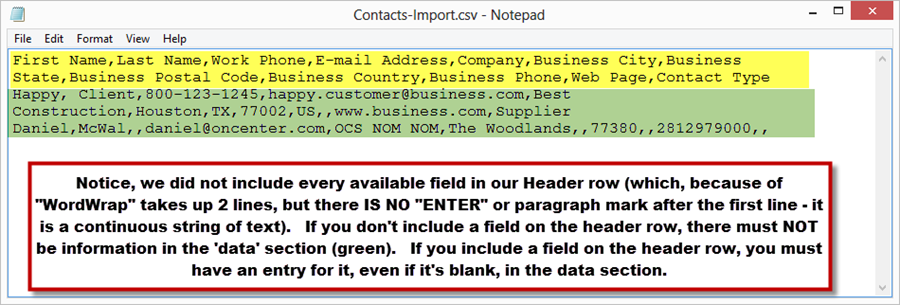
Do NOT include a space after any of the commas separating the different fields.
Do NOT use commas in ANY of the data (the information to import)- additional commas in the CSV will cause the import to fail. If necessary, go back and add commas to the Contacts in Quick Bid after importing the CSV file.
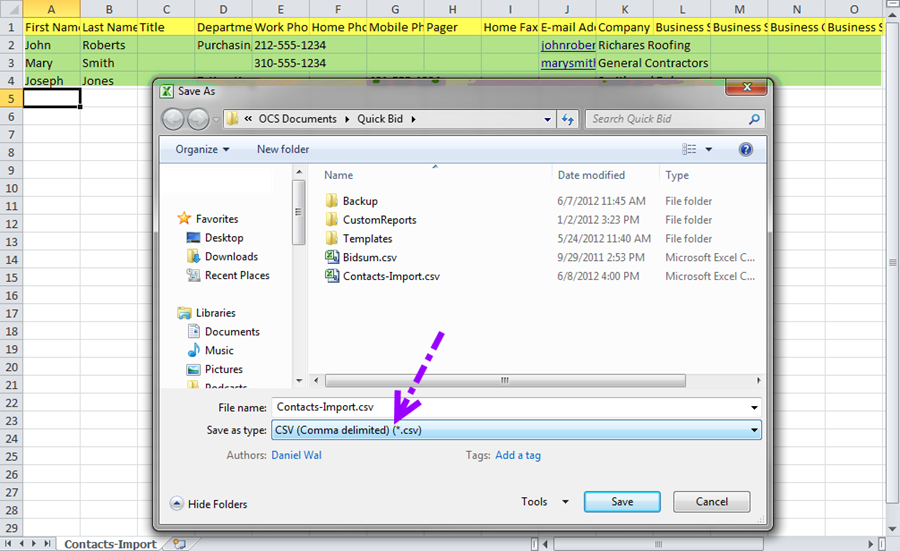
In Row 1 (yellow highlighted below) enter in each of the Field names to be imported
Move to Row 2 (green=data), enter DATA for each Field (your Excel file will NOT be color-coded)
Notice on the second data set there is no information available for 'Department' - that is OK, for each FIELD defined in Row 1 there must be an entry in the data section, even if it's blank
Do NOT use commas in ANY of the data (the information to import)- additional commas in the CSV will cause the import to fail. If necessary, go back and add commas to the Contacts in Quick Bid after importing the CSV file.
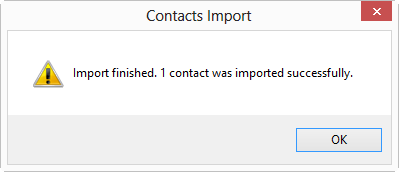
Once the import is complete, a confirmation displays.
If an error message is displayed, check the QuickBid.log file in the program's installation directory (usually "C:\Program Files\Quick Bid 4") for details. Make sure all field names are spelled correctly, that there are place-holding commas for fields without data, and that no data fields contain commas.
©2015 On Center Software, Inc. All Rights Reserved.
 Send Feedback About This Page