Navigating Plans
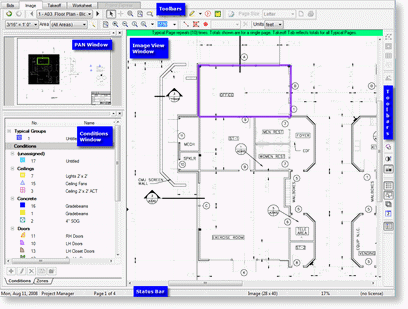
On the Image tab, Conditions and Plans can be viewed side by side. There are several features that make navigating plans easier. They include: panning, zooming and paging techniques, all controlled from the toolbars located at the top and right of the screen.
The various windows and toolbars can be moved around the screen by clicking and dragging from the outer edge of the window or toolbar. If using multiple monitors (or even one large monitor) undocking the Pan window, Conditions window and the other Toolbars outside of the main program window allow maximum space for viewing plans (the Image View window).
Navigating Pages
Use the Navigation toolbar to go to the various pages in a bid. The Pages field indicates what page is currently being viewed.
The Previous Page and Next Page arrows go in sequential order through the project.
The Back and Forward arrows function like standard browser arrows taking you back and forth through plans and views without respect to sequential order (for example, if you had just viewed page 2 at 100% zoom and then navigated to Page 10 at 50% zoom, the Back button, would move you back to page 2 at 100% zoom).
![]()
|
Back |
|
Last page or view. |
|
Forward |
|
Next page or view. |
|
Prev Page |
|
Go to previous page in project. |
|
Next Page |
|
Go to next page in project. |
Renaming Pages
To make navigating plans easier, On-Screen Takeoff provides the ability to rename pages with easy-to-recognize names rather than by the image file name or the page title.
To rename an Image page, click Edit > Rename Page or simply right-click on the Image View window and choose Rename Page and enter the new name. The new name will appear in the Pages field of the Navigation toolbar and on the Pages tab of the Cover Sheet.

 |
NOTE: Renaming a page does not alter the actual file - it only changes the name within On-Screen Takeoff. |
Panning and the View Indicator 


