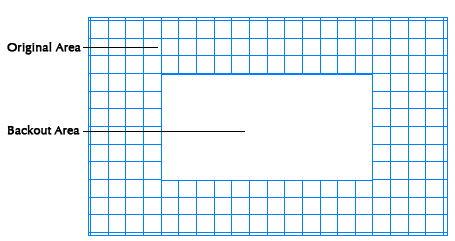
Sometimes, it's necessary to remove part of an area takeoff. For example, let's say you are installing carpeting. The client has chosen an inlay carpeting that is different that the border. The easiest way to take this off is to takeoff the entire area as the border, then, backout and auto-fill the area where the inlay carpeting will be installed.
To back out part of an area once it has been taken off
![]() , or click Tools>Backout Mode.
, or click Tools>Backout Mode.
 |
You must select an area takeoff object in order to activate the Backout icon and menu selection. |
Outline the backout area (the area you want to deduct from the original condition) as you would if you were performing a normal area takeoff.
The outlined area will clear and area quantities will be recalculated depending on your quantity results settings in the Condition Properties
Auto-Filling an Area Backout
Once you create an area and add a Backout, you can fill the backout with a different Area Condition.
Select an Area Condition from the Condition List.
Return to the area with the Backout and double-click on the Backout area (the clear part). It will auto-fill with the selected Condition
If you wish to change the fill, you will need to select and delete it from the Backout area before choosing a new Condition from the list to fill it.
Aligning Area Takeoff to a Grid


