Select the
Pan icon, ![]() , from the Tools
toolbar.
, from the Tools
toolbar.
Click and hold on the image in the Plan View window.
Drag the image to the desired view.
Panning allows a user to move the plans around the screen to view exactly what is necessary. Functionally, the same as using the scroll bars to move an image up/down and side-to-side but much faster.
Select the
Pan icon, ![]() , from the Tools
toolbar.
, from the Tools
toolbar.
Click and hold on the image in the Plan View window.
Drag the image to the desired view.
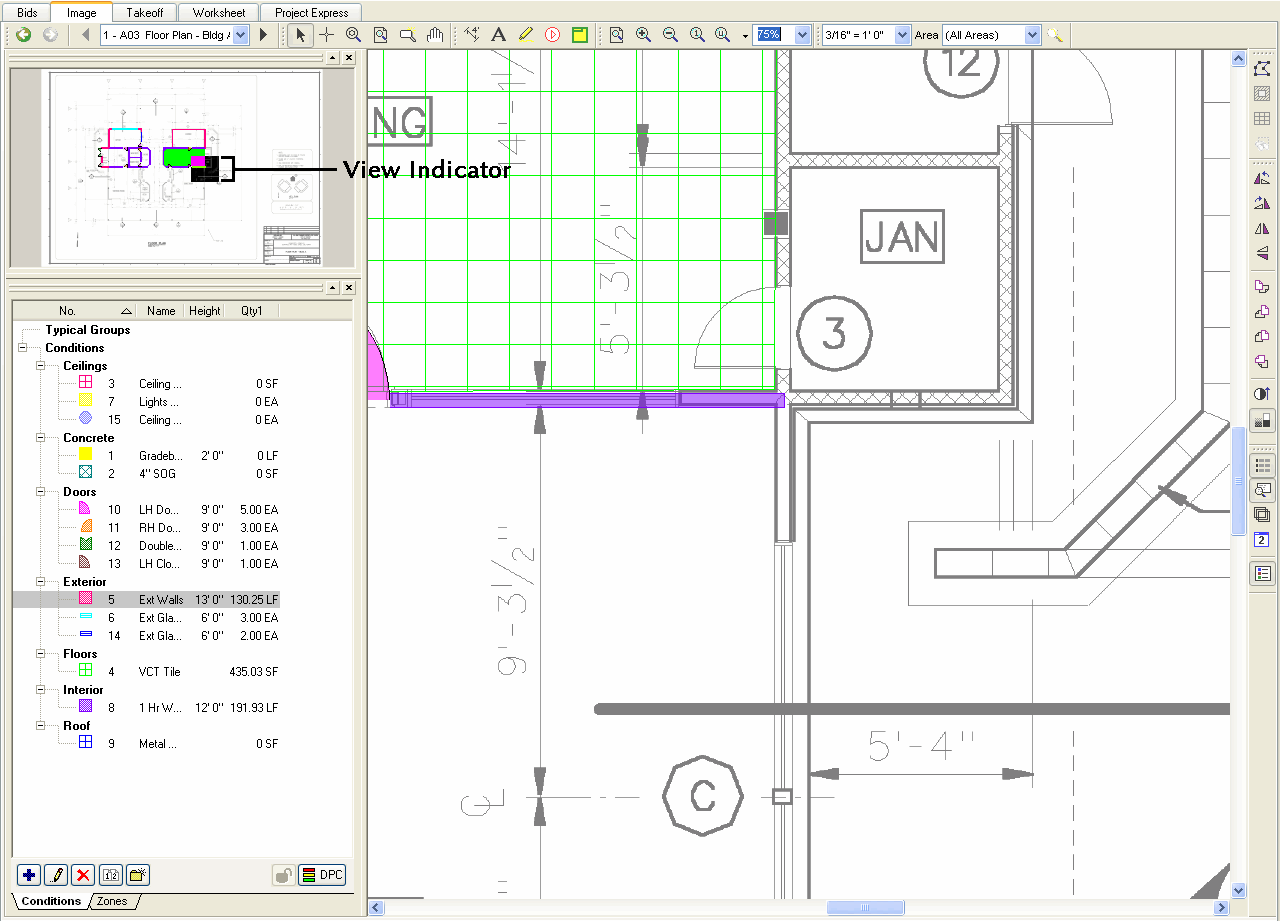
The Pan window shows a smaller view of the image in the Plan View window. The View Indicator, black box, represents what is currently displayed in a zoomed view on the Plan View window. The view can also be panned from this window.
Click and hold the black region known as the View Indicator.
Drag to pan across the image in the window. The Pan window displays what part of the page is visible in the Plan View.
From the Pan window a user can quickly view another area by moving the cursor to the desired location and clicking. Click once to move the closest side of the View Indicator to the point clicked. Double-click to have the area centered on the double-clicked point.
The View Indicator appears in the Pan View window when zoomed in on any portion of the Image Window. The View Indicator is black, and the more the zoom in increased, the smaller the indicator in the Pan View window becomes. If the page is zoomed to fit page or if the image is smaller than the Image View window, the View Indicator disappears from the Pan Window.
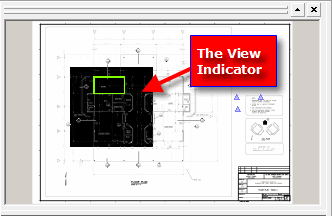
For example, when zoomed to only 10%, the View Indicator encompasses most of the Pan View because the majority of the plan in shown the Image Window.
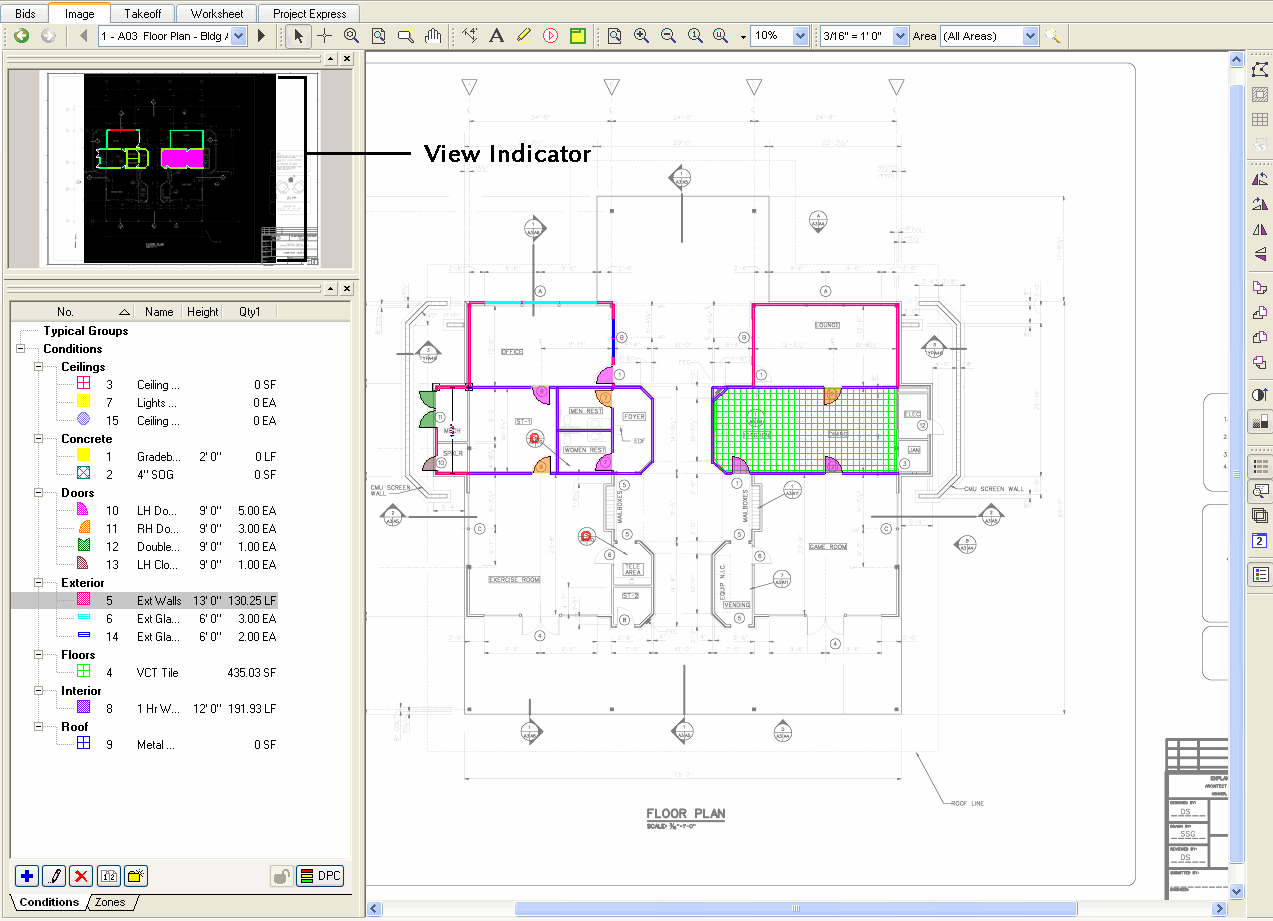
When the zoom is set higher, to 80% for example, the View Indicator in the Pan View narrows down to that specific portion of the plan now displayed in the Image Window. This helps keep track of what portion of the plan image is being displayed at all times.
To move to other locations of the plan in the Image Window,
Position the mouse on the View
Indicator in the Pan
View window, click and hold down
on either the left or right mouse button. The cursor
will become the Pan tool, ![]() .
.
While holding down the mouse button, drag the View Indictor to the desired location in the Pan View window. The plan in the Image Window will move relative to the mouse.
Release the mouse button when the desired location on the plan is highlighted in the Pan View window. This new location will not be displayed in the Image Window.
To jump to another location in the Image Window by using the View Indicator
Click once in the Pan View window in the desired location and the View Indicator will move to this point. The closest side of the View Indicator will move to the point clicked in the Pan View window.
Double-click in the Pan View window in the desired location and the View Indicator will move to this point and center on the double-clicked location.